There are 4 ways data is imported into Civil Pro:
- Flat table like data from any program such as a CSV, or tabular data from the clipboard.
- Hierarchical data previously exported from Civil Pro.
- Civil Pro registers imported from other repository (repo) projects.
- Copying parts or all of an existing project between projects.
Contents
CSV (comma separated values)
Flat table like data (CSV) can be imported using the Import Wizard and can be from any program that create this type of data such as Excel or Expert Estimate . You can also copy data onto the clipboard (ctrl+c) from a program like Excel.
Importing CSVs is available in the following registers:
- Schedule Items
- Work Types
- Area Codes
- Control Lines
- Tag Codes
- Test methods (without result fields)
- ITP Detail
- Documents
- Suppliers
- Resources
- Cost Codes
- Daycosts
- Production
- Invoices (v9)
To import into Civil Pro:
- Select the import option from the Context Menu of the register for the type of data you are using.
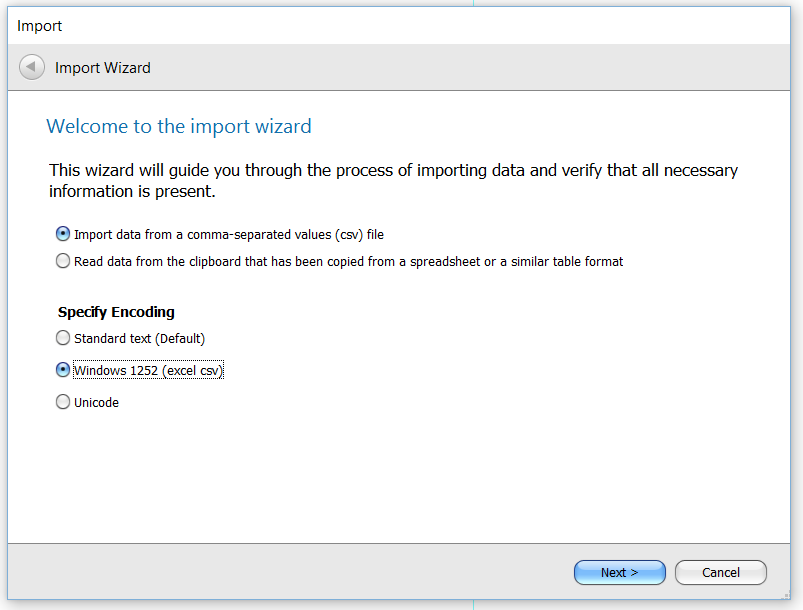
- Specify the source of the data – either CSV or clipboard.
- Specify the encoding. Usually it is fine to leave this as standard text, but if your import is showing strange characters after import, the CSV was probably encoded with a different file type, so you can try one of the others. Click Next.
- Select the name of the file to import.
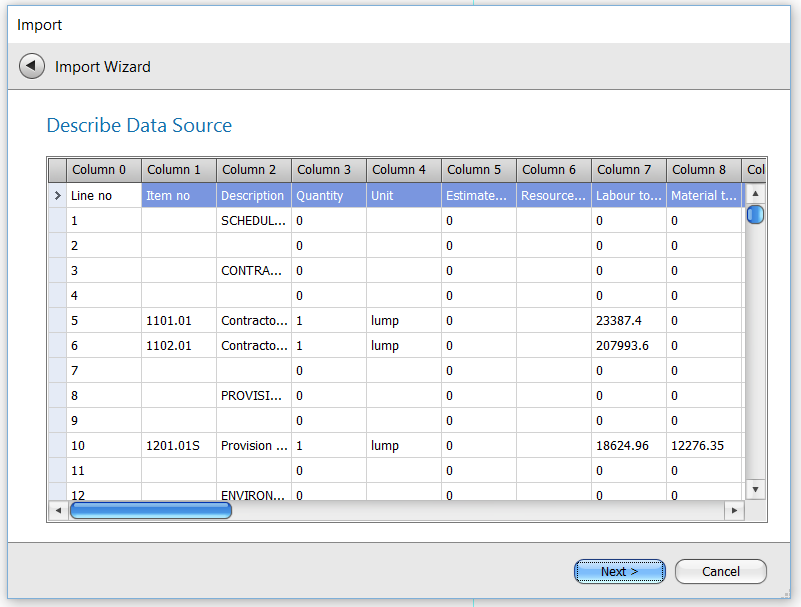
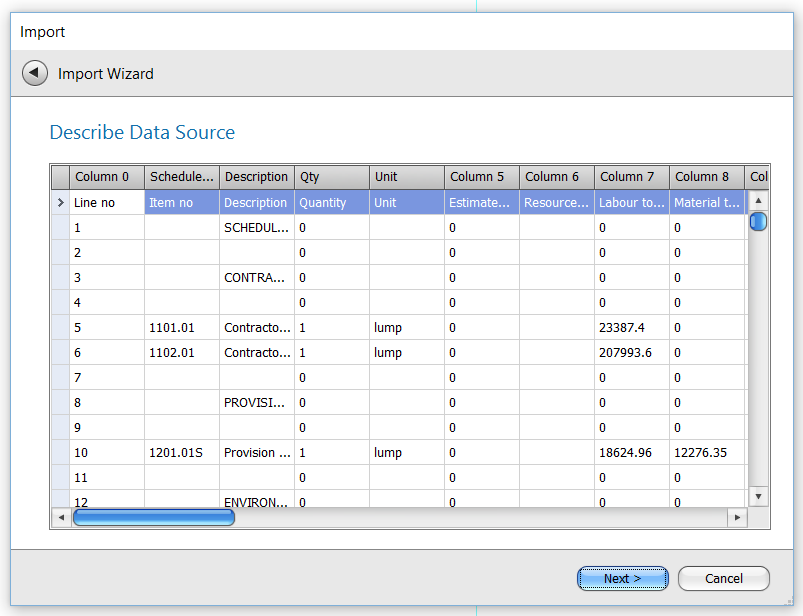
- The data from your file will be displayed in the Import Grid. For each column containing information you want imported, right click on the column heading and choose the Civil Pro import field from the list provided.
- When the fields have been assigned, click Import and Finish to complete.
Hierarchical data
Hierarchical data is produced from Civil Pro for copying between projects and is used when data contains multiple levels – for example an ITP which has to record a list of ITPs, the line items for each ITP and then the testing for each line item. Imports of this nature do not occur very often (ITP Register, Test Method Register and Custom Project Reports) but are extremely easy to manage.
To export hierarchical data:
- Select the Export Menu item from the Context Menu for the appropriate register.
- Enter a file name for the saved file.
- Click Save.
Importing is the opposite process.
Importing from repository projects (v9)
Any project can be marked as a Repository Project. Where a project is marked as a Repository, Project Administrators can copy part or all of a register from that project into the current one. Importing from a Repo is accessed from the right-click Context Menu.
Repository imports are currently available in the following registers:
- Work Types
- Test Methods
- Specifications (ITP)
- Suppliers (optionally inc Resources)
- Cost Codes
- Test Properties
- Risk Templates
To import from a Repository:
- Select the appropriate Import from Repository menu item from the Context Menu => Import/Export of a register with this feature.
- Select the repository project in the Project Selector at the top of the screen.
- Select the records you want to import (select all with Ctrl+A).
- Click Import.

Importing from other projects / transferring projects
System Administrators can transfer part or all of a project to create another project. The target database will either be newly created (always the case for standalone) or an existing Civil Pro database.
IMPORTANT – BEFORE STARTING
- Make a backup of the database you are copying from and, if the target database already exists – back that up too.
- Ensure both the source and target database are the same current version. If they are not, simply log in to each and they will be upgraded automatically.
Transferring Data
This example shows the use of the Transfer Project Data Wizard to change a standalone project into a server based. The opposite can be used to take a copy of a server based project as a standalone project. Creating the source and destination connections is exactly the same as when making a new connection to log in to a project.
A simplified version of this process is used to import data from other projects as part of the New Project Wizard.
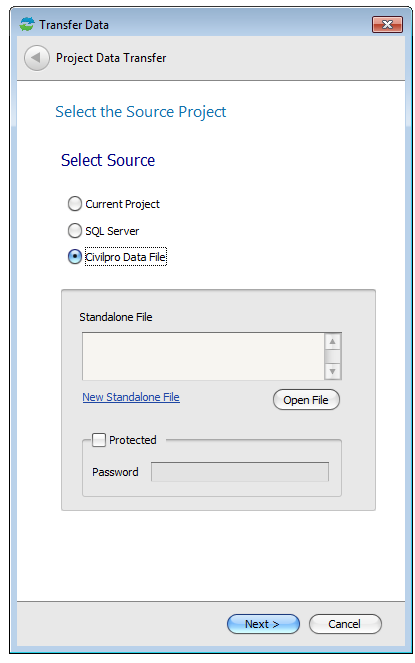
- In the the Program Menu, select Project=>Transfer Project Data.
- In the first screen of the wizard, select the source database and project. In this screenshot, we are copying an existing standalone project. Click Next.
- Select the destination. The example shows us creating a new database and project for a Server based install. Click Next.

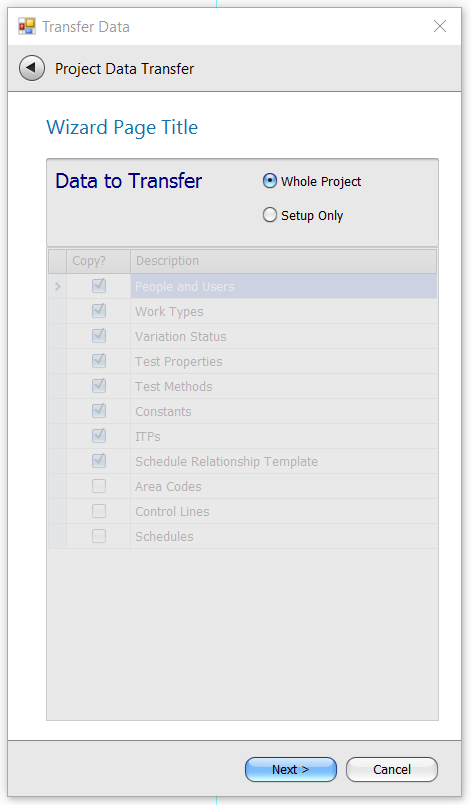
- Select to transfer either the whole project or specific datasets. Click Next.
- Check and amend the project details if necessary. Click Next.

- You will be notified that external files such as Lot Docs and Photos will not be copied as part of the wizard. If you have photos or Lot Docs that also need to be copied then simply move the folder where they are stored to the new storage location, and update the Project File Location in the Project Administration page.
- On the summary screen, click the Start Transfer button.
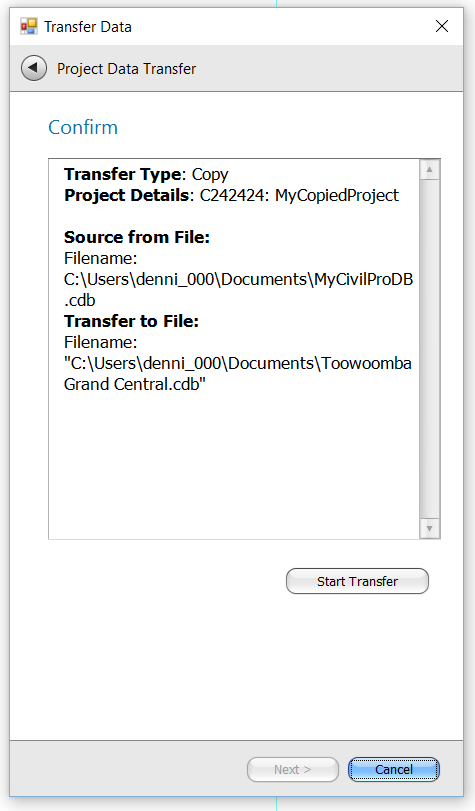
The transfer process can take some time – be patient.