The project settings define several parameters which are used by your project. Some of these settings can also be set at the system level using System Settings. If you set project settings and system settings, then the project settings will override the system settings. Project settings include;
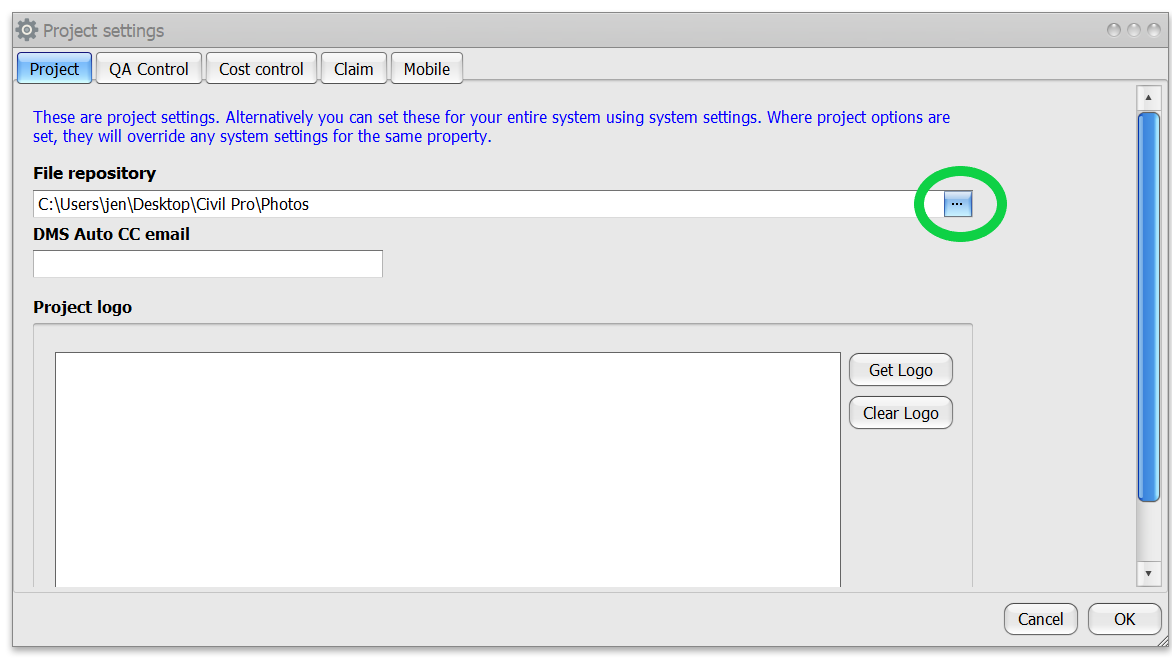
- the File Repository – this is the default location for file storage (for e.g. Lot Documents and photos) for your current project. This overrides the equivalent system setting.
- the Project Logo – this is the default logo used for the current project. This overrides the equivalent system setting.
- QA Control settings – there is no equivalent system control settings. These control things like customization of lot numbers and certain default behaviours
- Cost Control settings – settings for the cost management system, mainly purchase orders. These settings override the equivalent system setting.
The project settings are accessed from the Program Menu under System=>Settings=>Project Settings. This function requires Project Administrator permissions.
Contents
- 1 File Repository
- 2 System Logo
- 3 QA Control
- 3.1 Enable primary tags
- 3.2 Use Date Work Started to identify pre-opened lots.
- 3.3 Allow lot conformance with unapproved NCR | Unfinished TR | Unapproved ATP
- 3.4 Require completed or closed out checklist for conformance
- 3.5 Prevent project users editing ITPs
- 3.6 Disable prompt when ITP changed
- 3.7 Auto guarantee days
- 3.8 Custom lot number
- 3.9 Text for lot conformance sign off
- 3.10 NCR Root Cause
- 3.11 Prevent project users editing ITPs
- 3.12 Require Approved ITP for checklists
- 3.13 Custom Approval Status
- 4 Cost control
File Repository
If you set the file repository or project logo in the project settings, this is the location that all files such as lot documents and photos will be stored for all projects. This overrides any system settings.
- To set the file repository, either enter the path directly into the text box, or use the folder selector by clicking on the ellipsis at the right of the text box
System Logo
- To set the logo, click on the ‘Get Logo’ button to the right of the image preview box (where the blue sky logo is in the screenshot). Select your file.
- To clear the logo, click on the Clear Logo button.
![]()
QA Control
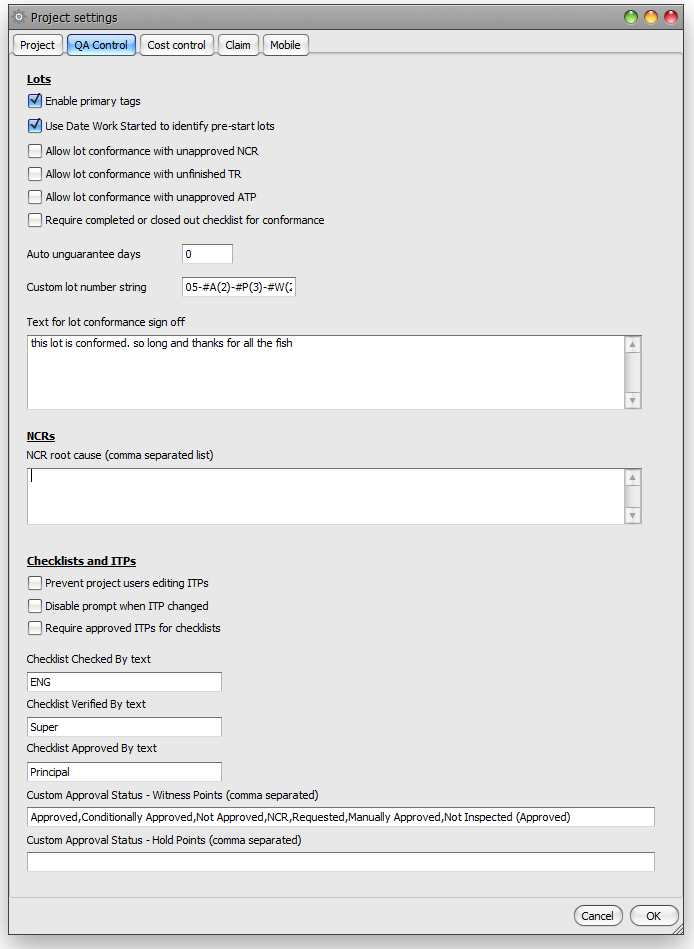
Primary tags can be used to tag a lot when it is created, just like a work type or area code. And just like a work type/area code, there is one primary tag per lot, and it can be used to form part of the lot number. Refer to the help topic for tags.
Use Date Work Started to identify pre-opened lots.
Some projects open lots in advance of work commencing. The problem with this is that reporting incorrectly identifies lots as being open too long, when the lot may not yet even have started. If it is the practice of your project to open lots in advance, you can control how they are reported by default in the dashboard by selecting this option. This will also enable a new standard view in the lot register which shows only pre-opened lots.
You can set a start date for multiple pre-opened lots by selecting them and using the Activate function of the context menu (Lot Status => Activate Lots).
Allow lot conformance with unapproved NCR | Unfinished TR | Unapproved ATP
Changes the conditions under which a lot can be conformed
Require completed or closed out checklist for conformance
When checked, a lot can only be conformed if;
- All Check/Verify and Approval items are completed or
- The checklist is closed out
Prevent project users editing ITPs
If set to true, users who do not have project admin level permissions cannot edit ITPs
Disable prompt when ITP changed
By default, Civil Pro has a prompt if an ITP is changed and the version number not updated. This disables the nag.
Auto guarantee days
This constant prompts the user to automatically unguarantee lots older than a set number of days. Set this constant to an integer (i.e. 28) representing the number of days after which lots will be unguaranteed. If this setting exists, then the user will be automatically prompted to unguarantee during the progress claim build.
Custom lot number
Changes the way lot numbers are automatically generated (refer to the help topic on custom lot numbers for more details)
Text for lot conformance sign off
Changes the text in the lot conformance report sign off from the default
NCR Root Cause
By adding a list of comma separated values, the default list of NCR root causes can be overridden. The default list would be specified by setting a value of Not Specified, Personnel or Training, Materials, Methods or Process, Machinery or Plant, Environmental or Conditions
Prevent project users editing ITPs
Prevents users from editing ITPs unless they have at least Project Admin permission
Require Approved ITP for checklists
When selected, only ITPs that have been approved are available to add to lots.
Custom Approval Status
The custom approval status can be used to substitute alternate statuses for witness points or hold points individually. To substitute the approval statuses, provide up to 7 statuses separated by a comma. The default statuses are equivalent to a setting of Approved,Conditionally Approved,Not Approved,NCR Required,Requested,Manually Approved,Other Approval
There are some important notes with regards the custom status settings
- The position of the statuses is important. There are four underlying statuses which cannot be changed
- Positions 1, 6 and 7 must have statuses that mean the request is approved
- Position 2 must have a status that means the request is conditionally approved
- Positions 3 and 4 must have statuses that mean the request is not approved
- Position 5 is for the status equivalent to requested
- If the list contains less than 7 items, then the default statuses will be used for unspecified statuses
- If the list contains more than 7 items, additional items are ignored.
- The NCR and Purchase Order statuses cannot be customized
For example, using the setting Approved,Conditionally Approved,Not Approved,CAR Required,Requested,Manually Approved,Not Inspected (Approved) for custom Witness Points will replace
- the NCR Required status with CAR Required
- the Other Approval status with Not Inspected (Approved)
To revert to the default statuses, remove any custom status settings.
Cost control
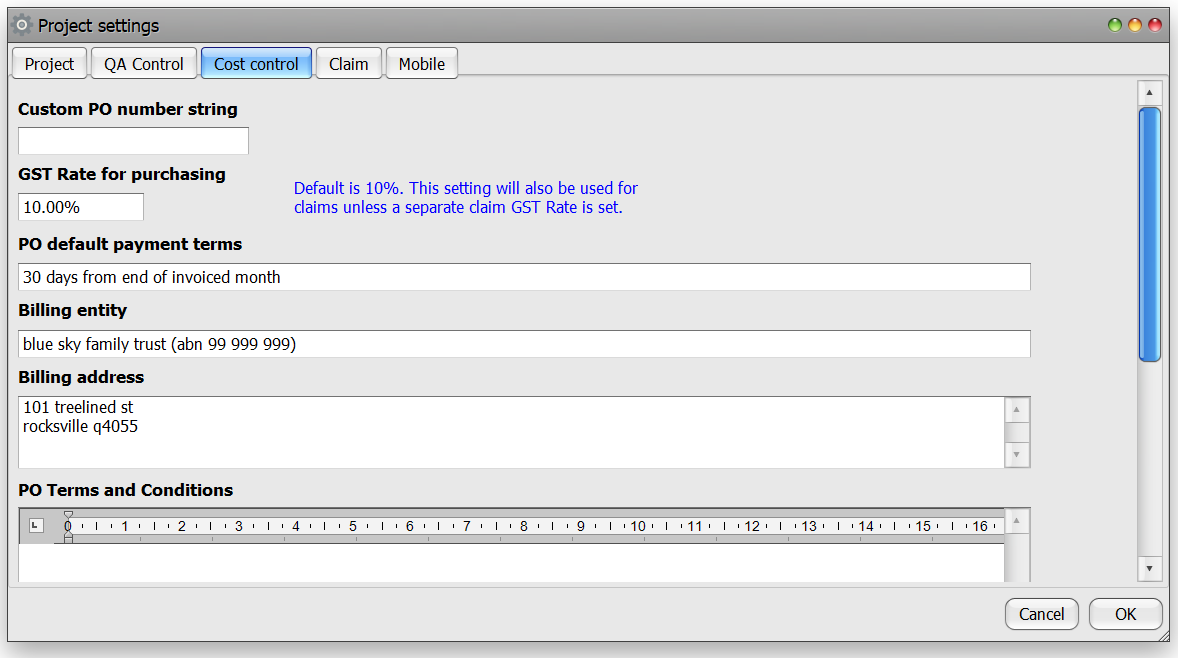
The cost control system settings provide data to the cost management system, predominantly the purchase orders. For information on project settings for cost control, refer to the help topic on server settings. Any project settings will override their equivalent server settings.