Contents
Registers
The main data in Civil Pro is contained in registers. These include the registers used to classify information (such as Work Types, Area Codes and Schedule Items etc.) and the project records like the Lot Register, NCR Register, Document Register.
Adding a record
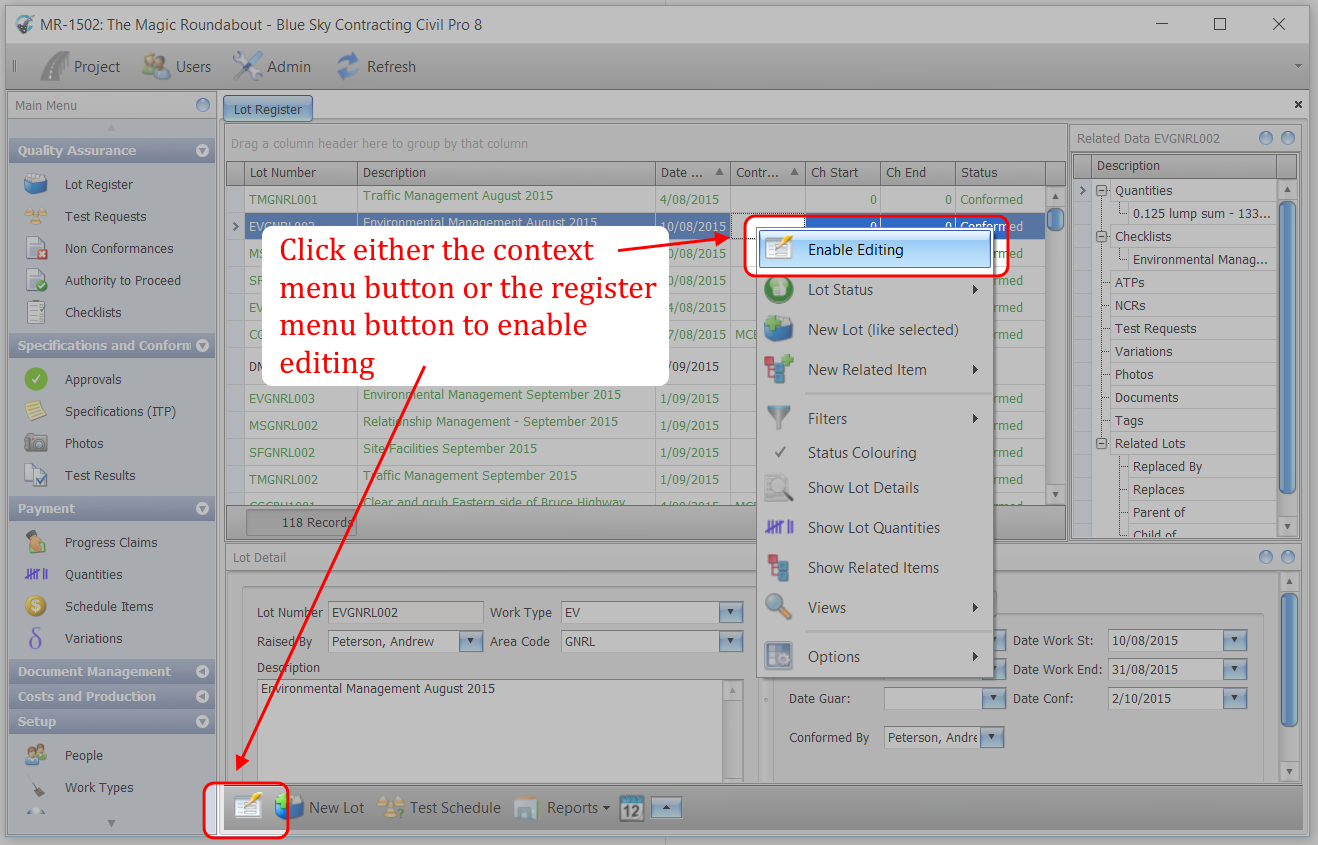
There are 2 methods used in Civil Pro for adding a record. For simple records like Work Types, Area Codes etc, these can be entered directly into the Register Grid. Simply click on the empty new line and start entering information. Just remember that Enable Editing is off by default. To enable editing, click on the Enable Editing button in the Context Menu or on the Register Menu.
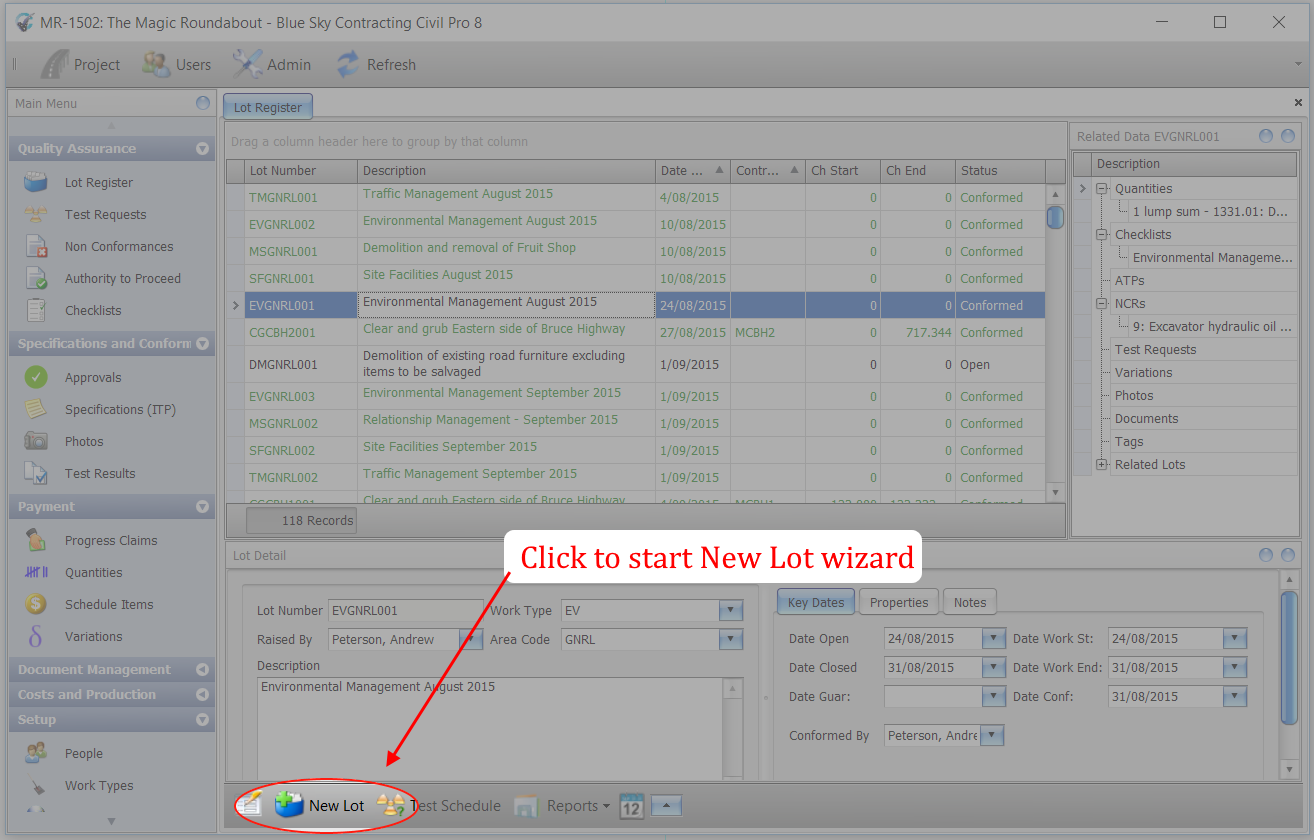
With more complex records such as Lots, NCRs and ATPs, data entry is through a wizard. To create new records, click on the appropriate wizard using the button in the Register Menu (e.g. New Lot).
Editing a record
There are also 2 ways to edit a record. In all registers, you can edit a record directly in the Register Grid. Simply click on the Enable Editing button in either the Context or Register Menu. The limitation of using the Register Grid is that not all the columns are shown be default (although they can be shown by right clicking on the grid header and using the column chooser).
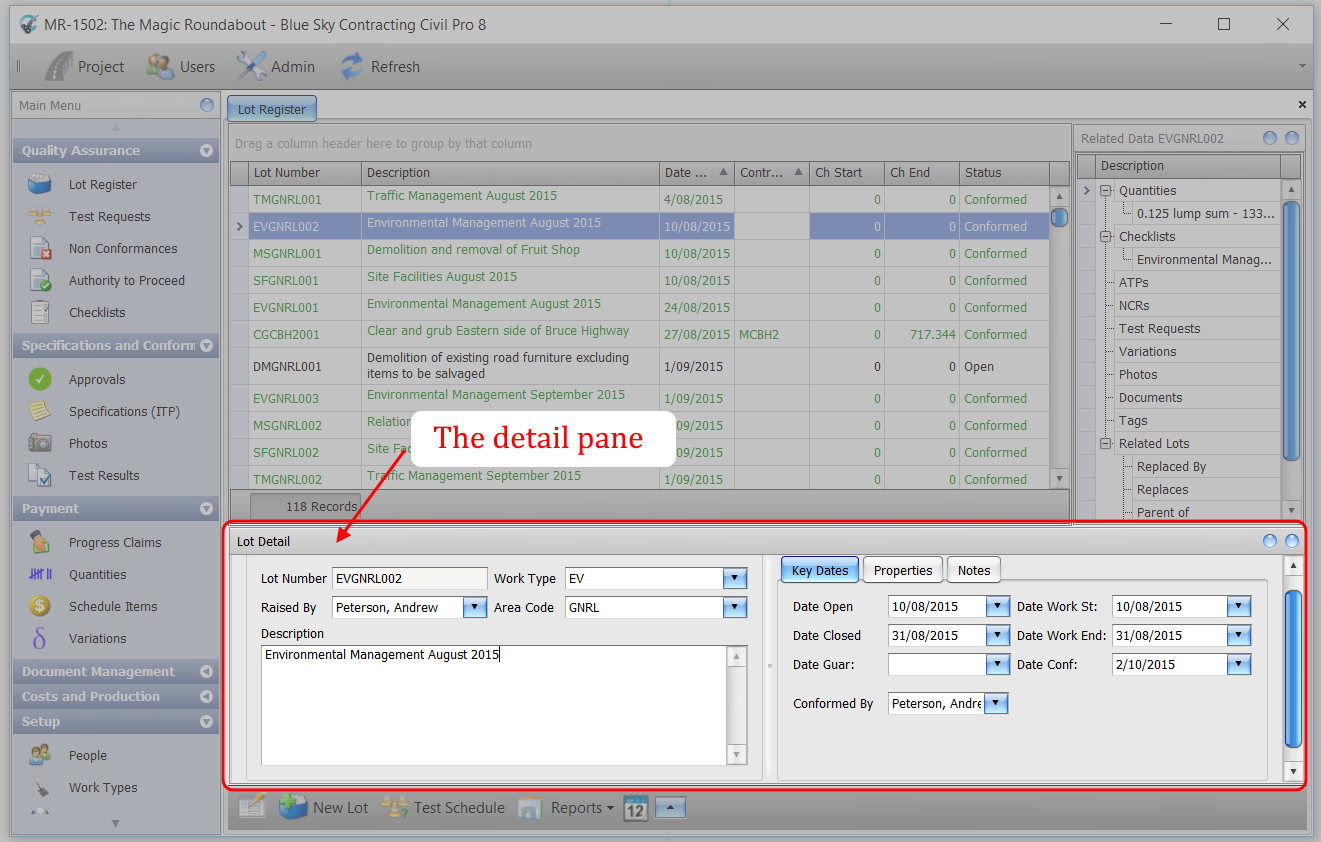
You can also edit a record using the Detail Panel. The Detail Panel shows all of the available information for a given record. You do not need to enable editing to edit the Detail Panel. If the panel is not visible, you can make it visible by double clicking on a record in the Register Grid.
Deleting a record
To delete a record, select it in the Register Grid, and press the delete key. Editing must be enabled to delete a record.
Related Items
The Related Items are displayed in the panel to the right of the register. If the Related Items are not shown, select the Show related items button from the Context Menu. When you add a link to a related item, you are usually only creating a link. You can add and delete these links without affecting either the register record, or the item you are linking to. This is the case with links between registers like NCRs, ATPs, Variations etc.
The exception to this is when you create a quantity or checklist item. This creates a new record.
NOTE: Deleting a quantity or checklist related item completely removes the record.
The following details how to add related items. For Checklists and Quantities, there are additional functions as described in the relevant help topics, but the basic principle remains the same:
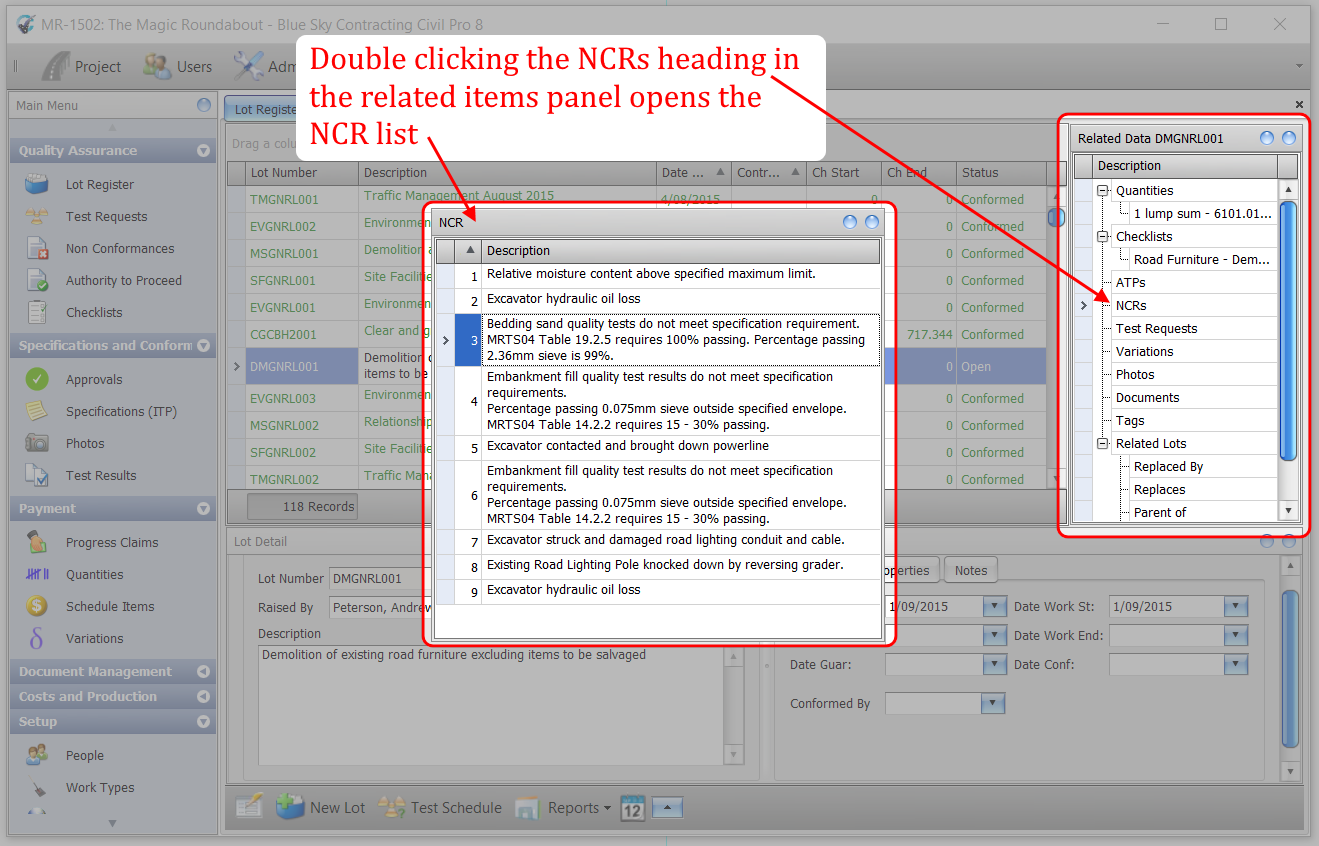
- In the Related Items panel, double click on the type of related item you wish to add. For example, in the Lot Register (shown below) if you want to add a link to an NCR, double click the NCRs heading. A list showing items of the linked type will be displayed.
- In the popup list, select the item you wish to link, and drag it onto the heading you double clicked to show the list.
To delete a related item, select the item in the Related Items Panel, then press the delete key.