There are 2 types of personnel records maintained in Civil Pro:
- Contacts (Accessed from the QA Setup section of the Main Menu – QA Setup => Contacts). These are personnel who may be assigned responsibility for items in Civil Pro or may have documentation otherwise associated with them, but who do not require a log in. Contacts are project specific.
- Users (Accessed from the Application Menu System =>Users ) – Users are system wide records of people who may access one or multiple projects in a Civil Pro system.
Contents
Contacts
The Contacts Register is a project specific list of persons to whom Civil Pro tasks can be assigned and records addressed. For example, you may want to send a Test Request to Michael Rogerson – this person would need a record in the Contacts Register. If however, Peter Jones was responsible for some Lots and was also expected to update the records in Civil Pro, he would need a Log In and so, would become a User. Users are also included in lists of Contacts for a project, if they have permissions for the project or are a System Administrator.
The reason Contacts and Users are separated is to prevent congestion of the list of people available in drop down lists for each project. An extraordinarily large list of people can become associated with a large project and they are of absolutely no interest to other Civil Pro projects. Keeping the Contacts list project specific means multi-project Civil Pro installs can each have their own list of associated personnel (Contacts) while maintaining a common Users Register (Users).
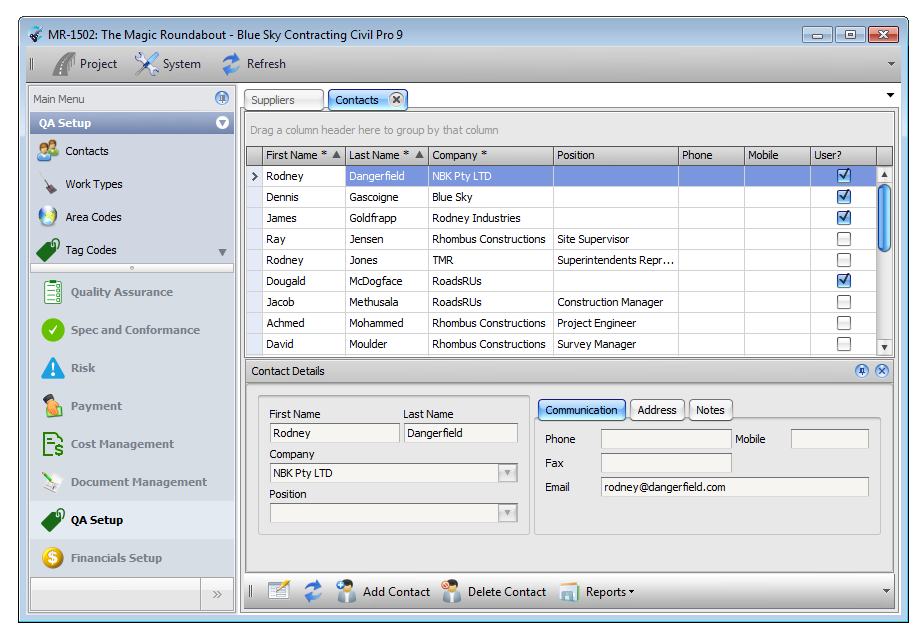
Adding a contact
To add a Contact:
- Access the QA Setup section of the Main Menu – QA Setup => Contacts
- Click the Add Contact button in the Ribbon Menu at the top of the screen.
- Provide the required information – required fields are coloured. Click OK.

Deleting a contact
To delete a Contact, click on the Contact and select the Delete Contact option from the Ribbon Menu. If the person you are trying to delete is also a User, you will be advised and the operation cancelled. This function will only delete the Contact from the current project.
You can tell if someone in the Contact Register is also a user by the checkbox in the right hand column of the Register Grid.
Changing a contact record to a user record
Using the Context Menu, you can promote a Contact to a User. Select the contact you wish to promote then click on Grant Login from the Ribbon Menu. If you have the appropriate permissions (System Admin or Project Administrator for the current project) you will be prompted to provide a username, password and Role for the new User. The User will now be able to log in and work on the project.
Users
People who can log in to Civil Pro are called Users. In a standalone system, each Civil Pro project has its own file so the differences between Users and Contacts end there. In a server based Civil Pro system, each Civil Pro database can have numerous projects and more differences between Users and Contacts are evident. In a server system, the Users are common to all projects, that is – a User can use the same User account to access all projects, as long as they have the appropriate permissions.
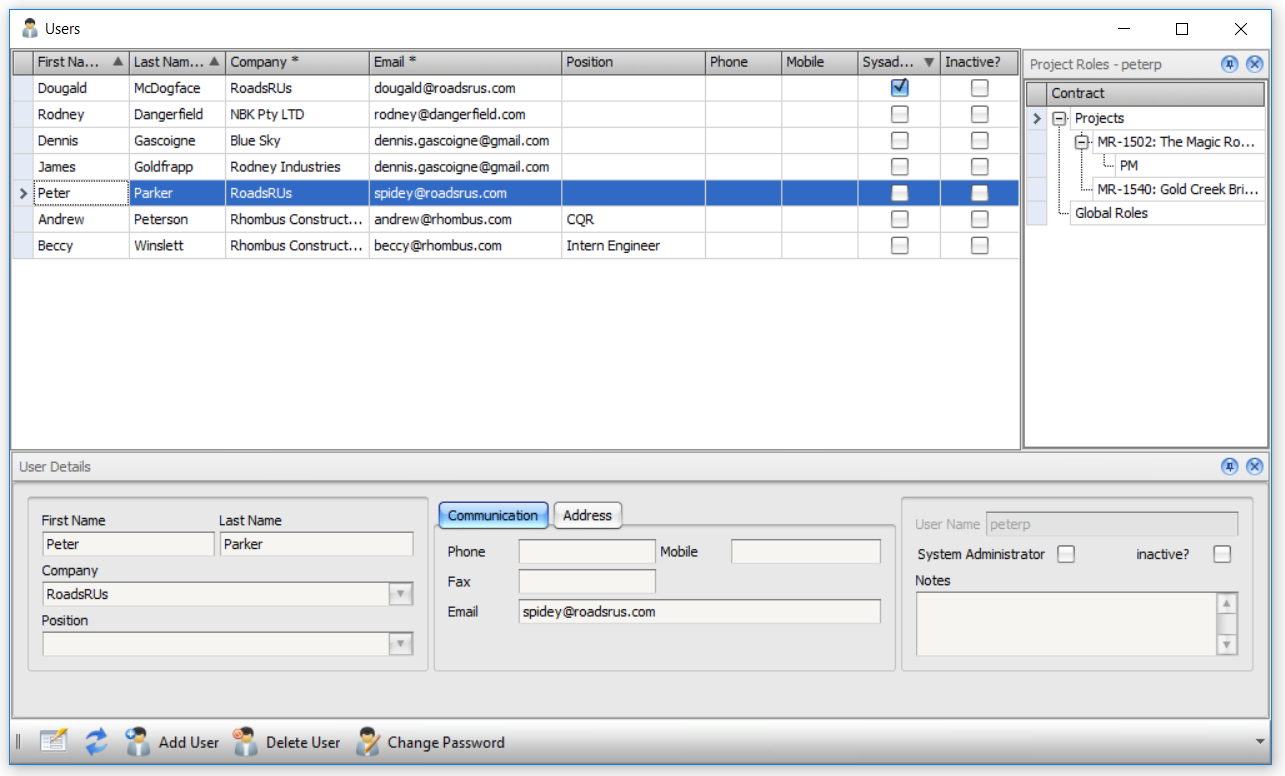
Adding and deleting users
To add or delete a User you must be either a System Administrator or Project Administrator. If you only have user level permissions on the current project, you can edit your own details (including changing your password) but not others. Access the Users page from the Application Menu System => Users. The add and delete operations are at the bottom left of the Users screen.
Assigning user roles
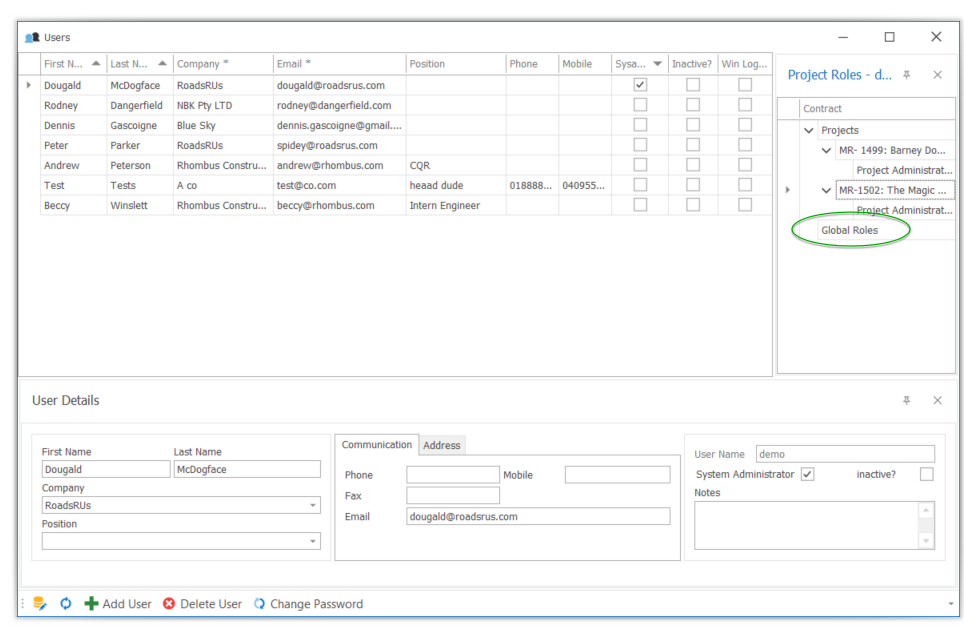
Once a User has been created, they will still not be able to log in to Civil Pro until they have been given a Role for at least one project (unless they are a System Administrator – refer below). To assign Roles:
Project Specific Roles
- Access the Users page per above from the Application Menu – System => Users.
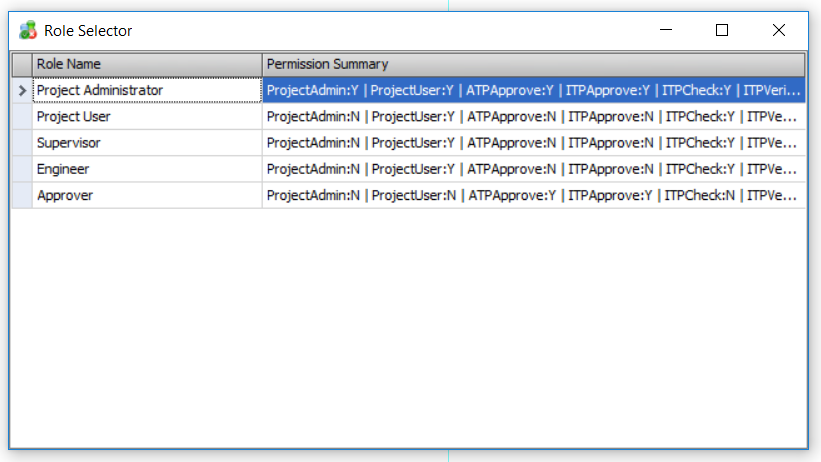
- Double click on the project in the Related Items Panel to display the Role Selector
- Either double click the role you want to assign the User for the selected project, or drag and drop Roles to any project.
Global Roles
Users can be assigned a global role. This role is applied across all projects in the database. To grant a user a global role, follow the instructions as above for a project specific role, except instead of double clicking a project to select the role, double click on Global Roles in the related items.
Any global roles will be visible under the global roles heading.
Creating system administrators
To create a System Administrator, either select the System Admin? check box when creating a new User, or select it later in the register or User Detail Pane. System Administrators do not need to be granted a specific Role to use a project, and can only be created by other System Administrators.
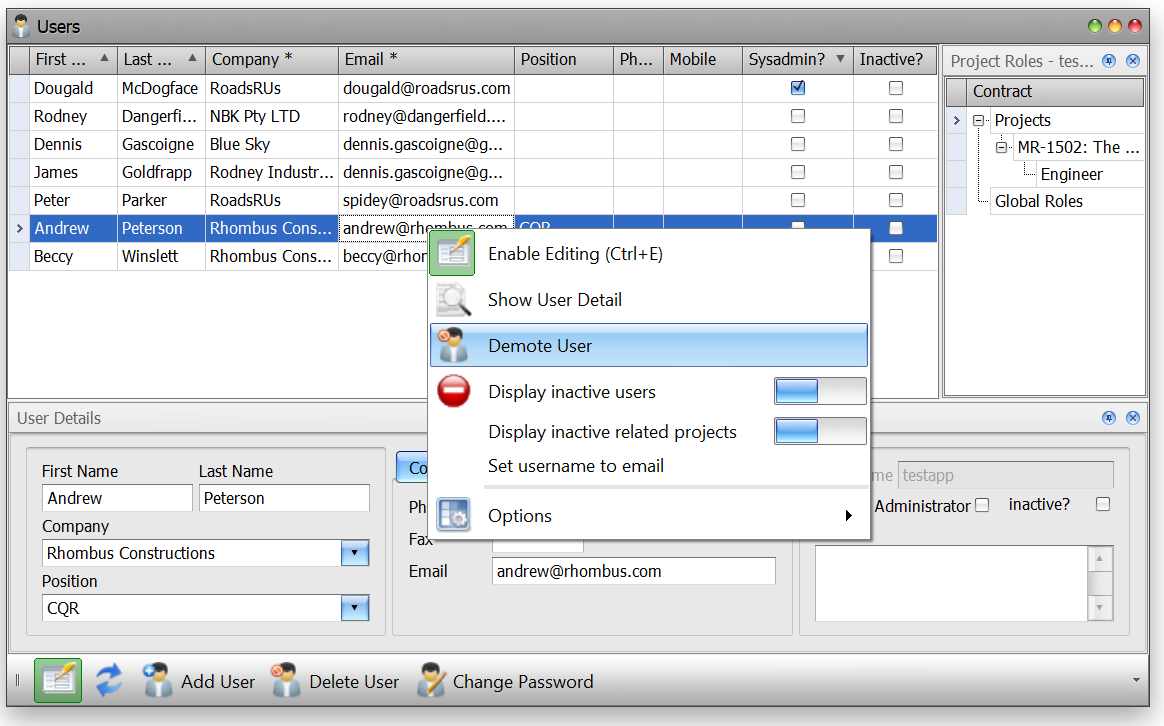
Changing a User record to a Contact record
Using the Context Menu, you can change a User record to a Contact record by selecting Demote User. This will remove their login and:
- If they have access to a single project, they will be assigned to that project as a Contact only.
- If they have access to multiple projects, a copy of the User will be created and added as a Contact for each project and the original User account will be deleted. Any references to the User in each project will be changed to the new Contact records in the appropriate project.
User Roles
User Roles extend across all projects in a Civil Pro database. Each Civil Pro system has 2 default roles:
- Project User – has the project User permission (refer below)
- Project Admin – has the project User and project admin permissions (refer below)
In addition to the 2 default roles, you can create additional roles with specific permissions for approving records. This is primarily designed for use with Civil Pro Mobile which facilitates the creation of users specifically for approving different types of records.
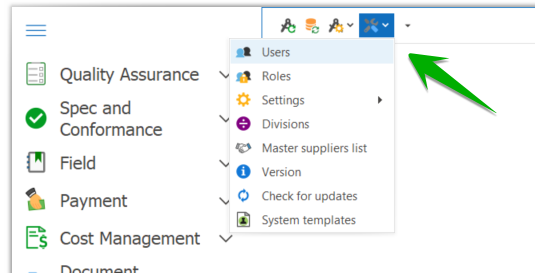
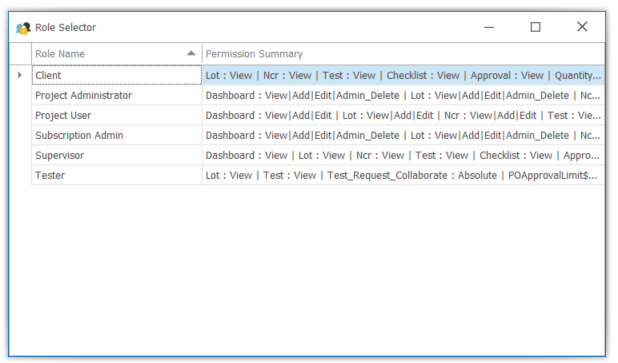
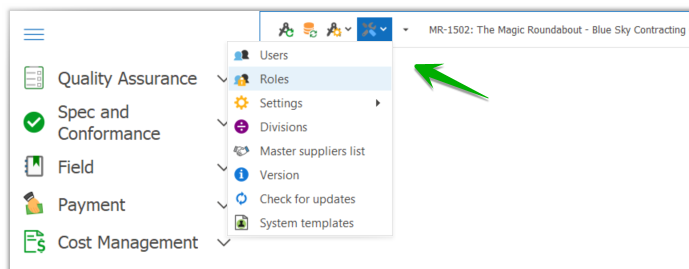
To manage your system’s Roles, access the Roles page from the Application Menu – System => Roles. Double clicking on the role brings up the Permission screen.
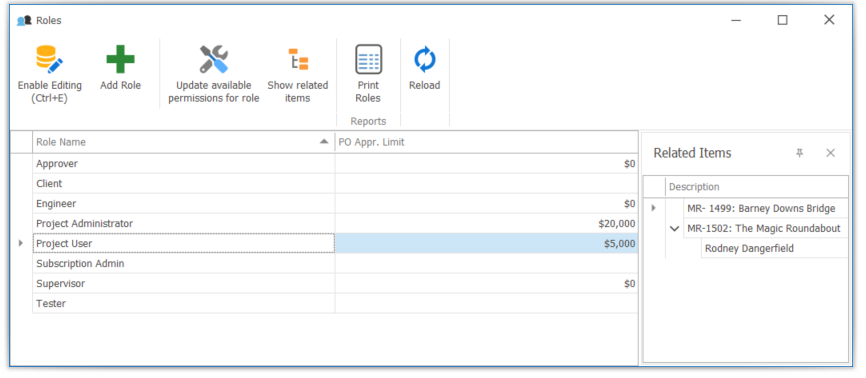
Adding a new role
To add a new Role:
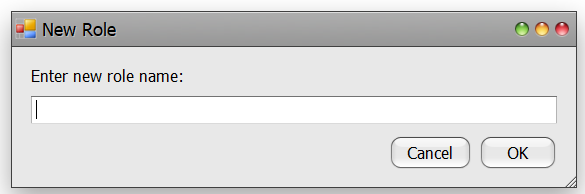
- Click the Add Role button in the Ribbon Menu at the top of the screen
- In the popup, enter a name for the new Role then click OK. It will be added to the Register with no permissions.
- You will then be bought back to the Roles screen. Double click on the new role name to bring up the Permissions screen. Select the permissions for the role, and optionally add a Purchase Order Approval Limit.
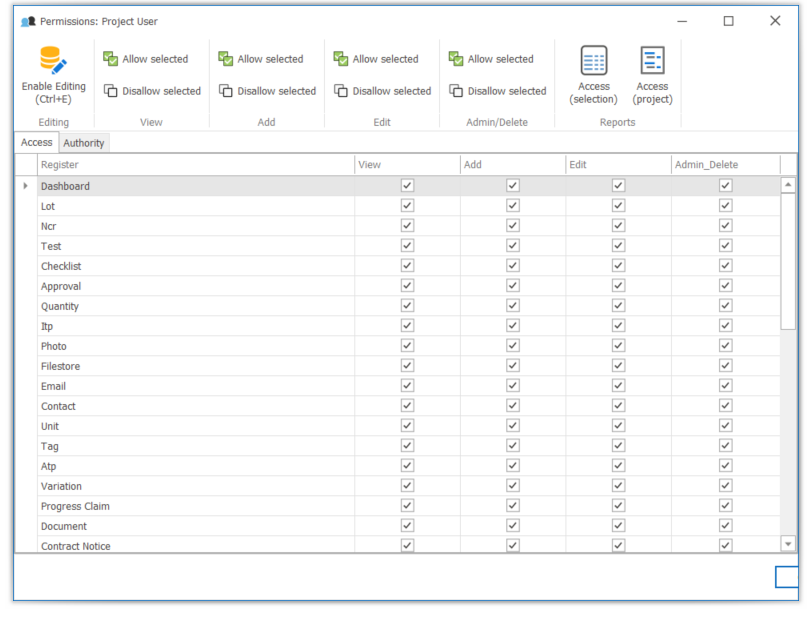
Available Permissions
- Project User (permission) – all functions in a project except: user management / project administration (including data transfer) / deleting records
- Project Administrator (permission) – can perform all functions (including assigning/managing users) for a specific project
- QVC Check / QVC Verify – Can check / verify / approve items in a QVC (mobile)
- NCR Approve / ATP Approve / Qty Approve / QVC Approve – can be the addressee of approval requests (Civil Pro Mobile) / can approve requests addressed to them using the Civil Pro Mobile platform
Related Items
The Related Items List shows all of the projects and the Users in those projects with the selected Role.
Adding users to a role for a project
You can add Users to a Role in a given project by:
- double clicking on a project to open the User List
- either dragging and dropping the User to any project, or double clicking a User to add it to the selected project
Deleting roles for a user
You can delete a Role for a User on a project by selecting the Role and pressing the delete key