The Daycost Register is a record of the Resources used on a project during a given reporting period. This information is used for tracking costs incurred and comparing to revenue earned.
The Daycost Register is accessed from the Cost Management section of the Main Menu – Cost management => Daycosts.
Contents
Daycost Register
When the Daycost Register is opened, the top part of the page displays a list of the available reporting periods. The bottom part lists the Daycost for the currently selected reporting period.

Daycost reporting periods
As described in the Cost Management Concepts – Reporting Period topic, the reporting period is common to Progress Claims, Invoices and Daycosts. However, in each of the registers different specified and calculated fields are also used. In the Daycost Register, additional columns include:
- Lock Out Cost – when checked, Daycost cannot be edited, even when editing is enabled. All previous reporting periods are automatically locked when a new reporting period is created. Read more about locking and unlocking in the Report Period Help Topic.
- Invoice Total – the total of all Invoices for the current reporting period
- Earned Revenue – the (direct job cost) DJC value of the Progress Claim for the current period
- Claim Total – the sell value of the Progress Claim for the current period
Adding, importing, editing and deleting daycosts
Adding/Importing
To add a new Daycost for a reporting period, select the reporting period ensuring editing is enabled and the report period is unlocked. Click Create.
Click on a new row in the Daycost grid and a new row will be initialized. Enter the required data. Data can also be imported from a CSV by selecting Import Data option from the context menu – refer to the Importing Data help topic.
As Resources are selected based on the Supplier, the Supplier must be entered prior to selecting or adding a Resource. Similarly, the Resource must be selected or entered prior to adding a qty, unit or rate.
Editing
Daycost records are edited directly in the Daycost Register. To edit, the period must be unlocked and editing enabled.
Deleting
To delete a Daycost, select it in the Register and press the delete key.
Daycost fields
- Date – the date which the Resource was used or receipted for the project
- Supplier – the Supplier providing the resource for the cost entry. The lookup editor will allow selection from Suppliers currently linked to the project in the Project Suppliers page:
- Type part of the Supplier name.
- Civil Pro will display a prompt with the Suppliers from the Master Supplier List that match the entered text. Select one of the Suppliers and click OK. The supplier will be used in the Daycost Register and linked to the project for future use.
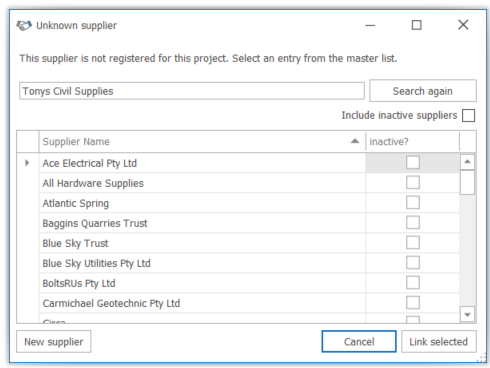
- If no matching Supplier is found, hit the tab key or click out to a different field. This will bring up the Unknown Supplier popup – see screenshot below.
- Click on the New Supplier button
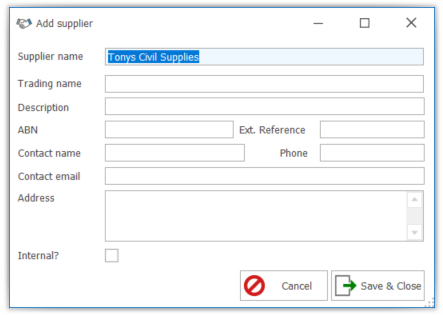
- The Add Supplier detail popup will appear – see screenshot below. Complete relevant information (only the field shaded blue is compulsory). Click OK.
- Note: only Users with ‘SupplierAdd’ permissions can add a new Supplier in this way – other Users must add Suppliers from the Master Supplier list.
- Resource – the item for which the cost or commitment is incurred – e.g. 20T excavator, 450m Drain coil, 28T 2.1 gravel etc
- Resource type – a classifier for the resource – Plant; Labour; Material or Subcontract
- Cost code – a Cost Code from the Cost Code Register
- Qty – the amount of the Resource to be costed for the date and Cost Code
- Unit – the unit of measure for the resource (will be automatically completed from the Resource Register if the selected Resource is an existing item)
- Rate – the rate for a unit qty of the Resource (will be automatically completed from the Resource Register if the selected Resource is an existing item)
- Total – automatically calculated as the Qty * Rate
- Not invoiced – mark this column if an Invoice will not be received for this item. This is commonly used for internal costs and excludes a Daycost from the Invoice reconciliation calculations.
- Docket reference – a text column in which docket references can be recorded for the purposes of assisting in reconciliation with Invoices
- Invoice (hidden) – a column showing any invoiced linked to the Daycost in the reconciliation process. This column can be selected using the column chooser (right click on the grid column header), and is visible in the Accruals and Invoicing views
- Not accrued (hidden) – mark this column for costs that are not to be included in the automatic accrual calculations. This column can be selected using the column chooser (right click on the grid column header), and is visible in the Accruals and Invoicing views
- Notes (hidden) – make a note against any Daycost item. This column can be selected using the column chooser (right click on the grid column header).
Daycost functions
A Daycost record is for a Resource, on a date, allocated to a specific Cost Code. This could mean that there are several entries for a single resource for the day – for example, a backhoe may have been working on subsoil drainage, excavating for gully pits and tidying up trimmings. Rather than having to add all of the information 3 times, Civil Pro allows you to enter it and then use its split function.
Similarly, because you use many of the same resources from day to day, the smart copy and paste provides a quick way to re-use resource entries from previous days on a new day. Not only that you can collapse previously split items and re-split them to different Cost Codes and different split quantities.
If you want to just make a new record like a previous one, just select it and use the “Ditto” function (New Daycost Like This option from within the context menu).
All of these functions also have keyboard shortcuts which you can be seen next the relevant option within the context menu. These are also presented in the Shortcuts and Useful Functions help topic.
Smart copy and paste for individual or bulk records
This is the function you will most likely use the most in Civil Pro’s Daycost Register. When you enter the Resources used on a project for a day, it is likely that on the following day you will utilise much the same resources. In Civil Pro you can easily copy these Resources, and paste them with updated details for the following day.
To copy one or more costs:
- Select the costs in the Daycost Register.
- Press Ctrl+Shft+C (or the context menu item for Copy selected)
To paste the costs:
- Press Ctrl+Shft+V (or the context menu item for Paste).
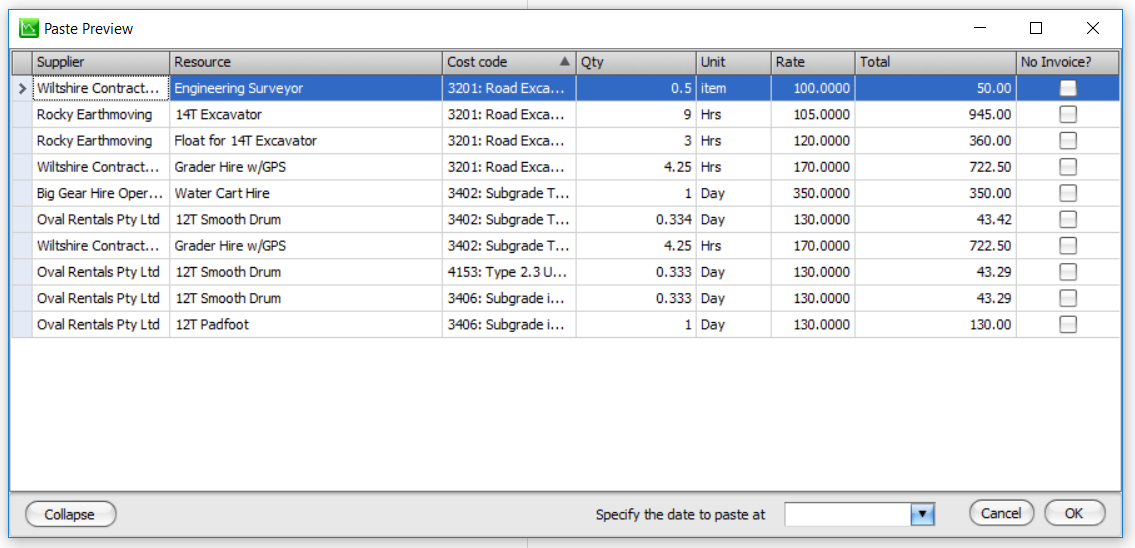
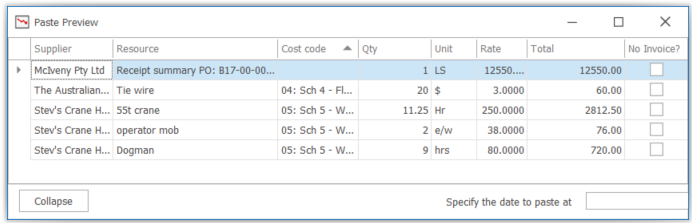
- In the dialog box, the pasted items will be displayed.
- Optionally, press the Collapse button to create a single item for the same Resource which was split in the copied data. In the below screenshot you can see the effect with the previously split smooth drum collapsed into a single line, and the Grader Hire w/GPS also collapsed. Note the Cost Code is blank and needs to be set prior to pasting.
- Select a date to paste at.
- Click OK.
Splitting daycosts
Often you will use a Resource for more than one activity in a single day. In this case you will need 2 Daycost entries. The problem is that the majority of this information will be exactly the same and just becomes a data entry exercise. With the Daycost split function, you can enter the Daycost once, and then split it using the Split Daycost function from the Context or Ribbon Menu.
When you invoke the splitter, the currently focused row is shown:
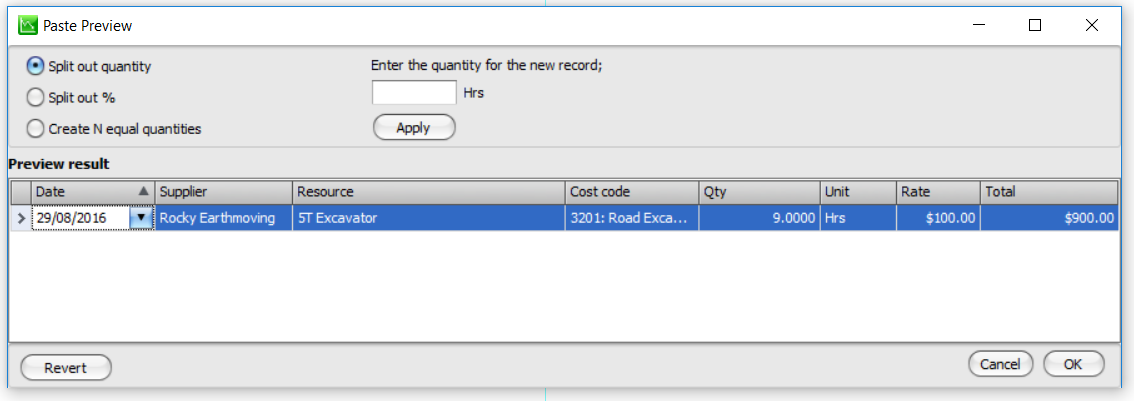
There are 3 ways to split the quantity:
- Split Out a Quantity – the existing record is broken into 2, one has the Split Quantity entered into the text box above the apply button, the other has a quantity of [Original Quantity] – [Split Quantity].
- Split out % – the existing record is broken into 2, one has a quantity of [Original Quantity] x [split %], the other has a quantity of [Original Quantity] x [1 – Split %].
- Create N Equal Quantities – the existing record is broken into the number of equal quantities specified
Once a split method is nominated:
- Click the Apply button. The new records will be created, but without a Cost Code.
- Update the Cost Codes for the new records.
- Click OK.
The Revert button will reset the grid to the original unsplit quantity.
New daycost like this (ditto)
The Ditto function copies the current Daycost record and inserts it in the new record row at the top of the list. This function is accessed using the Ctrl + ” keyboard shortcut or from the Context and Ribbon Menus.
Tag ‘internal’
These functions accessible from the Context and Ribbon Menus, allow a user to select multiple records and set the Internal field for all at once rather than doing them one at a time. This indicates that no invoice is expected for the associated Daycost. For more information on the meaning of the Internal tag, refer to the Invoice Reconciliation help topic.
Moving Daycosts
You are able to move daycosts to a different Report Period or even a different Project if needed by using the Move Daycost function accessed from within the Context and Ribbon Menus
Assigning invoices
The assignment of Invoices to Daycost is part of the Invoice Reconciliation process. Where there are multiple Daycosts relevant to a particular Invoice, our recommendation is to utilise the Invoice Reconciliation platform accessed through the Invoice Register, but if required the user can select the relevant Daycost, and use the Assign Invoice function from the Ribbon Menu. This will assign the selected Invoice to the selected Daycosts. You can even add a new invoice and assign that. To assign Daycost to an invoice:
- Select the Daycost(s).
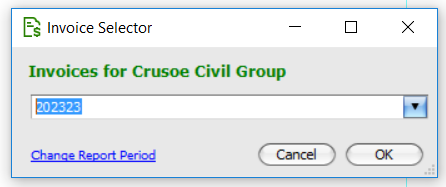
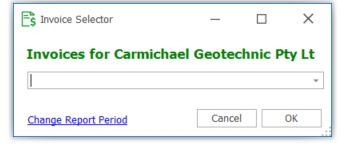
- Select Add/Remove Properties => Assign Invoice to Selection from the Context Menu – the Invoice Selector will be shown
- Either:
- Select your Invoice from the list, or
- Click the Change Report Period link if your invoice is from a different report period; or
- Type a new Invoice number in – this will start the new invoice prompt for the current supplier and reporting period.
- Click OK.
To remove Invoice assignments from multiple records, use the Unassign Invoice option from the Ribbon Menu.
Daycost Reports
In the Ribbon Menu under the Reports heading you can choose from a number of reports using the Reports dropdown.
- Daycost Register – a report showing date, supplier, resource, qty, unit, rate and total
- Daycost Supplier Totals – a report showing daycost totals by supplier
- Accrual Summary Current Period – a report showing only accruals for daycosts in the current report period (for more information on accruals see the Cost Management Concepts help topic).
- Accrual Summary to Date – a report showing accruals for the current report period plus all previous report periods
- Print Production Grid – a printable version of the production grid
- Print Daycost Grid – printable version of the daycost grid
- Custom Reports – access to any reports you have customised and saved (for more information on custom reports see the Custom Reports help topic).
Production Register
The Production Register allows the user to monitor performance on critical budgets. It summaries cost by cost code and date and provides a production rate for each cost code and day if a production quantity is entered.
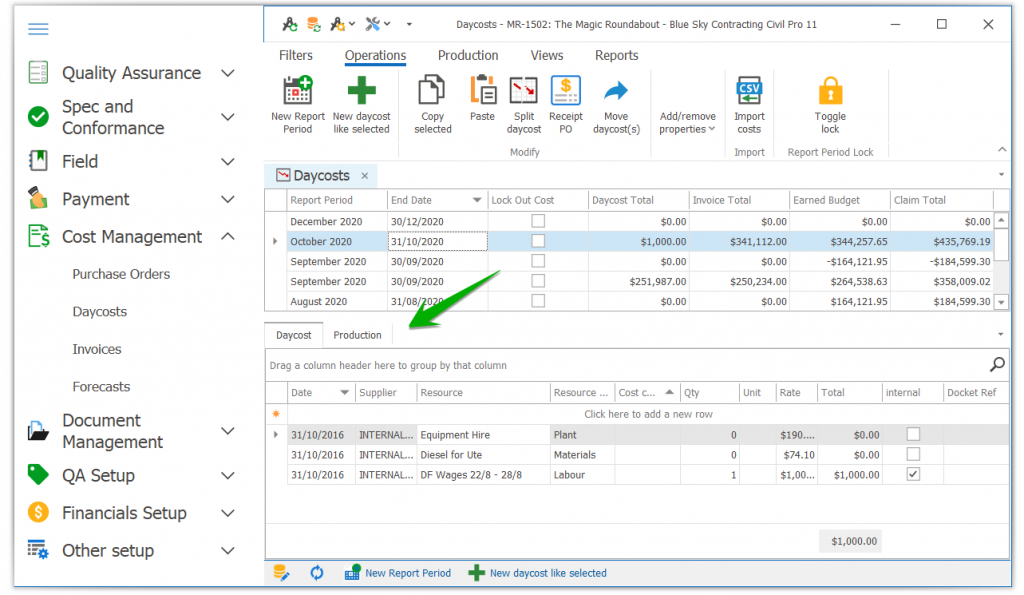
To enter a quantity against a date enable editing and enter number in the Qty column. The rate will automatically calculate.
Access a printable version of the Production Register via the Ribbon Menu under the Reports heading