Civil Pro enables users to completely customize reports, and save them to the database.
- For NCR, Checklist and Lot Conformance reports there is a ‘quick customization’ that can be completed using the report preview ‘options’ tab.
- For other reports there is a full customization function allowing complete control over the report’s layout.
Contents
Quick customization for NCR, Checklist and Lot Conformance reports
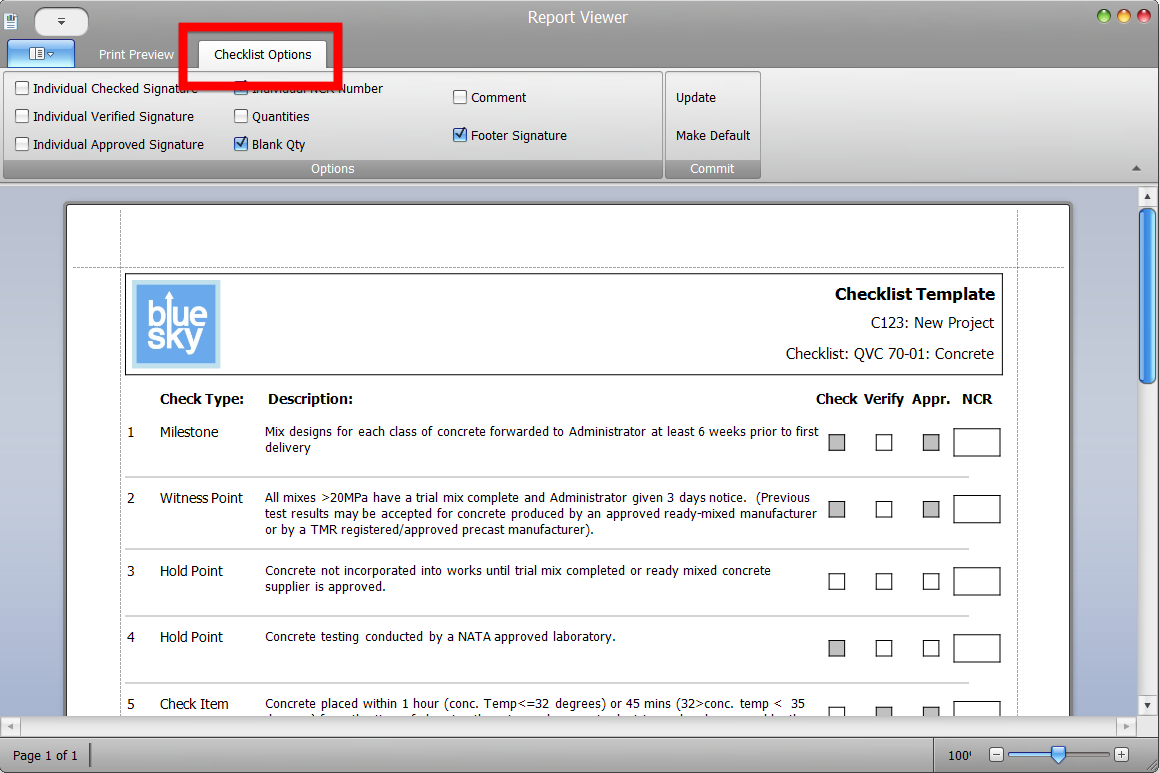
For the purposes of demonstration, this topic refers to customization of a checklist. The process is analogous for NCR and Lot Conformance reports.
In the report preview, change from the print preview to the checklist options tab (red box in below pic).
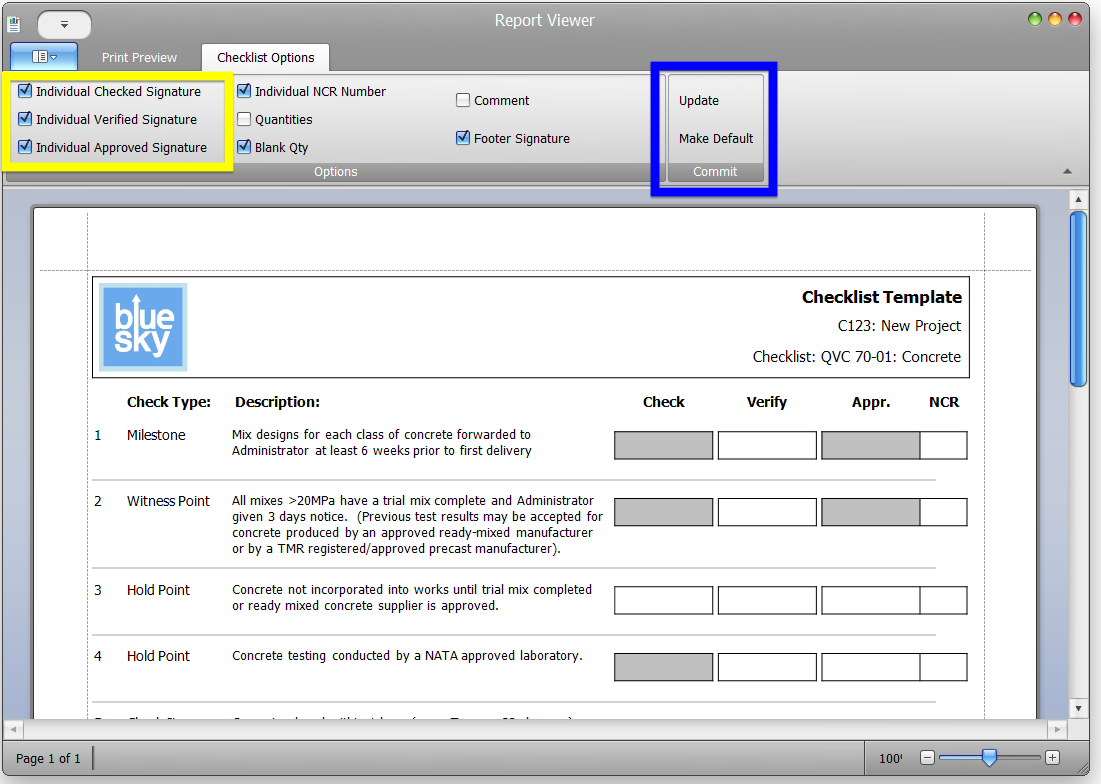
Change any options (for example the signature boxes have been changed in the below screenshot and click the Update button . If you want this to be the default every time you print this report, click on the Make Default button.
Full report customization
When you view a report in the report preview, clicking on the Customize button – in the Page Setup section of the Ribbon Menu– opens the report in the End User Designer (EUD).
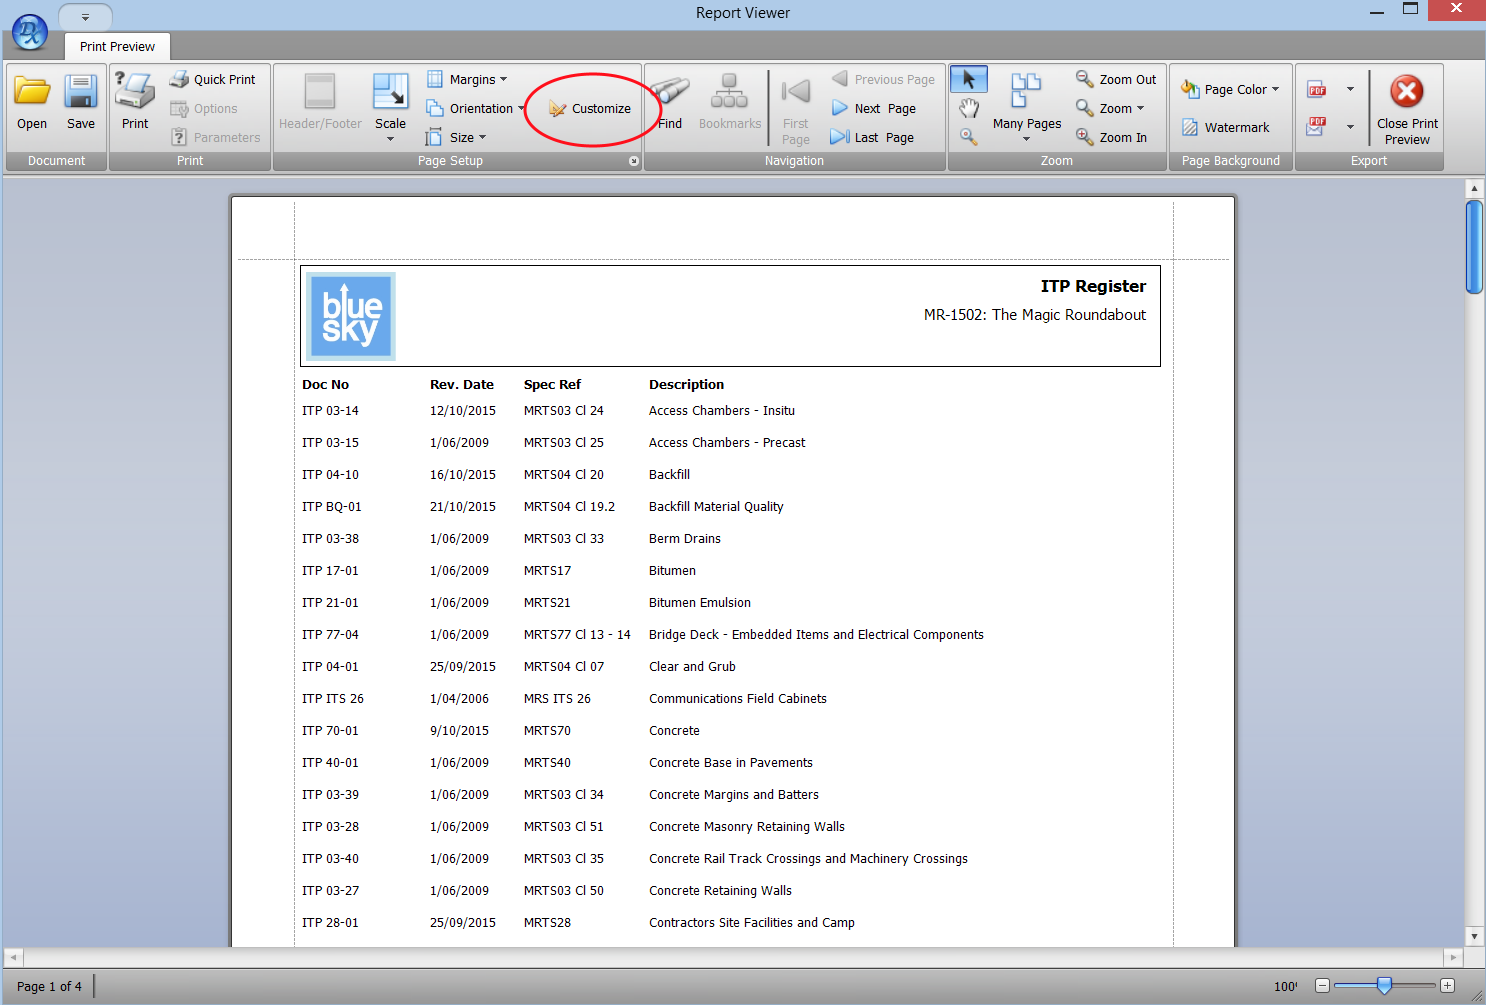
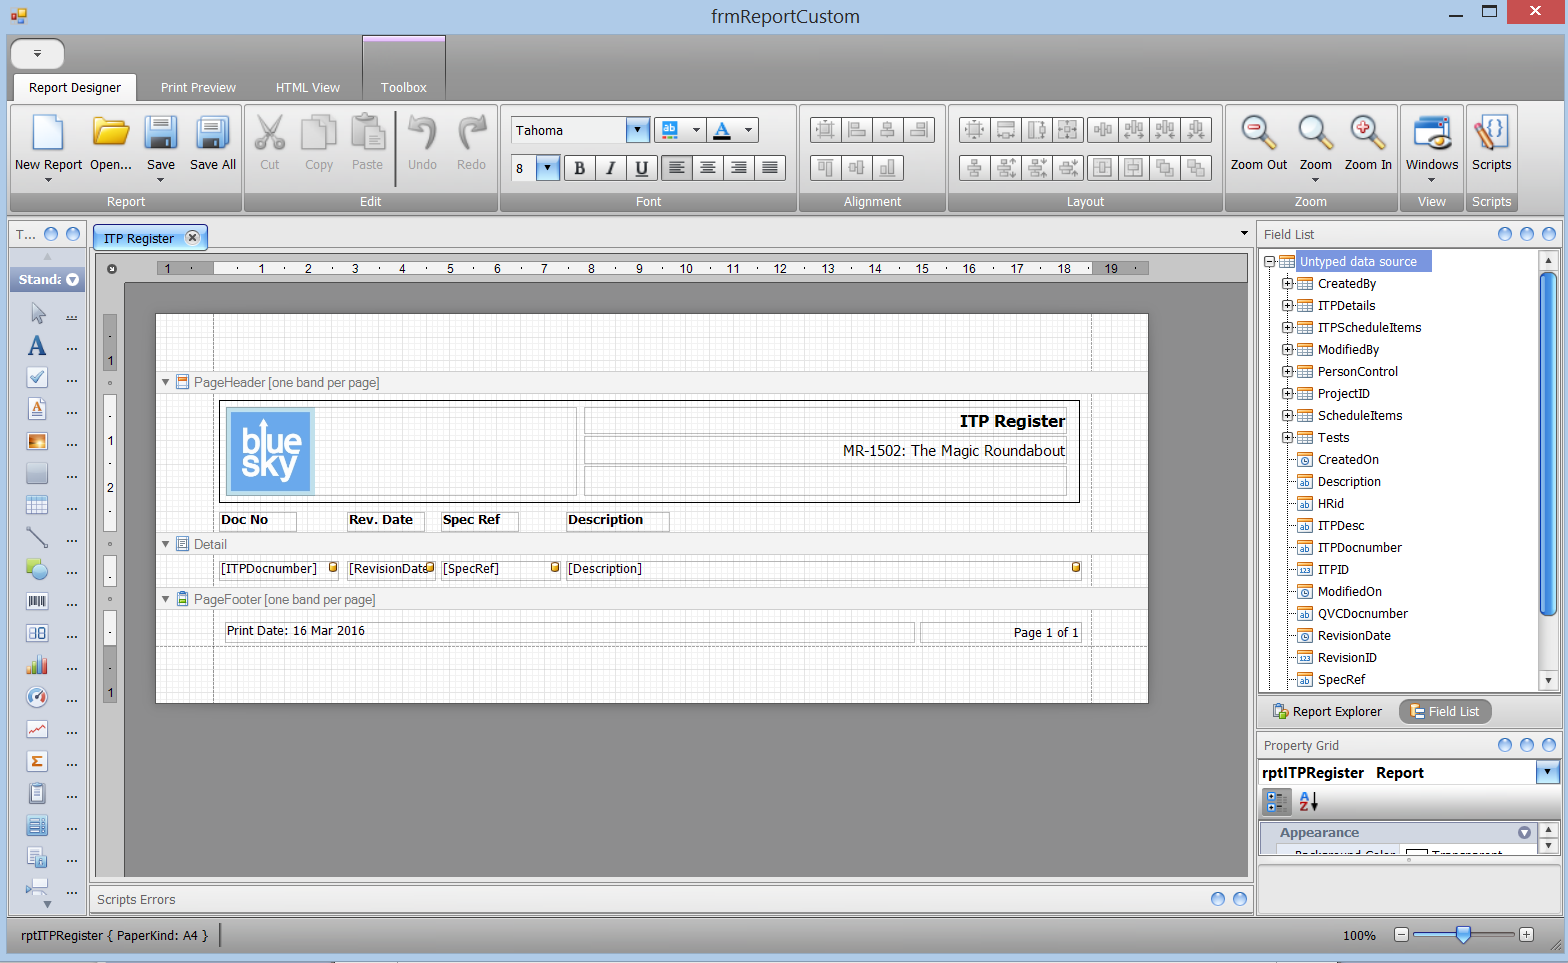
After clicking the Customise button, the report will be viewed in design mode as per below:
Editing
All controls on the report can be moved / edited and have their linked data changed. The toolbox on the left allows users to add new controls, or databound labels can be dragged from the field list on the right.
Properties of each control are listed in the bottom right in the property grid, but key properties are also available from the smart tag on each control (click on a control, and press the > sign).
If you are a programmer, then you can even review the scripts by clicking on the button at the top right of the ribbon control. This however is really unnecessary in the great majority of use cases.
For more information on editing reports, refer to the Additional Documentation.
Saving
Saving the report is easy. Just click on the save button in the top right, and you will be prompted for a name for the report. If you use the same name as an existing report in Civil Pro (which is the default on first save), Civil Pro will use your new custom report as default – it doesn’t overwrite the base report, it just hides it. If you change the name of your custom report, or delete it – Civil Pro’s report appears again.
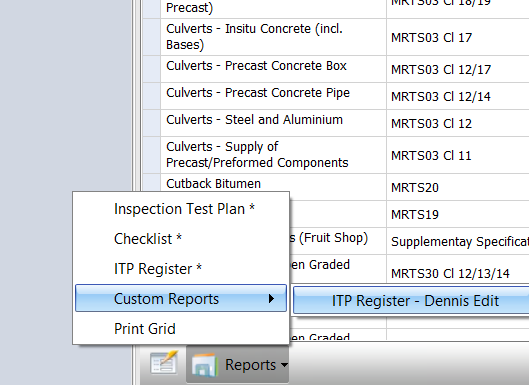
Opening custom reports
Access Custom Reports from within the Report heading in the Ribbon Menu. Any reports made in the current project will be displayed here.
To open the custom report, simply select it from the list.
In addition, if you did not change the reports name from the default when you saved it, your custom report becomes the default report and can be accessed by running the report from which it was derived.
For example…
If you created a custom report from the ITP Register, and saved it as ITP Register, then you can access your custom report by either;
- Reports => Custom Report => ITP Register
- Reports => ITP Register (because you have overridden the default report by using the same name)
Whereas, if you saved it as ITP Register – Dennis Edit, then you can only access it by;
- Reports => Custom Report => ITP Register- Dennis Edit
Deleting Custom Reports
To delete a custom report, find the report in the custom reports menu and right click on it. You will be prompted to delete it.
HELP – I’ve broken my default reports
Don’t worry. No matter how much you stuff up a custom report – its not a problem. If you have saved it with a new name, just find it in the custom report menu and follow the instructions above to delete it. If you saved it with the default name, and overrode your base report – you haven’t actually modified the base report. You have just made a custom report that is prioritised over the base report because it has the same name. So if you delete your custom report, the original is still there! Just find it in the custom reports menu and delete it, as if it had a different name. All fixed.