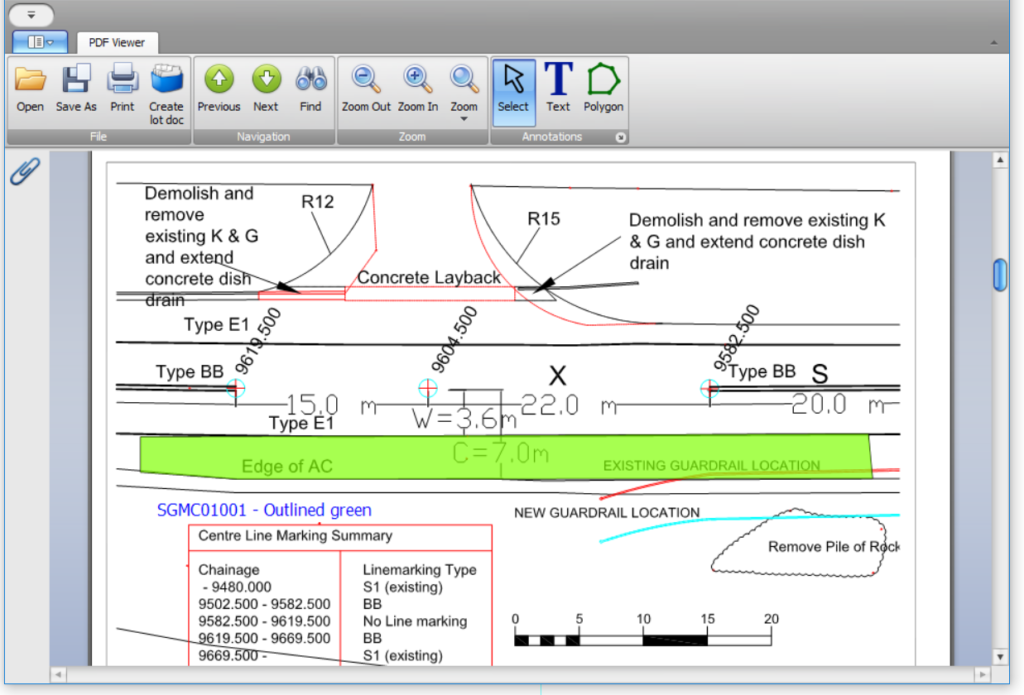
A Lot Map is a simple markup on a plan that indicates the location of the Lot. Civil Pro provides a basic interface for users to markup a PDF plan and save it in the Lot Docs, without leaving the Civil Pro environment.
The Lot Map was introduced in Version 8.10.83 and is accessed from the Lot Register’s Context Menu. In the screenshot below, the lime green polygon and blue text have been added with the Lot Map tool.
Contents
Creating a lot map
To create a Lot Map:
- Select a Lot and then choose Lot Operations => Lot Map from the Context Menu.
- In the Lot Map PDF Creator, click on the Open button and select the PFD you want as the basis of your map.
Tip:
Make the PDF for your maps as concise and small as possible – preferably 1 or 2 pages in A3 as a maximum. If it is a large project, consider having several different maps you can select from. This is for 2 reasons – firstly the larger the file, the longer the delay as Civil Pro draws polygons and text. Secondly, it will result in much smaller file storage requirements for your related Lot documents.
- On your Lot document click on the Text or Polygon tool and draw your map.
- Click on the Create Lot Map button.
To view Lot Maps:
- Select the Lot from the Lot Register.
- Double click on the the Lot Map under the Filestore Docs heading in the Related Items List.
- A PDF of the Lot Doc will open.
Editing lot maps
Both text or polygons can have their updatable properties edited until the point that you create the Lot Document. After this point, the PDF is burned in and can only be further edited with an external PDF tool like Adobe Acrobat.
The Lot Map does not support operations such as document rotation.
Tip:
When drawing a polygon, no visible action occurs when the first point is clicked. Once the second point is clicked, a line will be drawn. Subsequent points are joined with lines. To complete, click on the original point. To cancel, press the escape button.
Editing – all objects
To edit an object, click on the Select tool and then click on the object you want to edit. When selected it will have a green dashed outline. The following actions are available:
- Move the object:
- left and right, up or down using the arrow keys
- move quicker by also holding the CTRL key
- move slower by also holding the ALT key
- Delete the object – use the Delete option form the Context Menu or press the delete button.
- Edit properties – the properties that can be edited are detailed below and depend on the type of the selected object.
Text object property editing
Text object properties that can be edited (by selecting the object and selecting Properties from the Context Menu) include:
- the text itself
- the font size
- the font colour
Polygon object property editing
- the outline colour
- the fill colour
- transparency of the fill colour
