New projects can be created in two ways;
- Log on to an existing database in which a project already exists;
- select the Project => Project Administration menu item
- click on the Add Project button. The new project wizard will be started – refer below.
- Log on to a new database, or an existing initialized database which has no projects
- The new project wizard (refer below) will be started automatically after log on.
Contents
- 1 Creating a new project using the New Project Wizard
- 1.1 Importing setup from previous projects
- 1.2 Selecting the project and/or database to connect from (this page is not shown for the Do not import and Project on the current database options)
- 1.3 Providing Civil Pro log in details with access to the project (this page is not shown for the Do not import option)
- 1.4 Importing data (this page is not shown for the Do not import option)
- 1.5 Project Information
- 1.6 Add Users
- 1.7 Add permissions
- 1.8 Create the project
- 2 Log In
Creating a new project using the New Project Wizard
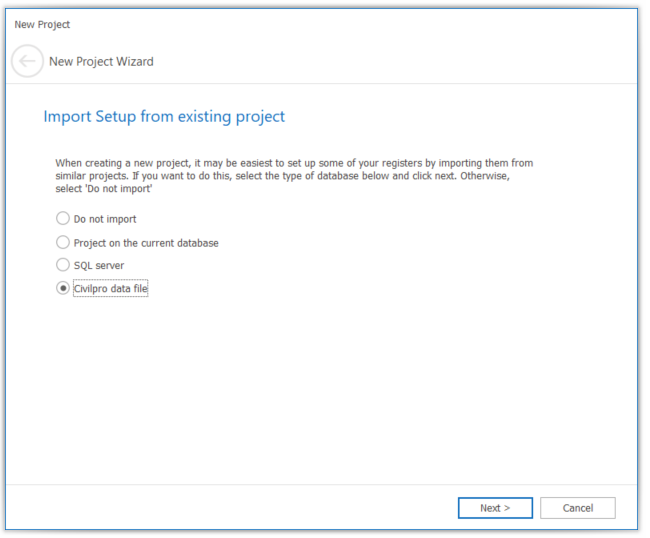
When the new project wizard is started, the first screen will provide options for importing data into the project from other projects and/or databases.
Importing setup from previous projects
There will be some data which does not change between similar projects such as Work Types, Test Methods, Variation Statuses etc. While you can always import them from an exported Civil Pro file, you can also import them now as part of the project initialization.
In the screenshot below, we are going to import information from a different standalone project. The process is similar when importing from an SQL server or a project on the current database.
NOTE: If you want to do this, the only requisite is that the source project be the same database (major) version. If you are not sure, simply exit the wizard, log in to the project you want to import from, and it will be updated. Then you can restart the new project wizard.
Selecting the project and/or database to connect from (this page is not shown for the Do not import and Project on the current database options)
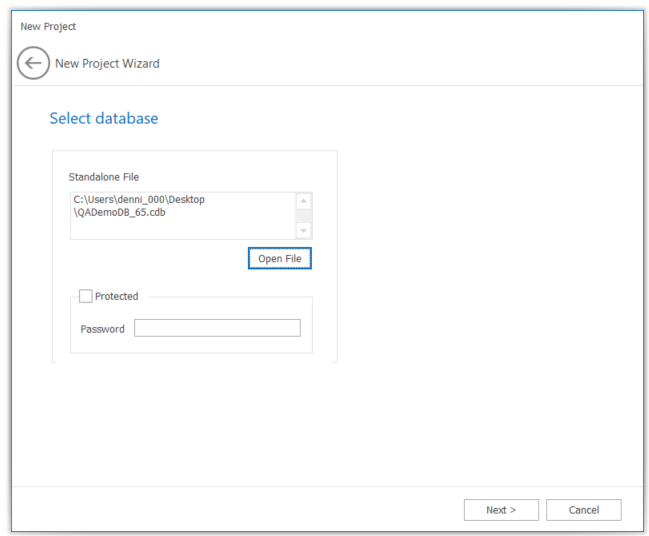
- Provide the connection details – the screenshot shows importing from a standalone file.
- If the file itself is password protected (refer above section on standalone files), click the Protected checkbox and enter the password. This is NOT you civil pro username password and will only be applicable if the file was password protected when created. This is not usually the case and can normally be left blank.
- Click Next.
Providing Civil Pro log in details with access to the project (this page is not shown for the Do not import option)
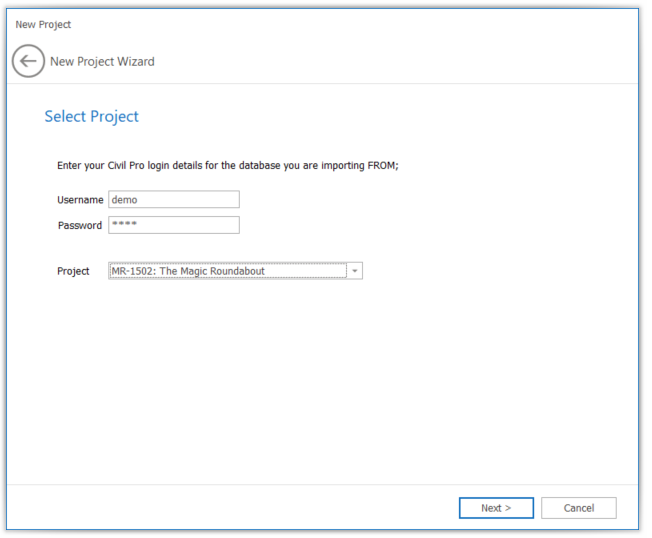
You can only import from a project to which you have valid authentication details. Select the project in the database, and provide valid log in details.
NOTE: If you are importing from a project on the current database, your existing credentials will be used so the username and password boxes are greyed out.
Importing data (this page is not shown for the Do not import option)
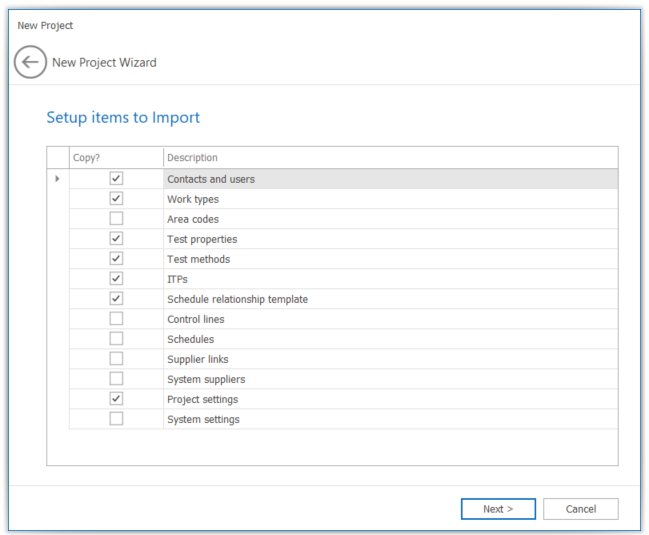
In the Importing Data Screen, select the data to import and click Next.
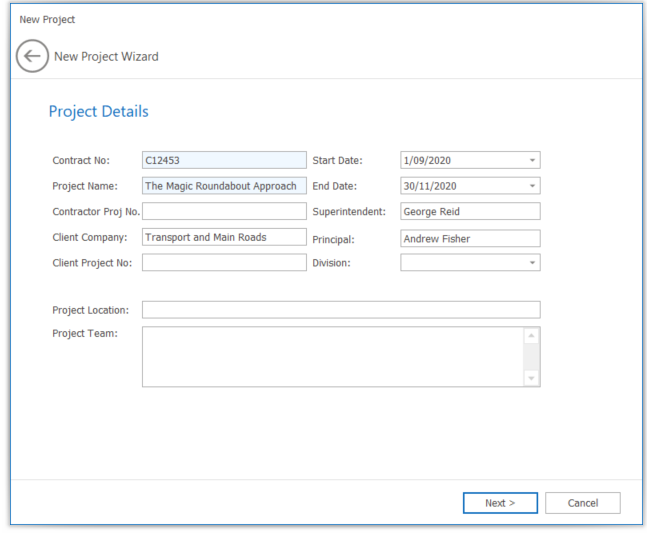
Project Information
Enter the key information describing the project. You can update this later. Only the coloured boxes are required fields.
Add Users
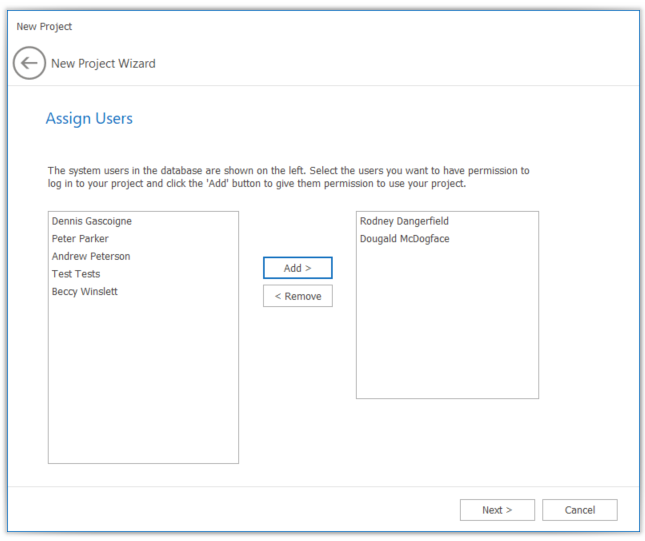
NOTE: This page will only appear if you are creating a project on an existing Civil Pro database which has multiple existing users. Otherwise you will skip straight to the Create Project screen
Select the users (left side) who will have access to this project. When you are creating a standalone or the first project on a server install, there will only be the user you added earlier in this process, but if you are adding a new project to an existing server install, all of the users in the system will be available.
Add permissions
NOTE: This page will only appear if you are creating a project on an existing Civil Pro database which has multiple existing users. Otherwise you will skip straight to the Create Project screen
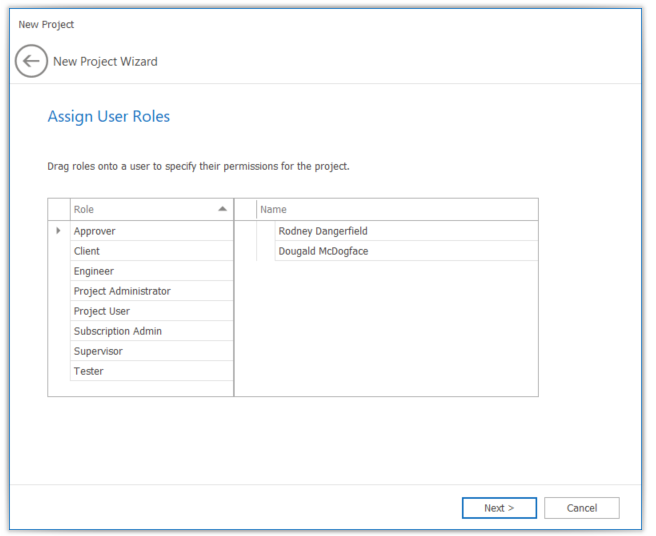
Add permissions for the users in your new project. Do this by dragging roles from the left onto the relevant user on the right.
Create the project
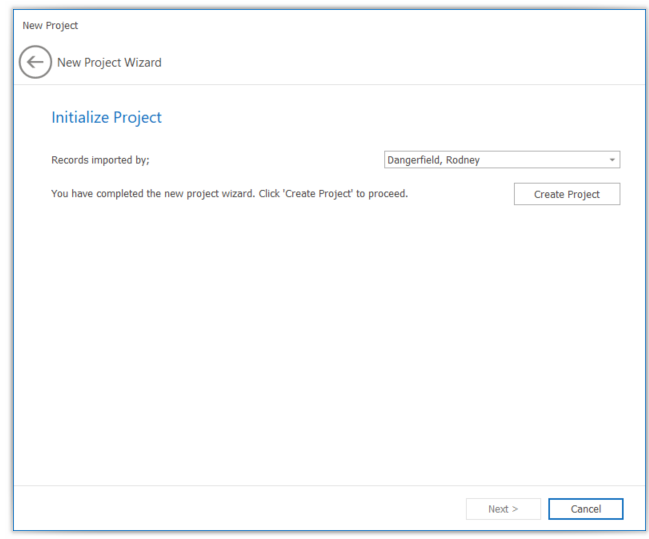
Select the user who will be recorded in Civil Pro as importing the records (assuming you did so in the previous step in the New Project Wizard) and click Create Project.
Log In
You will be returned to your Log In screen. Enter the username and password from the Initializing the Database step and you can start setting up your project.