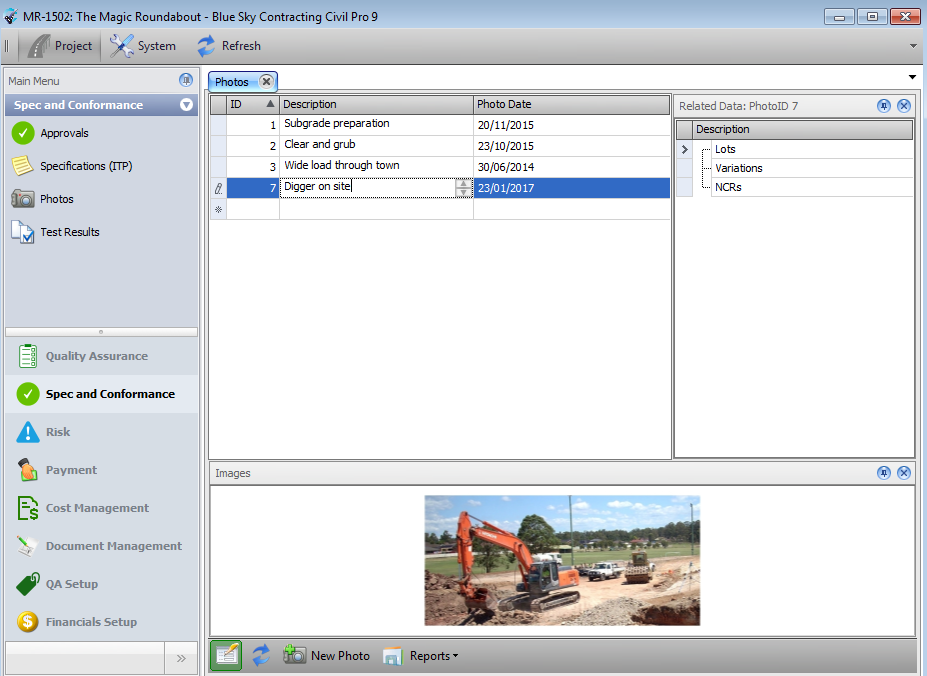
The Photo Register provides a central repository of images for a project, and provides the means to describe them and link them to Lots, Variations and NCRs. The Photo Register is displayed as a list of photograph descriptions and their dates. Double clicking on any entry will display a panel in which the photo will be displayed. Related Items are managed in the panel to the right of the Register.
When you add a photo to Civil Pro, a copy is made of the photo. Any changes you make will not affect the original image. If you delete the Civil Pro record, the copy of the image in Civil Pro will be deleted, but the original image is not changed.
The Photo Register is accessed from the Specifications and Conformance section of the Main Menu.
Note: You cannot use the Photo Register until the Project Filepath is set. Refer to the Project Administration topic.
Contents
Photo Fields
- Description – a description of the photograph
- Photo Date – the date the photo was taken. When using the New Photo function or the Batch Import function, Civil Pro attempts to determine this date from the photo’s EXIF data
Adding a new photo
To create a new photo:
- Click on the New Photo button in the Register Menu or select Batch Import from the Register Context Menu. Both of these functions do the same thing.
- Select one or more photos to import by selecting a photo, and then selecting a range by holding shift when clicking on another photo, or select additional photos individually by clicking on them while holding the Ctrl key.
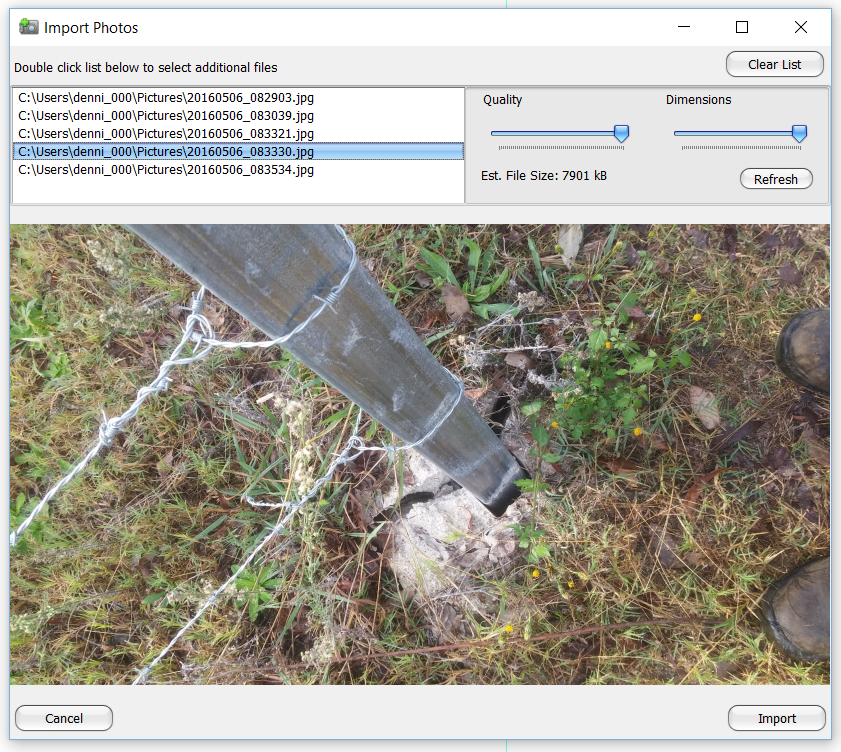
- In the Import Photos screen, a list of the selected photos is displayed. You can:
- Remove photos from the list by clicking on them and pressing the delete key.
- Add photos by double clicking on the list of photos.
- Preview individual photos by clicking on their filename in the list.
- Adjust the file size (for all photos) by sliding the dimensions or quality selectors. If you click the Refresh button, the new file size will be displayed.

- When you are happy with the list and their file sizes, click the Import button. If photos need to be rotated/flipped etc, this can be done in the Photo Register after they are imported.
- After import, you will see the items have been added to the Register with a default description <Enter Description>. You should select each photo and:
- update the description
- update the date field if necessary
- adjust the image if necessary (rotate etc) – refer below
Updating a photo record
Updating metadata
To update a photo’s metadata (description and date), simply enable editing and update the description and date in the register.
Changing the image
To change the image use the File => Get File function from the Context Menu (accessed by right clicking on the image).
Manipulating the image
To rotate, flip, pan or zoom an image, access the relevant function from the image Context Menu (accessed by right clicking on the image). After a rotate or flip, the image is automatically saved.
Deleting a photo
To delete a record:
- Enable Editing and select the record to delete.
- press the delete key.
Deleting a record will also delete the Civil Pro copy of the photo. It will not affect the original photo.
Related Items
Photos can be linked to Lots, NCRs and VRNs. These relationships are listed in the Related Items Panel and can be added/deleted as described in the Adding, Updating and Deleting topic.
Photo functions
Save image as
To save the image to a file, access this function from the image context menu File => Save Image As.

