All of the civil pro registers are displayed in summary using an excel like grid. The civil pro grid is a very flexible interface. Understanding how to use it makes civil pro even more powerful.

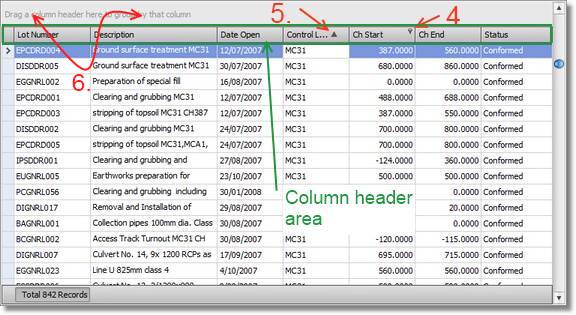
Fig 1. Accessing common grid functions
By default, the grid is not editable and data cannot be deleted. To enable editing, right click to access the context menus and select "Enable Editing".
1. Reorder columns - grapping a column (left click and hold) with the mouse and dragging it will reorder columns.
2. Showing different columns - A standard set of columns are shown when you open each register, generally there are many additional columns available. These can be accessed from the header context menu and clicking Column Chooser. Drag the column you want from the column chooser to the grid column header area and drop it.
3. Removing Columns - A column can be hidden by grabbing it (left click and hold) and dragging it out of the column area.
4. Filtering Data - When the left mouse cursor is over the column heading, the filter icon appears in the top right of the column header (see the Ch Start column in the figure). Clicking this opens the filter menu. Select the value you want to filter on, or select custom to enter a complex filter. The filter system is analogous to that found in Microsoft Excel.
5. Sorting Data - Clicking on a column header sorts the data using the values in that column. Clicking it again reverses the sort order. To sort on multiple columns, click on the columns you want to sort on in order while holding shift. The figure shows the Control Line is sorted (there is a black triangle in the header)
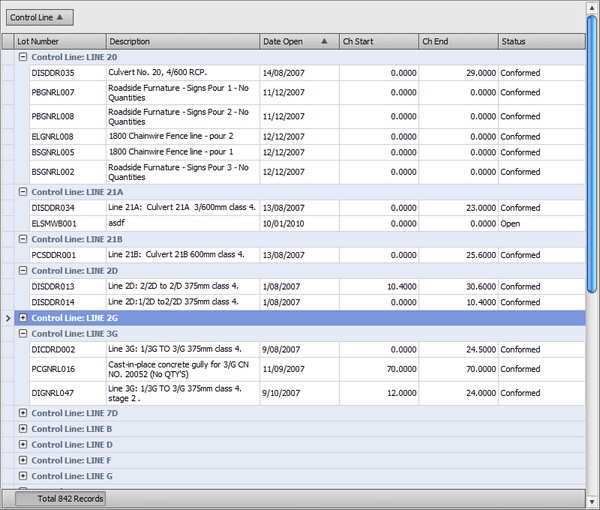
6. Grouping Data - dragging one or more columns into the grouping area at the top of the grid allows users to collect similar information together. In Fig 2. the grid is grouped by Control Line as can be seen by the control line column which has been dragged into the header. When the grid is grouped, the expansion state and whether the grouped column is shown can be controlled through the grid's context menu. More than one grouping can be applied to further collate like information.

Fig 2. The lot register after the Control Line has been dragged into the group area.