You can attach documents of any kind to a lot - including spreadsheets, word documents, pdfs or images. Related documents are shown in the related items panel under the heading "Documents". Before adding an documents (or photos) you must have the project file path set up. Refer to the topic Project administration
To add a document, simply select the lot you want to add the document too, and double click on the "Documents" heading. In the file selector dialog, select the file and click "Open". You will be prompted to update the description (Fig 3.) which defaults to the file name. When ready, click on "OK". The document will now appear under the "Documents" heading for the lot.
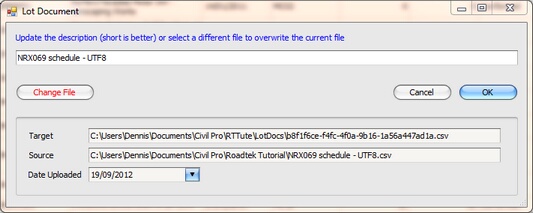
Fig 1. The lot document editor
Viewing Lot Documents
To view a lot document, double click it and civil pro will open it using the default program for the file type of the lot document. Civil Pro cannot open documents that do not have an associated program.
Printing Lot Documents
To print a lot document, right click it to get the context menu, and select the print option.
Editing Lot Document Records
To change the file a lot document refers to, or to update the description of the lot document, right click on it and selecte the edit option from the context menu.
Testing Documents
Lot Documents can also be added in the Test Request register. This is used for recording copies of test reports from testing authorities. Any document added to a test request is also listed in the Lot Documents for the lot tested on the test request.