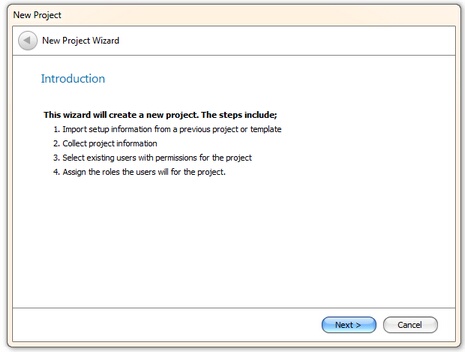
When you create a new project, the project initialization wizard will be automatically started. The first screen explains the process.
If you have entered the Project Initialization page without going through the Database Initialization, civil pro does not know if you have the appropriate permission (you must be a system administrator) to create a new project. In this case this page may also prompt for the user name and password of a valid system administrator - you will need to enter this information to continue. If you have just completed a database initialization, the credentials are not required and you will see the first page as shown below.
When you are ready, click Next.
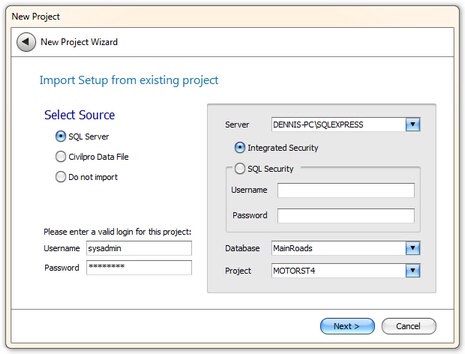
When you start a new project, much of the information may be similar to a project you have previously worked on, or your company may have a set of standards you need to reuse. You can copy the set up from your previous project on the next page. Simply select the type of connection (SQL Server or Civil Pro file), enter the appropriate details and click next. If you are not importing, or you prefer to import specific information later - select Do Not Import.
IMPORTANT NOTE: Civil Pro can only import from projects with the same data structure as the current version. If you have problems importing, fix the target database by simply logging in to it, then try again.
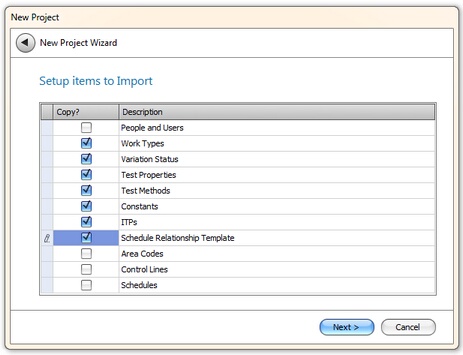
If you selected to import from a project, you will be prompted with a list of the data you can import - the most common are selected by default. Review the list, and select the data you want. If you selected Do Not Import in the previous step, this page will be skipped.
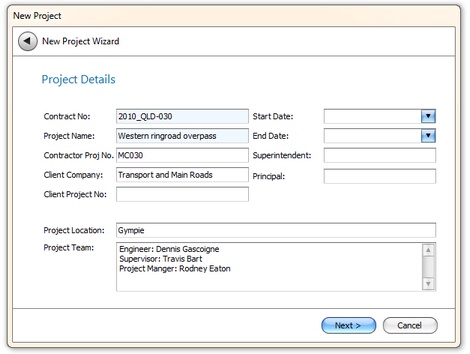
The next step is to collect key information about the project. If you have imported data, some of the source project's data will be shown here such as the project team, location, client and superintendent. Enter the compulsory information (coloured boxes) and optional information, including changes to any imported data. When you are finished, click Next.
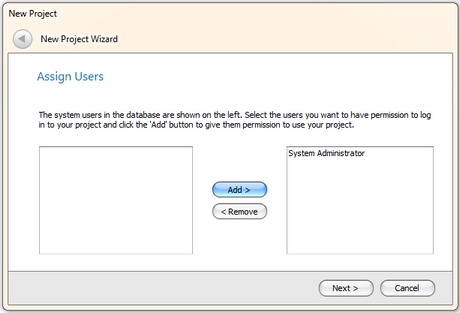
Each project must have at least one user who is granted log in permission. Select the users who will have some kind of access to the project from the left, then click the Add button. You can add new users after set up is complete. When you have finished assigning users, click Next.
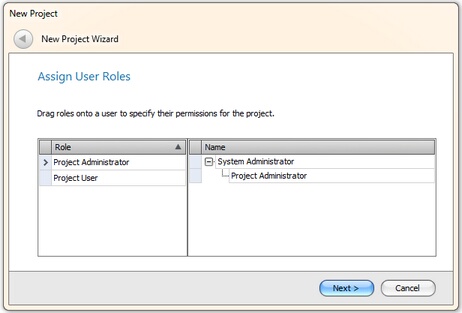
Each of the users you assigned to the project in the previous step need to have a role (for more information refer to Access Control). The role determines what responsibilities a user has for the project. The default roles are Project Administrator and Project User. Drag the appropriate role over to the user on the right. When each user has a role, click Next.
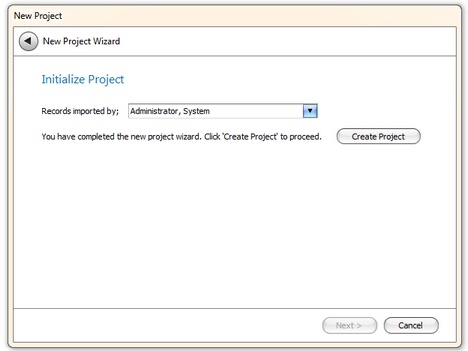
You are now ready to initialize your project. Click on the Create Project button. If you have selected to import People and Users, it is more than likely that at least one of the users you are importing will already exist in your current database (for example if you are copying from a project with a sysadmin user). In this case Civil Pro will prompt you, asking how to deal with it. Most of the time you will tell civil pro that it is the same user (default) but you can change it as needs be.
If you have selected to import data, you also need to select the user to whom the records will be assigned once they are imported into your project
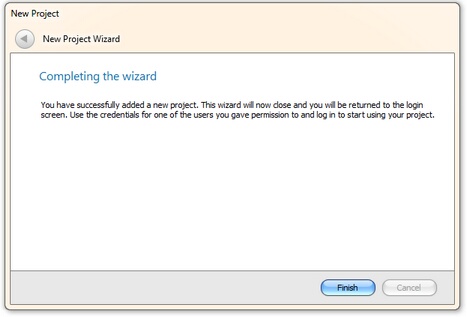
Assuming all goes well you will see the Finish page. Click Finish and be returned to the Log In screen.