The new lot wizard simplifies the creation of a new lot by undertaking the task step by step. To access the new lot wizard, click on the New Lot button on the bottom of the Lot Register.
TIP: Holding down the shift key while clicking on the new lot button will start the new lot wizard using the currently selected lot as a template. Alternatively you can use the New Lot (like selected) option from the context menu.
Step 1. Select an Area Code, Work Type and Description. The Description is compulsory.
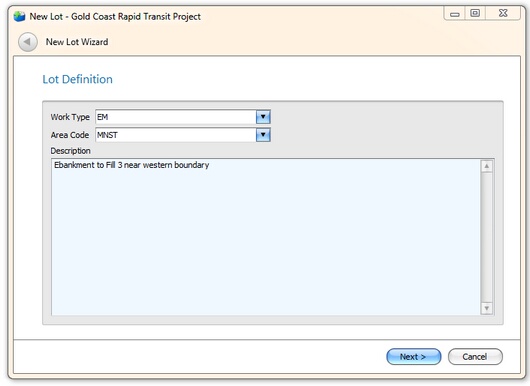
Fig 1: New lot step 1 1 - work type, area code and description
Step 2. Enter the person raising the lot, the date the lot was opened and optionally the date that work started on the lot. Also specify if the level of testing is reduced.
Civil pro will recommend a lot number based on either the default lot number definition, or as in the case below, a user defined lot number definition. Most of the time this can be left as is.
In this step you also decide how the lot's position will be defined. Select from;
| 1. | No Geometry - Sufficient information to describe the lot is contained in the description and no additional information is required |
| 2. | Chainage - The lot is defined by chainage / offset / RL |
| 3. | Coordinate Position - the lot contains features that identified by a series of coordinate positions x,y,z |
| 4. | Coordinate Region - the lot is a region bounded a series of points for which coordinates are provided as x,y,z |
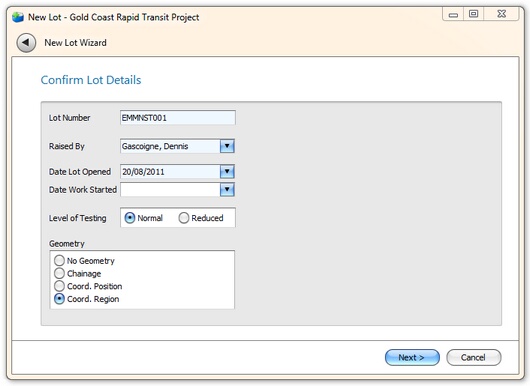
Fig 2: New lot step 2
Step 3. (Not required for No Geometry)
| 1. | No Geometry - Not Used |
| 2. | For chainage geometry enter the details of the lot geometry including the control line, chainage details and offsets (Fig 3a). |
| 3. | For coordinate position, enter the x,y,z coordinates for each feature (Fig 3b). |
| 4. | For each coordinate defining the region, enter its x,y,z (Fig 3b). |
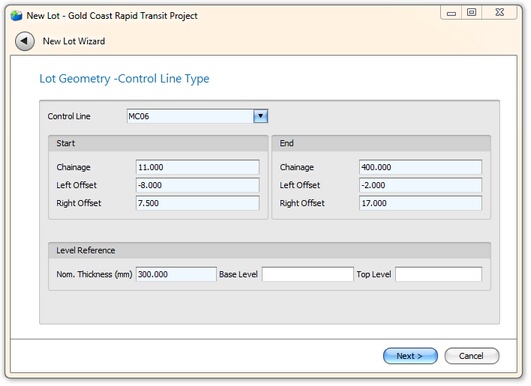
Fig 3a: New lot step 3
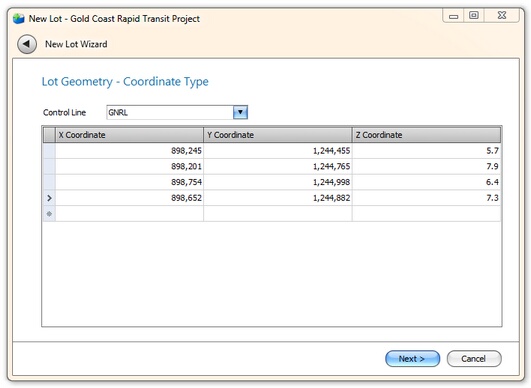
Fig 3b: New lot step 3
Step 4. Lot Calculations are performed and the results displayed on this page. If you want to used different values to those automatically calculated, click on AVL override and enter the values you want.
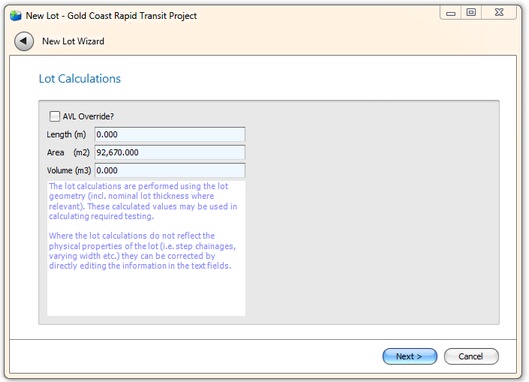
Fig 4: New lot step 4
Step 5. The final page summarizes the information you have entered so you can confirm prior to committing the new record. If you are happy with the information, click on Finish. If at any point you want to revise your information, you can click on the back button in the top left corner.
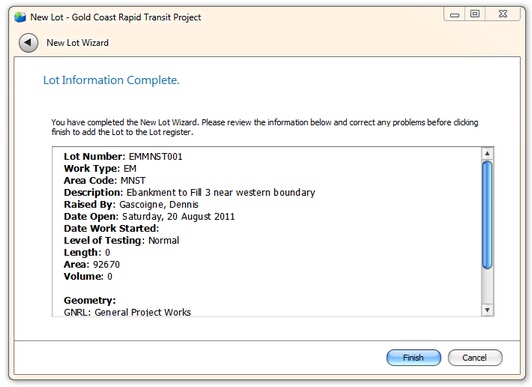
Fig 5: New lot step 5