The Photo Register is used to create a library of images and connect them to the records in civil pro to which they relate.
The Photo register is accessed from the Main Menu and consists of the main grid, related items panel and detail panel. New photos are created using the New Photo wizard - accessed from the New Photo button in the bottom left of the page. Changing the selected item in the Photo Register will change the list of related items. To see the image preview page (hidden by default) double click on a Photo or select the Show Preview Panel option from the context menu (right click the grid).
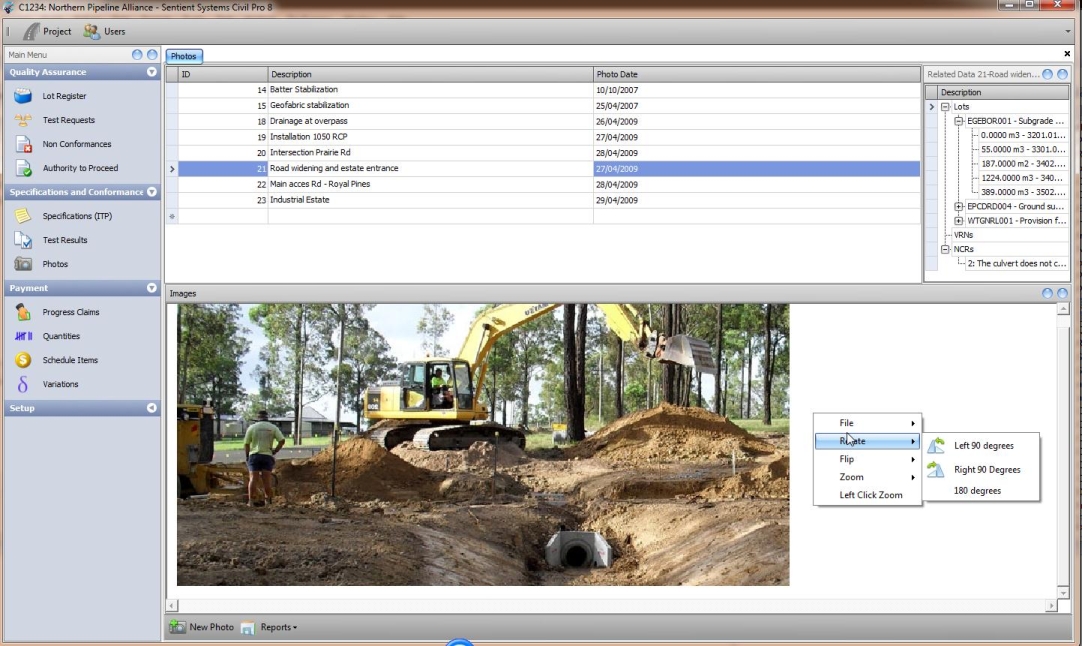
Fig 1. The Photo Register showing the preview panel
Photo Records
A Photo record consists of;
Photo ID |
A sequential number for each photo - generated automatically by civil pro |
Description * |
A description of the non-conformance |
Photo Date * |
Where the non-conformance is located |
Adding New Photos
New photos can be added in three ways;
| • | Enter a new photo record in the grid. Add a new image using the Get Image function on the Preview Panel context menu |
| • | Use the New Photo wizard and update the grid entry after importing. The New Photo wizard and Batch Import functions use the same interface. |
| • | Use the Batch Import function from the context menu and import numerous photos at once. Then update the imported entries in the grid. |
Image Swapping and Downloading
| • | To change a photo record's image, select the Get Image option from the Preview Panel Context Menu (accessed by right clicking on the preview panel). Select the replacement photo, and click OK in the import wizard. |
| • | Saving a picture (for example to an external device or to send in an email) use the Save Image As function from the Preview Panel context menu. |
Photo Manipulation
Each image in civil pro can be manipulated using civil pro's image manipulation tools. The image manipulation tools are accessed from the Preview Panel's context menu (accessed by right clicking on the preview panel). Zooming functions are also performed with the mouse scroll wheel.
The available functions are;
Rotate |
|
- Left |
Rotates the image left 90 degrees |
- Right |
Rotates the image right 90 degrees |
- 180 degrees |
Turns the image upside down |
Flip |
|
- Horizontal |
Flips the image horizontally |
- Vertical |
Flips the image vertically |
Zoom |
|
- Zoom In |
Increases the zoom |
- Zoom Out |
Decreases the zoom |
- Fit |
Resizes the image to fit the panel while maintaining the aspect ratio |
- Actual Size |
Changes the zoom to 100% |
- Stretch to Fit |
Stretches the photo to fill the available panel area regardless of aspect ratio |
Left Click Zoom |
When enabled, left clicking and dragging a window on the image zooms to that window |