When starting a new project, a lot of the data you need to enter into civil pro is already available electronically
| • | There will probably be a standard list of work type abbreviations your company uses - either on other civil pro projects or for other reasons |
| • | The payment schedule is generally created as part of the tendering process |
| • | ITPs are usually maintained in base form for customization for an individual project |
| • | Test methods are also likely to be the same on different projects of the same general type |
| • | Your surveyor may have a list of control lines |
| • | The client will probably provide a list of project documents for the document register |
Civil pro allows many types of information to be directly imported using a basic wizard. This wizard is available form the context menu of any grids for which data can be imported. To access the context menu, right click anywhere on a register's grid.
On the first page of the wizard you will prompted for the source of the data (Fig 1). This is either data you have copied to the clipboard or from a csv formatted file.
| • | csv formatted files are simply files in which the values are separated by commas. These can be generated from excel and other spreadsheet like programs, as well as from estimating programs such as Expert Estimator. If you select this option, you will be prompted for the file before continuing. |
| • | Civil pro can read data you have stored on the clipboard if it is in a table like format - for example if you have selected some cells in excel or a web page and copied them |
If the first row of your data contains the headings for the columns, select the check box 'First row contains column headings'. If this option is selected, civil pro will try and guess what data is in each column using the headings for the next step - if not you can do it manually without difficulty.
IMPORTANT NOTE: Special characters (such as apostrophes) can be stored using many different formats. This can lead to strange substitutions when importing data especially when using excel csv's. When using "Save As" in excel there is a "Tools" drop down next to the cancel button. Selecting "Web options" allows you to specify the encoding. We have had success selecting the UTF8 option when saving, then using the Windows 1252 import option in Civil Pro.
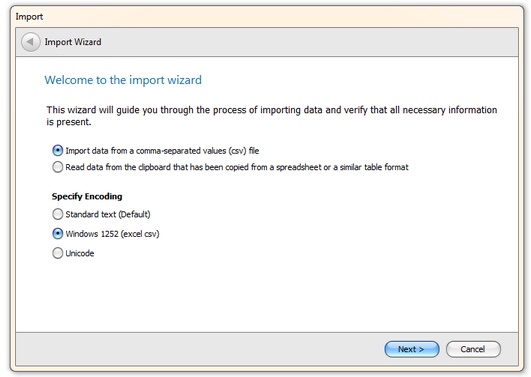
Fig 1 - Import wizard step 1
Once you have selected your data, it will be displayed in a grid (Fig 2). If you right click on the column that contains data you want to import, you will be given a list of data that can be assigned. Select an item from the list matching the data in the column. Repeat until you have matched the required data.
If you want to un-assign a column, select None from the the menu instead of a data type.
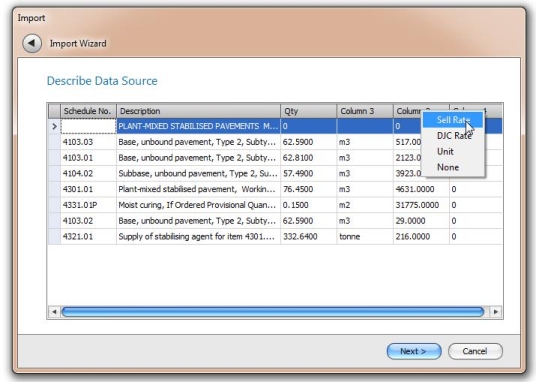
Fig 2 - Match columns to civil pro fields
When you are finished, click 'Next'. The following step confirms the tasks to be undertaken. Click import and if your job is successful - 'Finish'. Your data is imported.
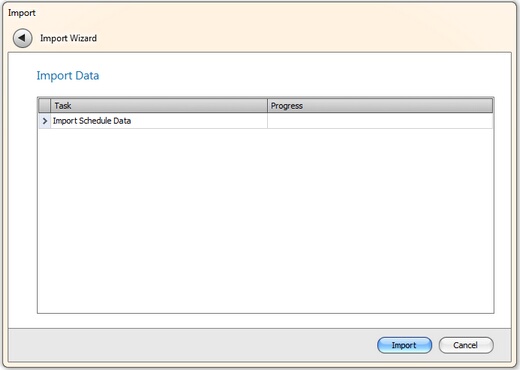
Fig 3 - Confirm jobs to run.