The new test request wizard simplifies the creation of a new test request by undertaking the task step by step. To access the new TR wizard, click on the "new TR" button on the bottom of the test request register. For information on what each of the fields is for (description, requested by, date requested etc. refer to the test request register section.
Step 1: Enter basic information about your test request. The fields are quite self explanatory including a description of the tests to be taken (or area to be tested) the lot to be tested, who requested the test and when, who is responsible for organizing the actual testing and when the testing is required.
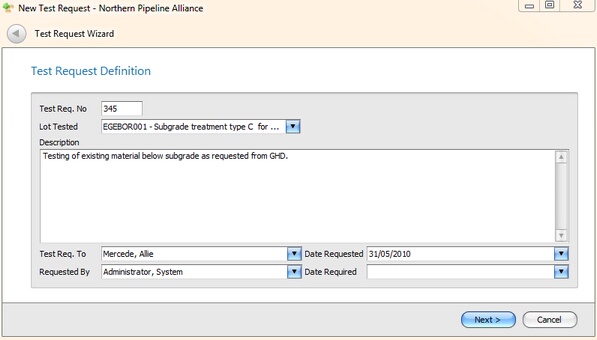
Fig 1. Test request wizard step 1 - general test req. definitions
Step 2: This step is where the area to be tested is defined. The elements of the geometry are explained in both the lot register and the test request register
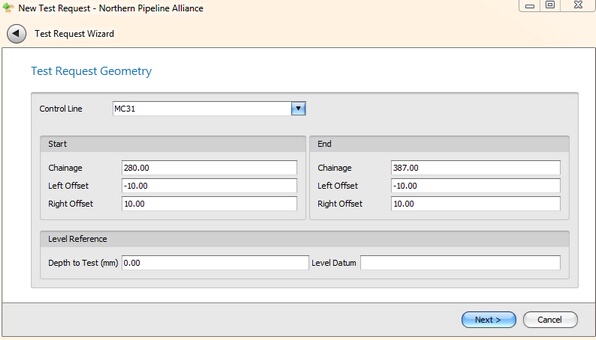
Fig 2. Test request wizard step 2 - test req. geometry
Step 3: Calculations
In this step the user specifies the Material Source, who specifies the testing location and how. The method of location field has the following impact;
| 1. | Tester locates - No locations are specified, the tester decides where to take the tests based on specification requirements. |
| 2. | Random stratified testing - civil pro creates random locations using random stratified sampling |
| 3. | Location specified - the person raising the test request specifies the locations |
The random locations section (middle) determines which positions are calculated when random stratified sampling is used. In Fig 3. Civil pro will calculate random positions in the longitudinal and lateral directions, but not depth. If you were testing something like a kerb platform, you would want civil pro to only calculate a test position longitudinally.
The resolution is the number of decimal places civil pro will calculate the location to. The default is zero (i.e. closest metre).
The calculations values for length, area and volume are calculated automatically by civil pro unless the AVL override checkbox is selected, in this case you can specify these values to account for irregular shapes or other departures from the calculated values.
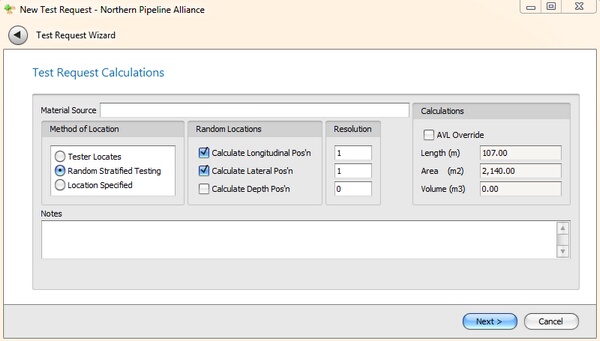
Fig 3. Test request wizard step 3 - test req. calculations
Step 4: Tests
For each test you want taken, enter the test type, (optionally) the schedule item and the number of that type of test. If civil pro is calculating the test positions it will locate tests together to minimize the number of samples required. For example in the Fig 4, the single CBR will be located in the same place as the first density - as is seen in Fig 5. Remember, if you need to delete a value (such as if you accidentally selected a schedule item), close the selector and click ctrl+delete. This will clear the editor.

Fig 4. Test request wizard step 4 - test req. tests
Step 5: This page shows the sample locations according to the location method shown in step 3. There is usually nothing to do here.
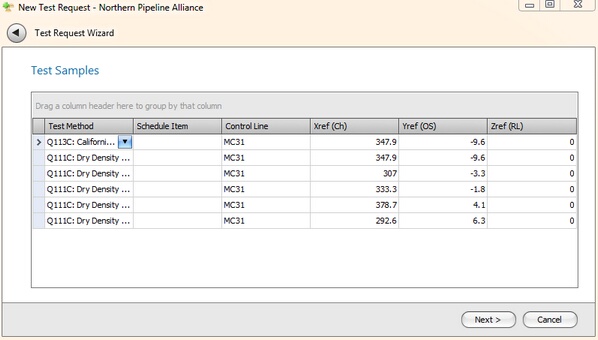
Fig 5. Test request wizard Step 5 - test req. samples
Step 6: Each test request can have one or more test properties. These can be entered manually or selected from a pre-built list. In the above example, the list for 32MPa concrete was selected and the "add properties" button pressed. The properties such as concrete class and target slump were imported along with some default values. Check any default values are correct and update any other values that are empty and relevant.
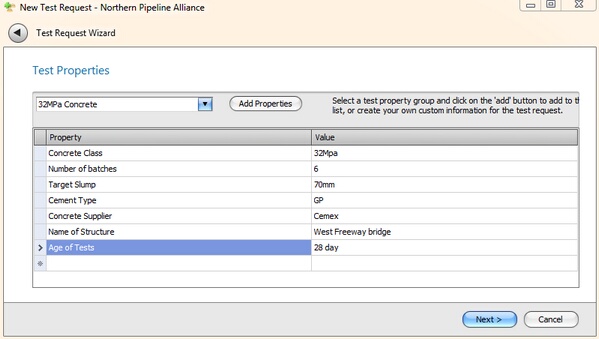
Fig 6. Test request wizard step 6 - test req. properties
Step 7: Review the summary of the information civil pro has collected for your test request and click "finish" if it is OK. To correct information go back through the wizard by clicking the back arrow in the top left of the wizard.
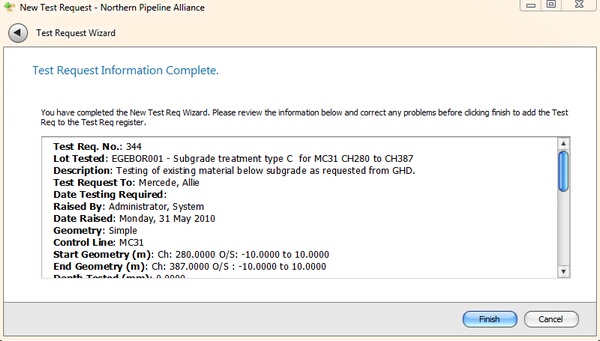
Fig 7. Test request wizard step 7 - test req. summary