Contents
Viewing the Lot Register
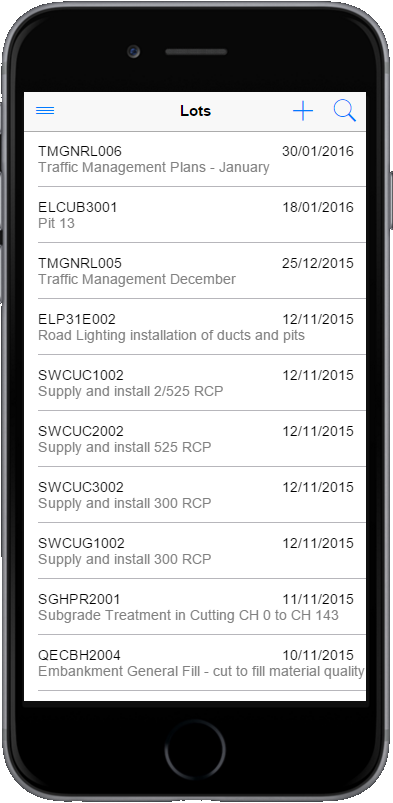
To access the Lot Register, click on the Lots menu item. This menu item is not visible to users who only have approver permission (are not Project Users or Project Admin).
When you first open the lot register, it will display all of the lots for your project, in reverse chronological order. Due to Civil Pro’s ‘on demand’ loading strategy, only the 20 most recent will be loaded until the user scrolls to the end of the list, at which point the next 20 will load, and so on. This ensures that performance is not impacted by unnecessarily downloading lots you closed 8 months ago and do not need to review.
Filtering the Lot Register
When you do need to find a specific set of lots, or even a single lot, Civil Pro has an advanced search filter, accessed by clicking the magnifying glass in the top right of the screen. This opens the search menu;
The different filters restrict the list in the lot register;
- All Lots – shows the entire lot register unfiltered
- My Lots – shows lots which were raised by the currently logged in user
- Open Lots – shows lots which are not guaranteed or conformed
- Conformed Lots – shows only conformed lots
- Text Search – shows lots where the entered text matches part of either the lot number or the description (case insensitive)
- Advanced – shows the advance lot filter page
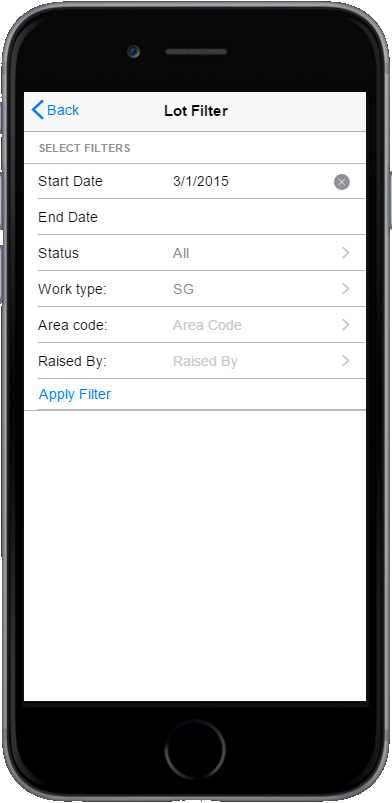
The Advanced Lot Filter
The advanced lot filter allows users to restrict the lots displayed based on;
- Start Date and End Date (refers to the lot’s Date Open)
- Lot Status – either All, Open, Guaranteed or Conformed
- Work Type
- Area Code
- User who raised the lot
All of the selected filters will be applied in parallel when the Apply Filter button is clicked
Viewing Lot Details
To view details for an individual lot, click on the desired lot in the lot register. The lot details for the selected lot will be displayed.
As there is a lot of data for a single lot, and many mobile devices have small screens, the initial view is rolled up into what is called an accordion view. Clicking on each section will expand the section to see the data in detail. Exactly which sections are displayed for the lot depend on what type of geometry is used. The available sections are;
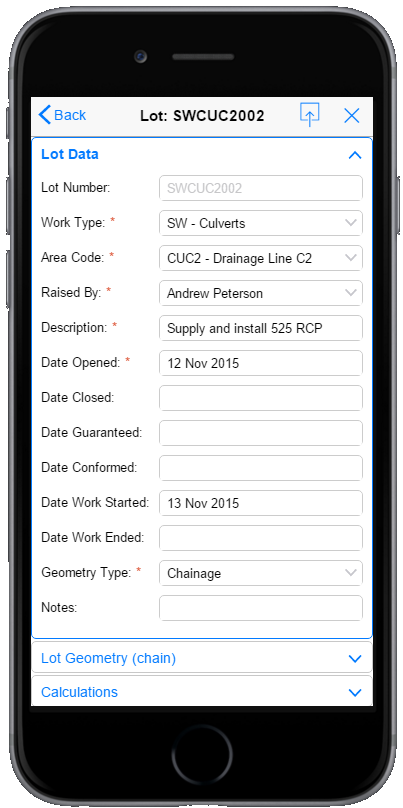
- Lot Data – displays general lot information such as the lot number, key dates, description etc., and the geometry type
- Lot Geometry (chain) – this is displayed only for lots with a geometry type of Chainage and includes information about the control line, start end chainages and offsets
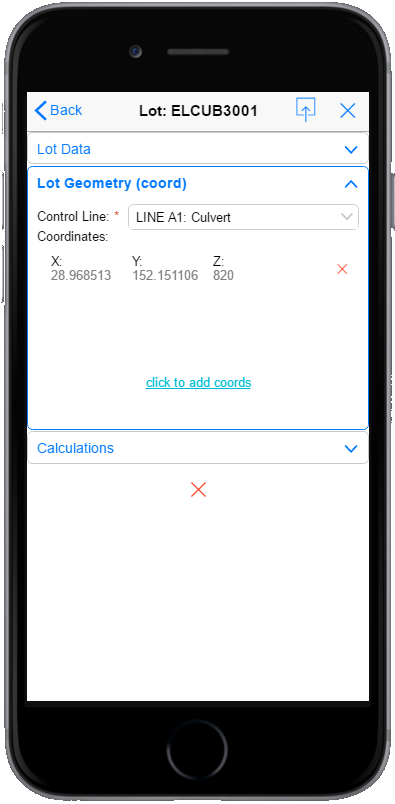
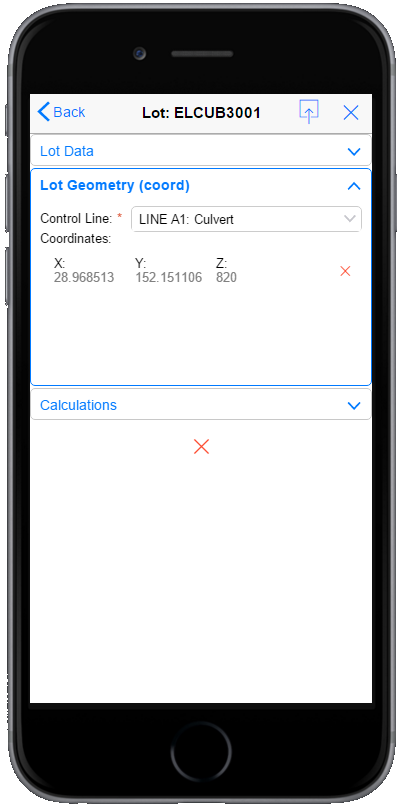
- Lot Geometry (Coord) – displayed for lots with geometry type of Coord Position or Coord Region and includes 2 or 3 dimensional references relative to a given reference
- Calculations – displays properties of the lot such as the % complete, reduced testing status and Length, Area and Volume calcs
The below screenshot shows the lot detail with the Lot Data section expanded.
Adding a new Lot
To add a new lot, click on the + symbol next to the magnifying glass in the top right corner of the Lot Register (not the detail page). . You will be forwarded to the Lot Details page (described above), except it is blank to enter the new record.
Data that is required for registering a new lot is marked with an asterisk. Other fields are optional.
Updating a Lot
The information in the lot detail page is live and editable. No changes are made permanent unless the save icon (top right next to the X is clicked).
Updating Lot Geometry
If your lot uses chainage geometry, then updating (or adding) data for your lot is exactly the same as for entering lot data – simply add the required information.
For coordinate geometry, the process is a little different. If you have selected a coordinate geometry as the geometry type, then the Lot Geometry (coord) pane will be available – expand it to see the coordinates. To add a new coordinate, click on the Click to add coords link.
In the new coordinate popup, add the coordinate details (X and Y, or X, Y and Z), and click the Add Coordinate button;
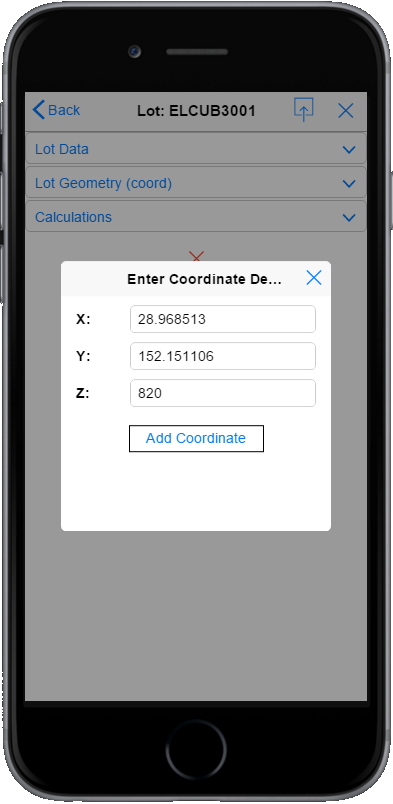
The new coordinate will then be updated in the Lot Geometry (coord) section. To delete the coordinate, click on the red cross to the right of the numbers.
Related Data
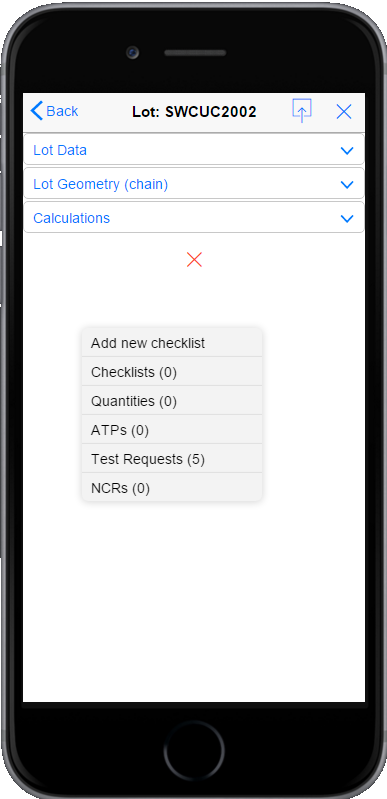
To see information related to the current lot, click and hold (or right click if using a desktop web interface) anywhere on the lot register. A context menu will appear as shown in the following screenshot.
Each option in the menu links to the related items of that type, and displays the number of each category of related item. For example, the lot SWCUC2002 for which the context menu is displayed above has 5 test requests associated with it. Clicking on the Test Requests (5) item will show the Test Request register with only those test requests relating to SWCUC2002.
The Add new checklist option is a shortcut to the checklist register. It displays the standard new checklist dialog with the currently selected lot prefilled. The user has only to select the ITP the checklist is based on.
