Civil Pro’s site diary is designed for supervisors and engineers to create a record of activity onsite. One of the main features is the ability to record resources used onsite, and (optionally) cost code them. This is then recorded in the central civil pro database where it can be reviewed and automatically converted into daycosts.
A complete site diary provides a record of;
- A text summary of activity onsite and significant events
- Weather and lost time
- Instructions given or received – these are stored directly in the project’s instructions register
- Incidents – this is stored in the project’s incident register
- Resources (Plant, Labour, Materials and Subcontract)
- Cost Coding of Resources
- Recording of HSE stats – labour hours, # labourers, subbie hours and # subbie personnel
- Photos
Contents
Lifecycle
The site diary has a very simple life cycle. Once a site diary is created, it can be edited by its original author until the diary is reviewed. The diary review process is undertaken in the desktop application and enables the project administrators to review the content of each diary, amend it if necessary and automatically convert site diary resources into costs.
Site diaries that have been reviewed are coloured green in the register.
Viewing the site diary register
To view the site diary register, navigate to Site Diary page from the main menu.
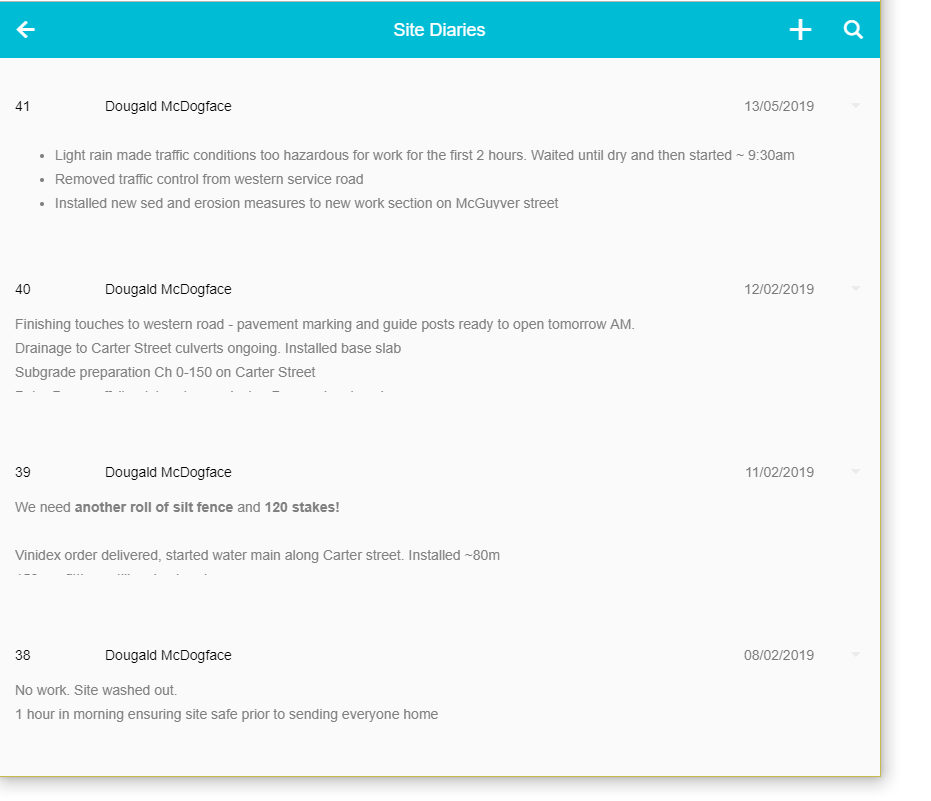
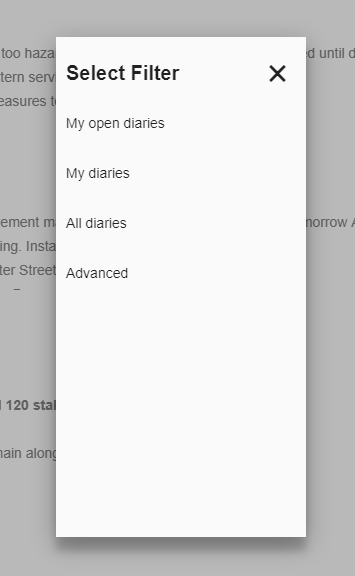
Filters
By default, the site diary register shows only the diaries for the current user. You can use the filter to show one of 3 preset filters, or use the Advanced option to create more sophisticated filters. You can select a filter by clicking on the magnifying glass (search) icon in the top right and selecting the desired filter.
Adding a new site diary
To add a new site diary, click on the ‘+’ icon in the top right. A new diary will be opened in the site diary detail page.
Layout
The diary is split into 7 sections;
- Diary Info –
- who the diary is by
- what date it refers to
- weather
- lost time
- Description of activity onsite
- Instructions
- A list of instructions received and given on the day
- Incidents
- Any incidents occurring onsite during the day
- Resources
- The resources used onsite for the day
- Cost Codes (optional)
- Cost codes for the resources
- HSE
- Hours worked and # labourers onsite
- Subbie labour and hours
- Photos
As you complete each section, click on the ‘Next’ link to go to the next section. After completing the first section, you can skip to any other section by clicking on it.
Some of the fields will be pre-filled – e.g. the Diary By and Diary Date fields. The Diary By field defaults to the current user and cannot be changed. The Diary Date defaults to the current date, and can be changed to complete diaries from previous days.
Diary Info
The first set of data to enter is the diary info. The required information is;
- Diary By * – this is prefilled to the logged in user and not editable
- Diary Date * – this is initialised as the current date, but can be changed
- weather *
- lost time * – set this to 0 if no time was lost
- Description of activity onsite * – this is a free text field and should describe the activities that occurred onsite. This is HTML meaning it can formatted to include lists, numbered lists, bold, italic etc.
* Required field
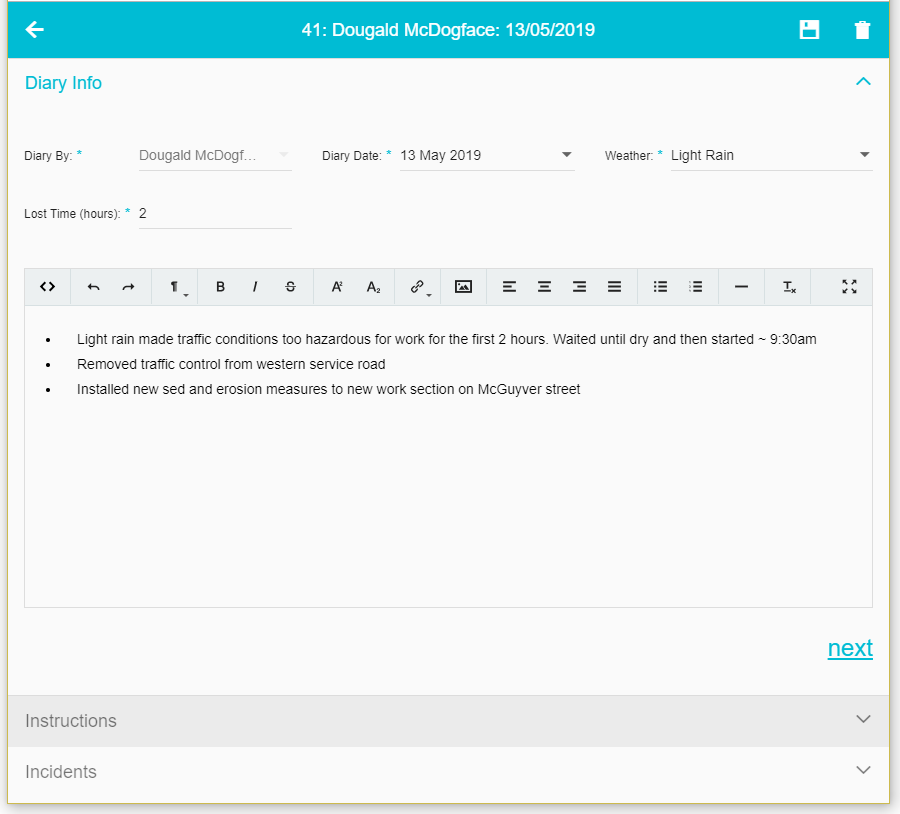
Once you have entered this data, click Next. Civil pro will save the diary and give it an ID. You can see in the screenshot that this is diary 41 by checking the header.
Instructions
Instructions are simply directions given or received onsite. Keeping records of directions is critically important as they are generally contractually or legally relevant and can have significant implications for the project and the business.
Generally;
- Instructions Received are usually from an entity such as the client’s representative (such as a direction to do additional work, or change the way work is done) or an authority (such as a temporary stop work notice for changed conditions etc.)
- Instructions given are usually for subcontractors. Supervisors may direct changes to work methods, reprioritise the works to be undertaken or direct improvements to safety, quality or environmental procedures.
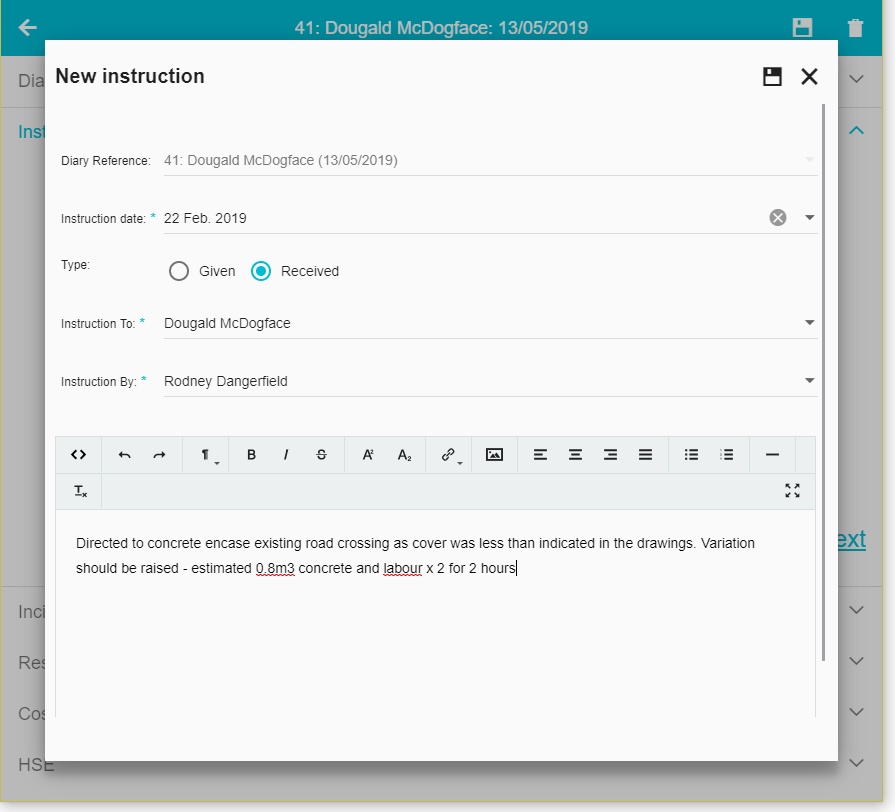
To create a new instruction, simply click on the ‘click to add instruction‘ link. A popup will be displayed in which the instruction can be entered;
- Diary Reference * – Automatically added as the current diary. Cannot be changed
- Instruction Date * – Default date can be changed
- Type * Defaults to ‘Received’. Change as required
- Instruction To * – the person to whom the instruction was directed
- Instruction From * – the person giving the instruction
- Instruction Content * – Details of the instruction. Provide as much information about what, where and when as practical.
Incidents
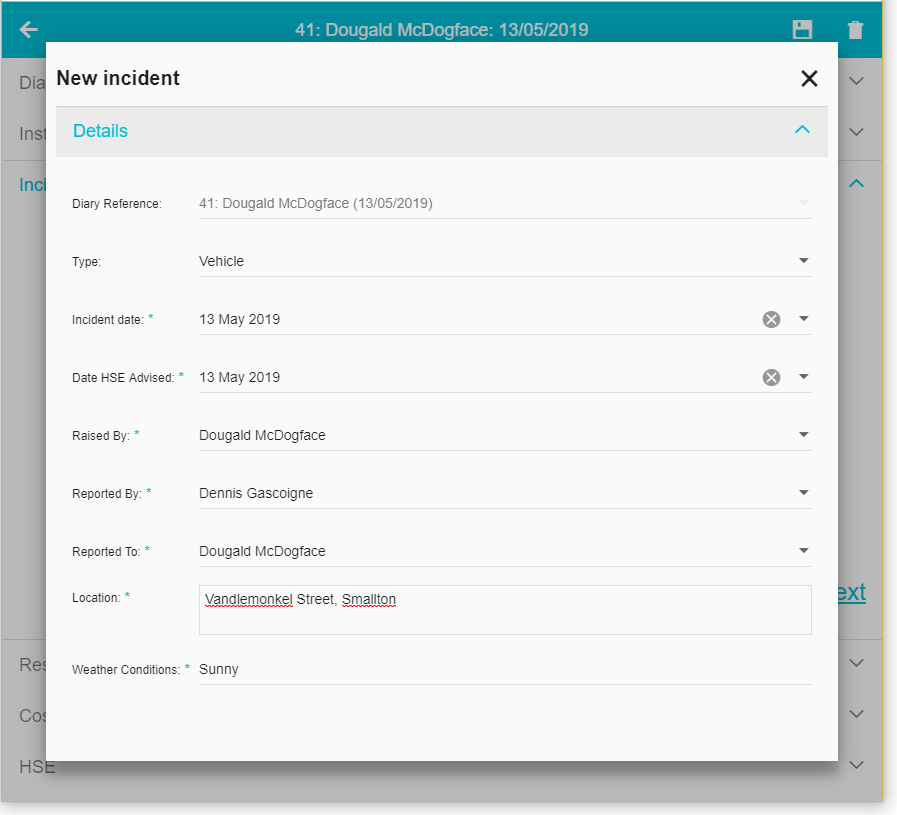
Incidents are reportable safety, environmental or quality incidents that are recorded for the purposes of regulatory compliance and system improvement. To create a new incident, simply click on the ‘click to add incident’ link. A popup will be displayed consisting of several different sections – the first of which takes the details of the incident. You can see the different sections by clicking on the details heading to collapse it.
To start working on the incident, ensure the details section is expanded and start entering the required information;
- Diary Reference * – Automatically added as the current diary. Cannot be changed
- Type * – The type of the instruction – safety, environmental, vehicle etc.
- Incident Date * – Default date can be changed
- Date HSE Advised * – The date the HSE officer was advised of the incident
- Raised By *
- Reported By *
- Reported To *
- Location * – as much information as possible about where the incident took place
- Weather conditions *
- LTI Hours * – If any time was lost from injury, enter the hours here
- Estimated Cost – A rough estimate of the direct costs of the incident such as stood down machinery, damaged equipment etc.
- Covered by SWMS – was there a safe work method statement governing the activity being undertaken when the incident occurred
- SWMS Reference – if the answer to the previous question is yes, then provide the relevant SWMS(s) here
- Subbie Report Required – If a subcontractor was involved in the incident, are they required to submit their own report
- Incident Information – a description of the incident
When the information is entered, click on the next link at the bottom of the section. The incident will be saved and allocated an incident number and you will be advanced to the next section. You can proceed to add additional information as available to complete the incident.
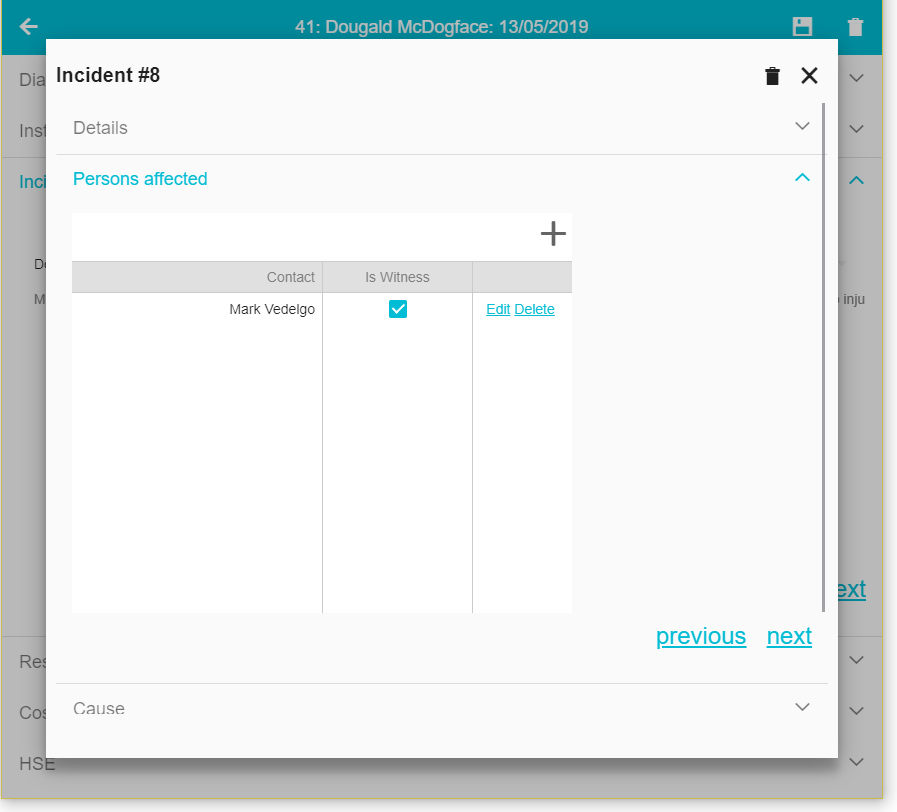
Persons affected
This is a list of the people involved in, or who witnessed the incident. Add persons by clicking on the ‘+’ button, and selecting them from the list. If a user is not in the list, simply type their name and you will get a prompt to add them. When complete, click next to progress to the next section.
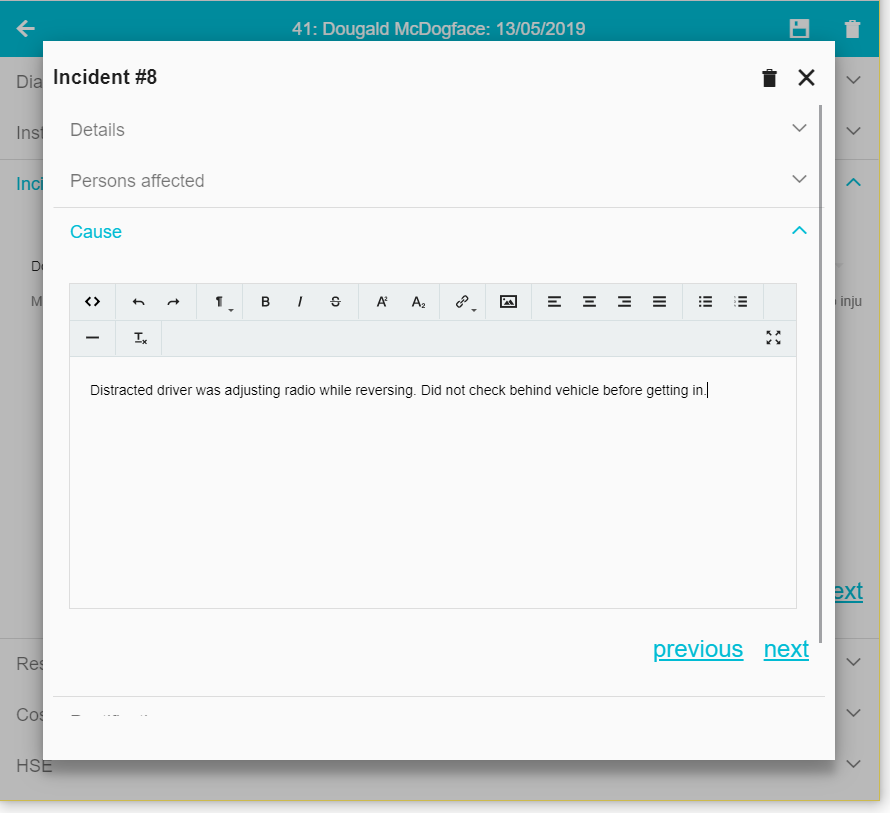
Cause
In the cause section, add text describing the causes of the incident. When complete, click next to progress to the next section.
Similarly for rectification and reoccurrence. When complete, click the save button which will be shown when you are focused on the last section.
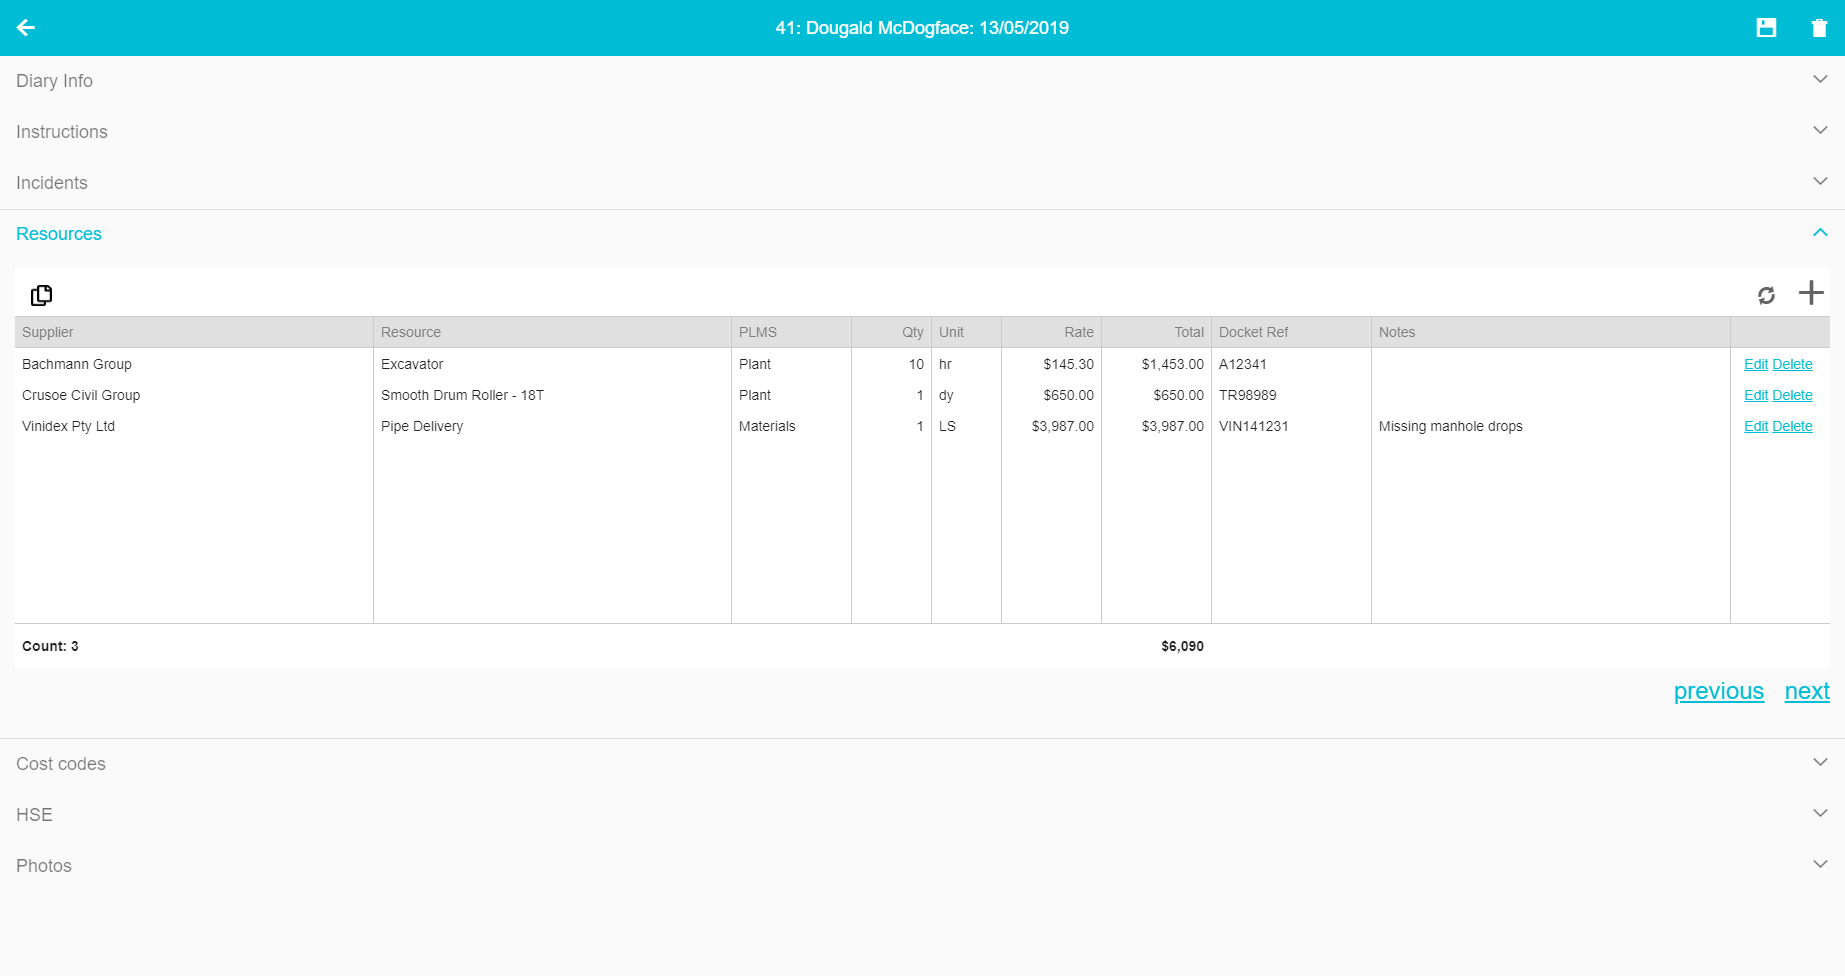
Resources
Resources are simply plant, material, subcontractors and labour used on the job. To add a resource, click on the + icon in the top right of the diary resources section. You must select resources in the order;
- Supplier (e.g. Bachmann)
- The supplier drop down will show all of the suppliers currently linked to your project. If you need a supplier that is not linked to your project, then simply enter in the part of their name in to the supplier box and Civil Pro will search and you can select the correct entry to be linked to your project. The supplier must exist in the master suppliers register (and if you use divisions, must be registered for your division).
- Resource (e.g. 30 Excavator)
- Once you have selected a supplier, the resources linked to that supplier will be shown. Simply select the resource and the unit, rate and PLMS type will be automatically filled. If it is a new resource, type in the resource name and it (along with the rate, PLMS and unit) will be added when the line is saved.
- Other details
- Enter the quantity and optionally notes and docket number.
Repeat until all resources used on site are entered.
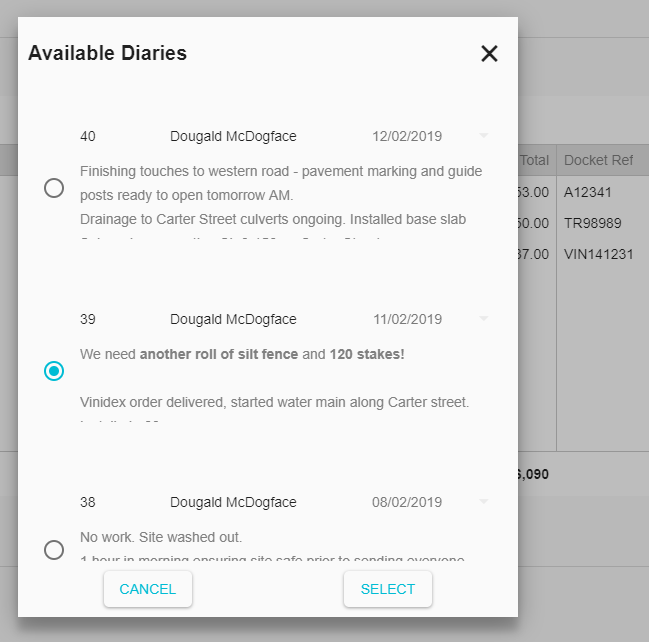
Copy from previous diary
At the top left of the resources page is a copy icon. Clicking this will show a list of previous diaries. Select the diary you require and click the select button
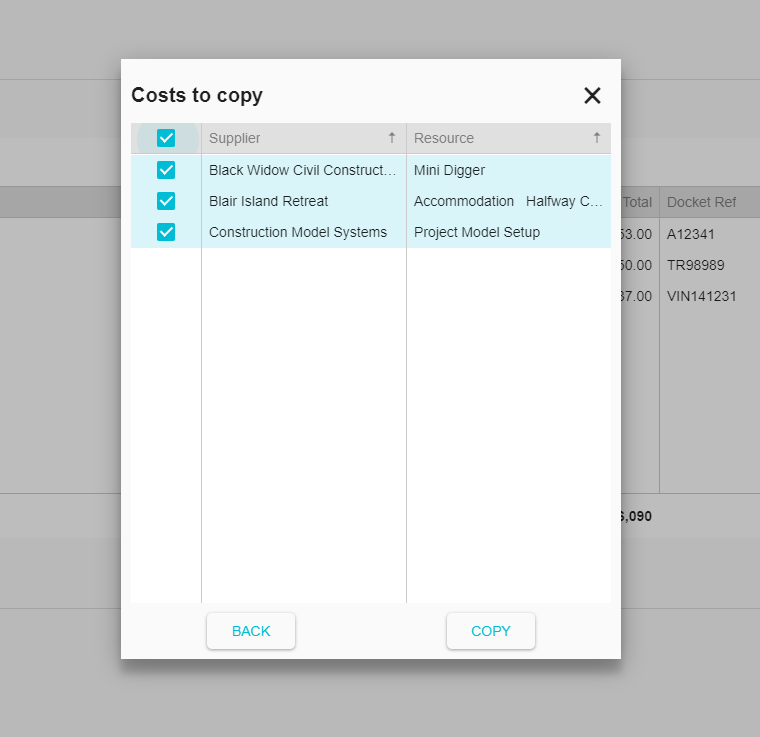
The next screen will show the resources for the selected diary. Select the ones you require and click copy. The selected costs will be added to the current diary with zero quantity and no docket reference. Update the qty and if necessary docket number.
Cost Codes
The cost codes page can be used for assigning one or more cost codes to the resources added in the previous section. When the screen is first shown, each line will be red. This indicates that each resource has not been fully assigned to cost codes. This colour will change once cost codes are correctly allocated.
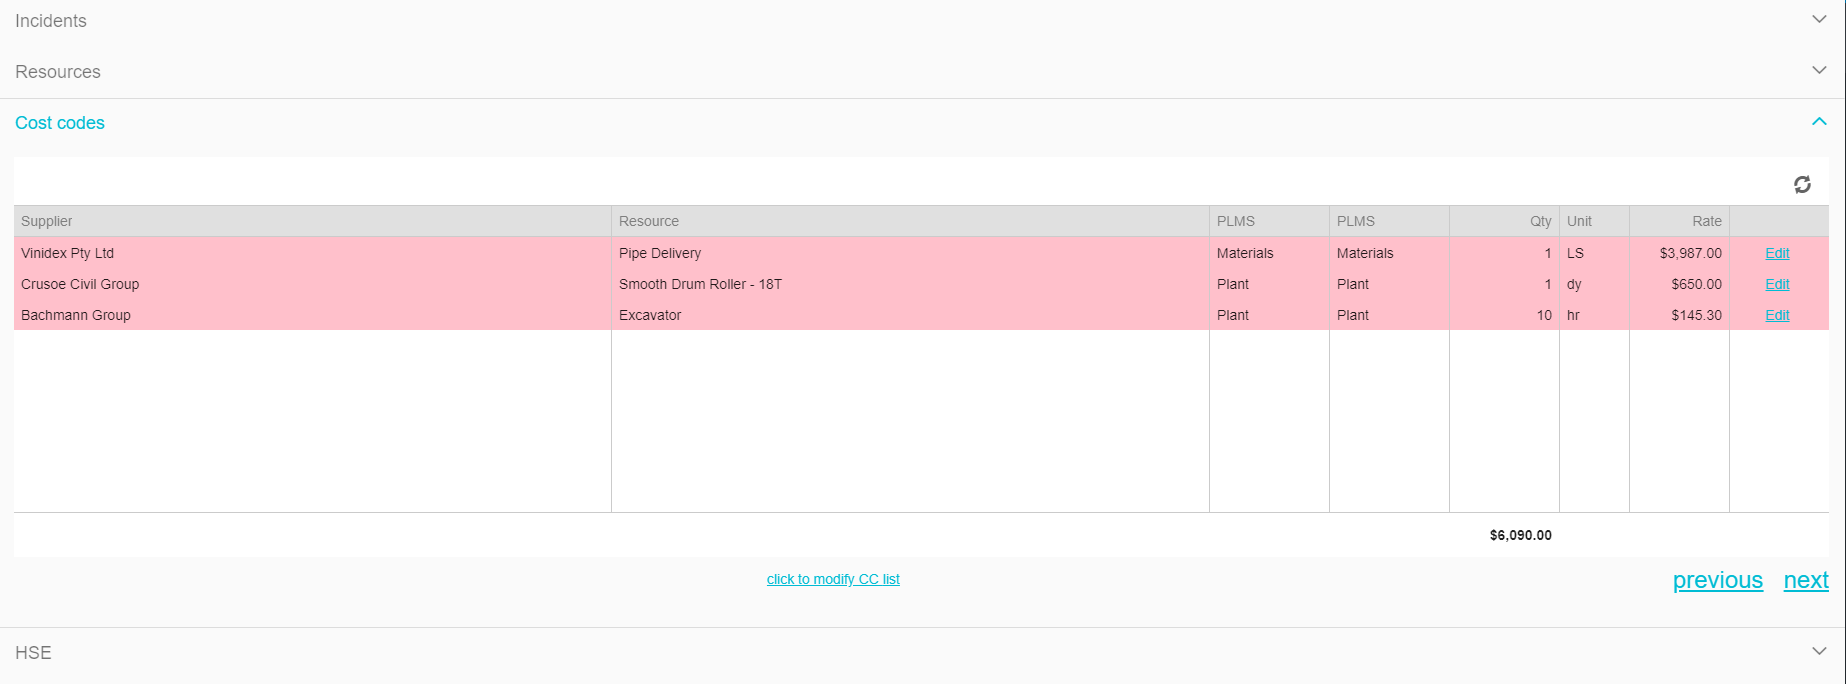
To assign cost codes, select the required cost codes by clicking on the ‘click to modify CC list’ at the bottom of the cost codes section. The available cost codes will be shown. Select one or more cost codes.

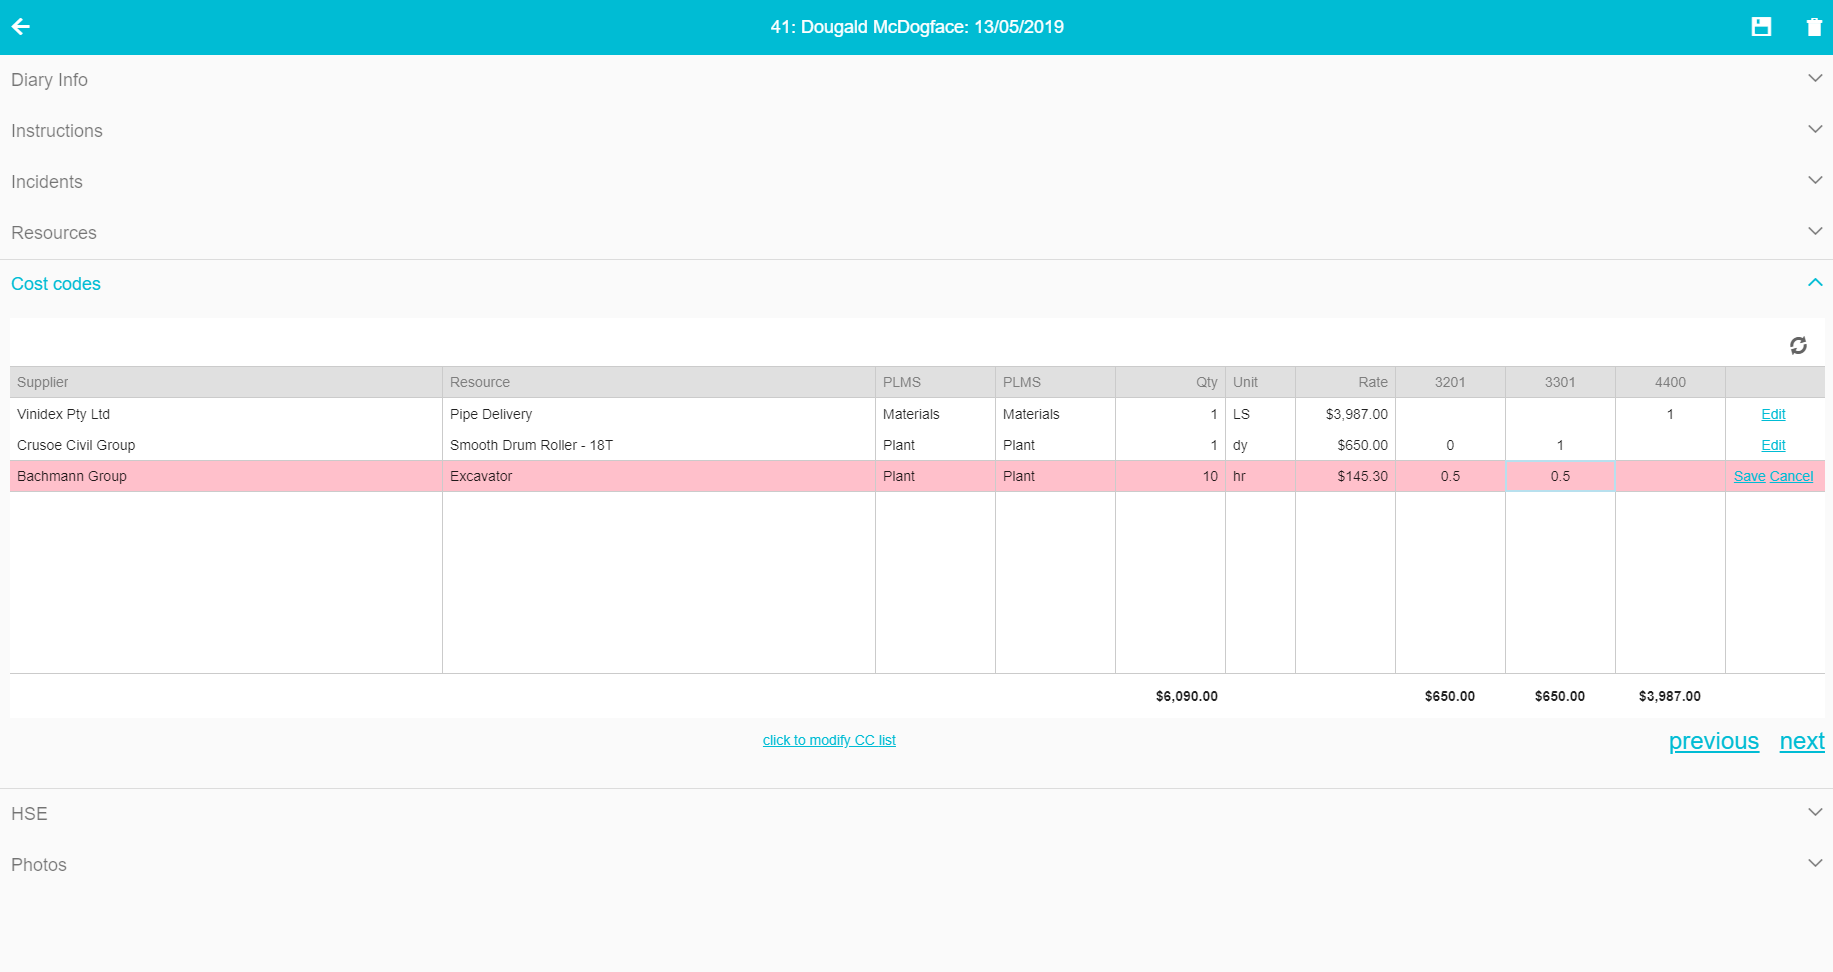
The resource list will now show additional columns for each cost code. For each row, click on the edit button and enter quantities for each cost code. The row colour will change as each cost code is fully assigned. Click save to finish each row.
Swap CC
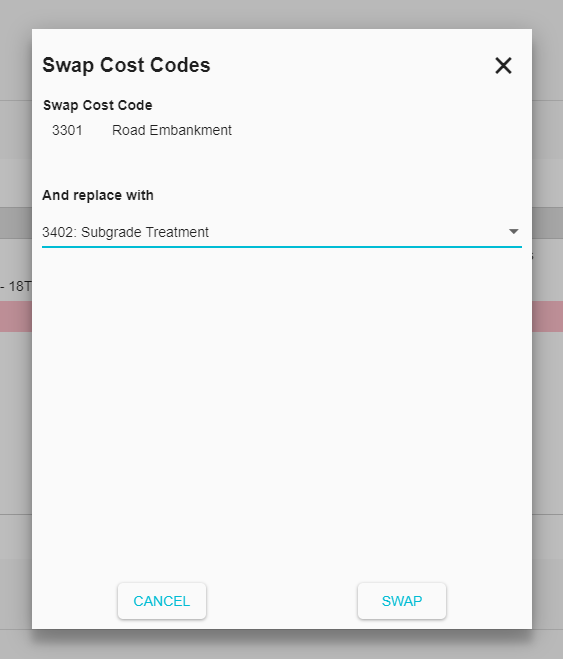
If you have selected the wrong cost code and want to swap to a different one, simply right click (or long hold for a touch device) on the cost code column. In the context menu, select ‘swap CC’
When complete, click on the next link.
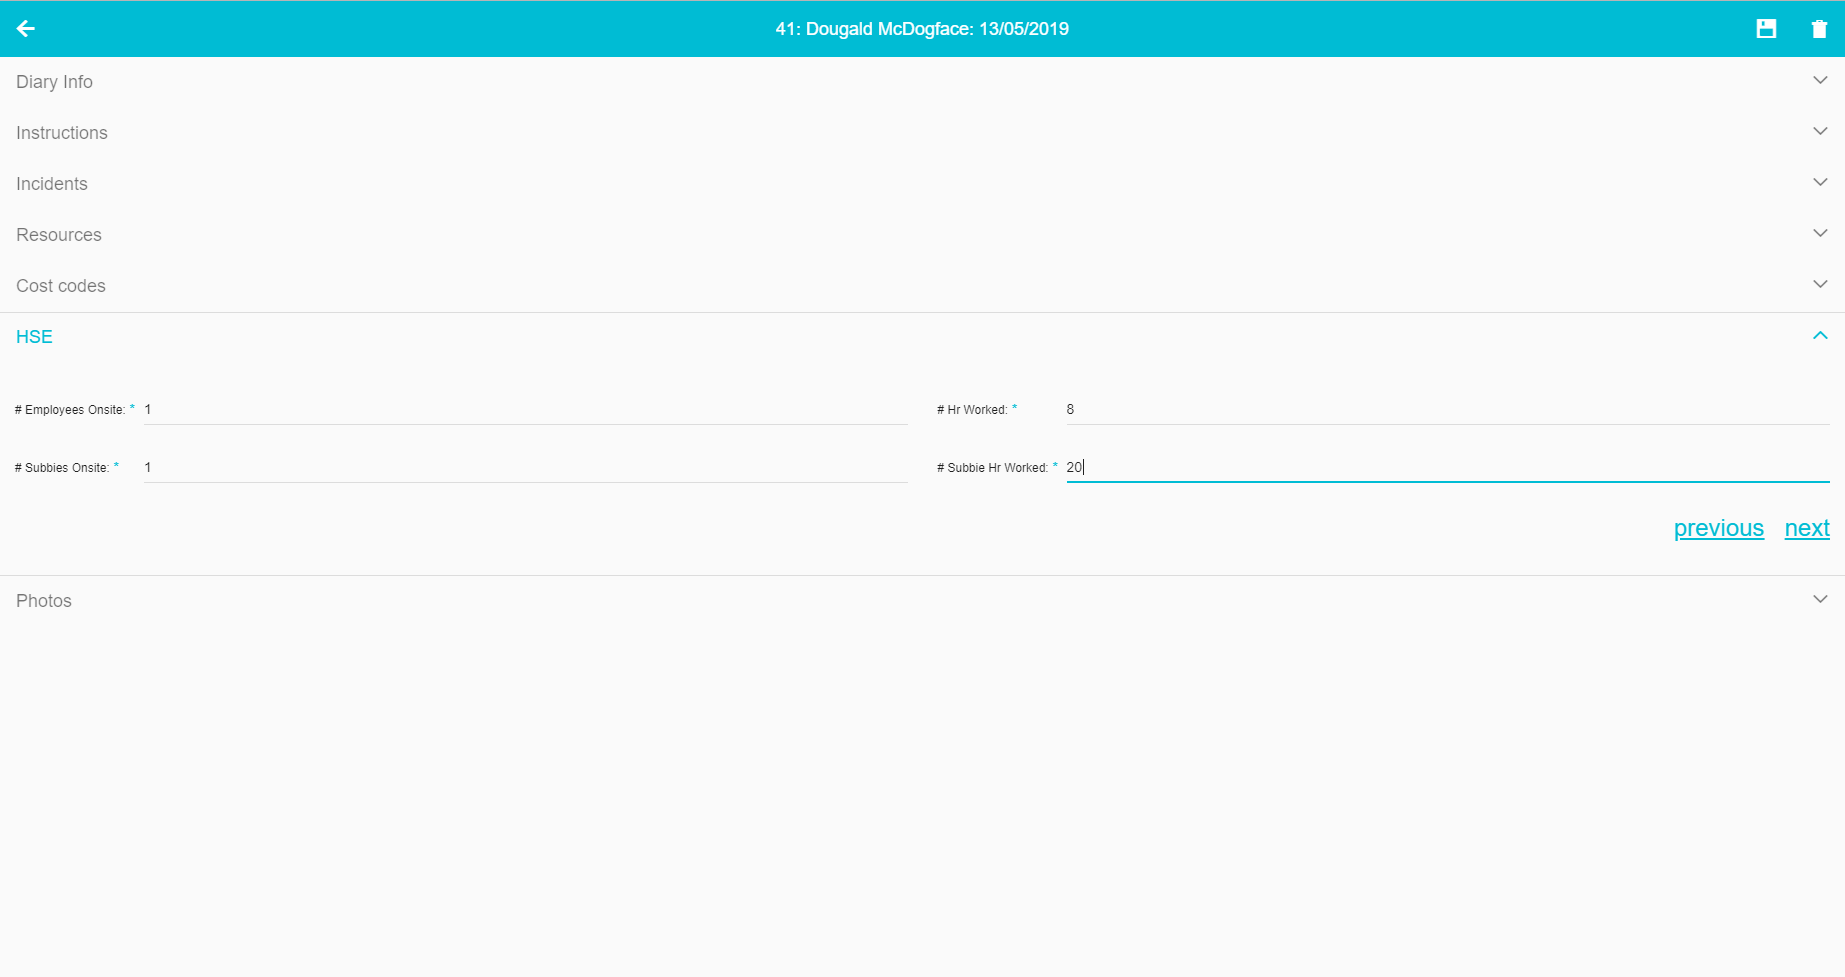
HSE
The HSE section includes data for HSE stats, namely hours worked and number of workers for direct employ and subcontractors. If you have added any resources allocated to labour, the application will take a stab at what hours and numbers to add for direct resources. Ensure you check these.
Photos
To add photos, click the ‘click to add photos’ link at the top of this section. In the popup, click the Take Photo button. If you are using a desktop PC, this will show the file chooser so you can select images already on your PC. On a tablet, you will be able to use the camera.
Once the photo has been selected, add a description and provide any links to Lots, NCRs or Variations.
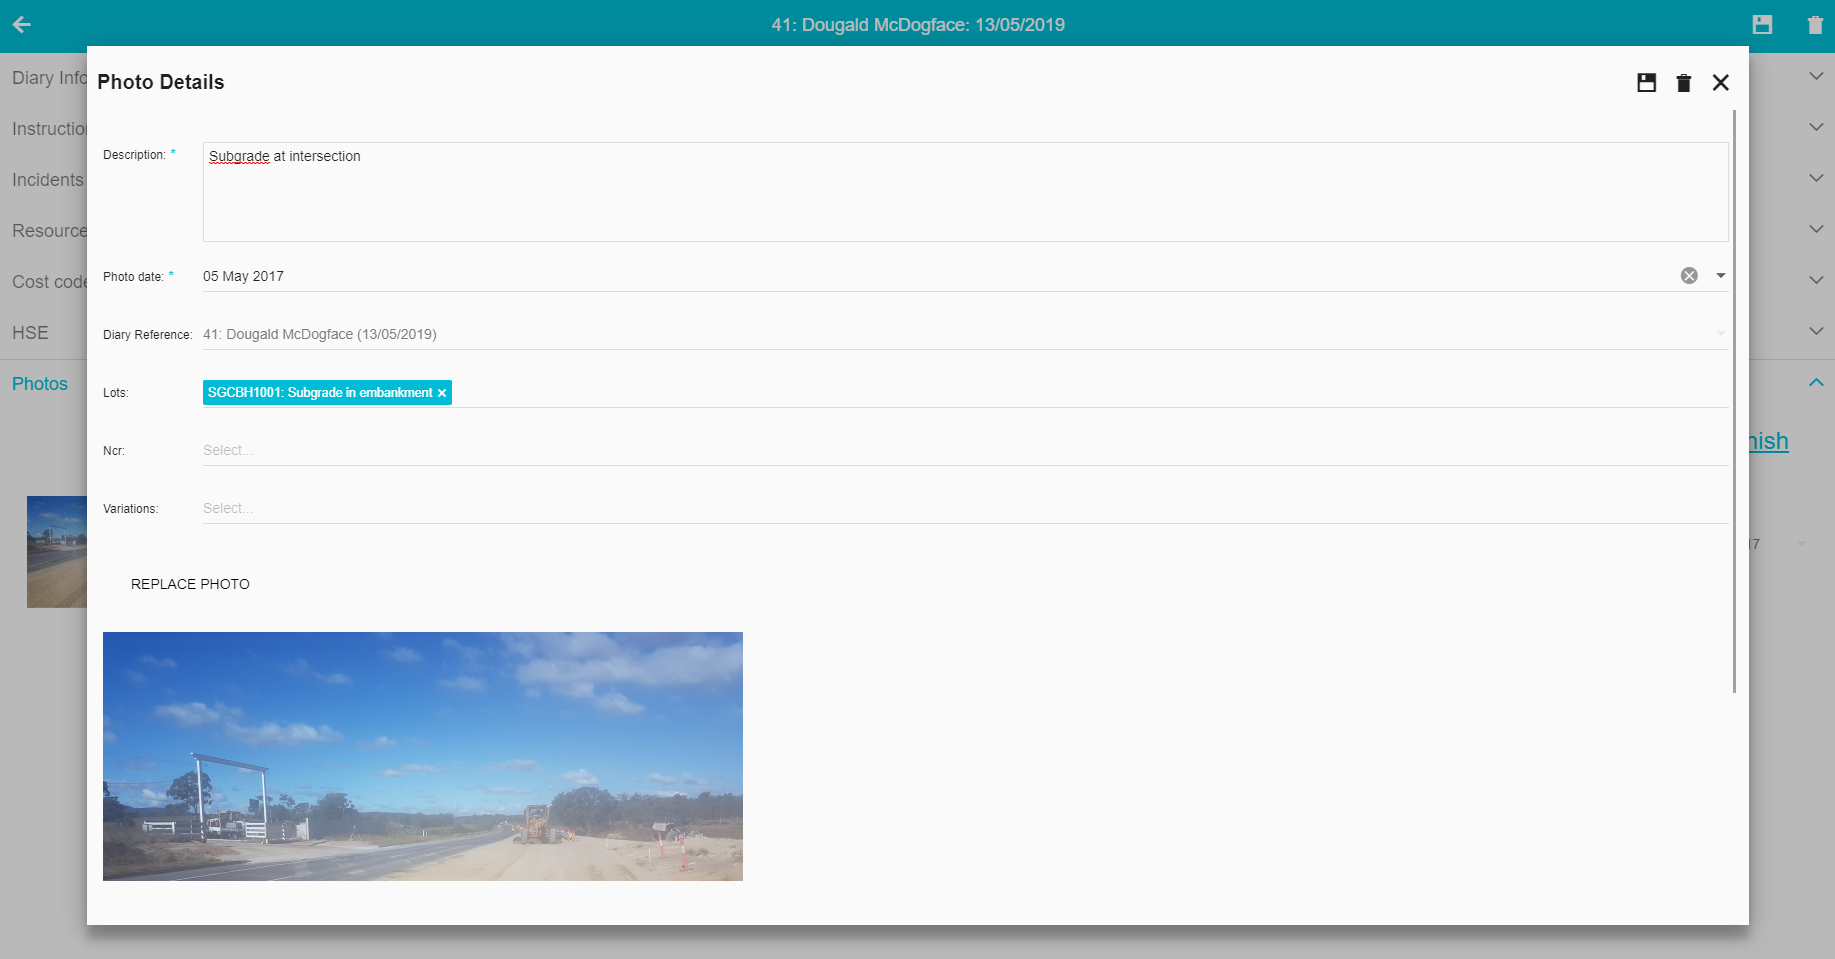
Click the save icon in the top right.
Completion
When the diary is finished, click the finish link at the top of the section, or the save icon in the top right.