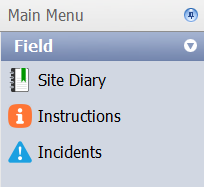
The Incidents Register is a record of an incident that occurred on site. The Incidents Register is accessed under the Field heading within the main menu.
Contents
Incidents Register Fields
The default view contains the following fields:
Incident ID – a unique number generated by Civil Pro for each new incident entry
Incident Type – the nature of the incident (safety / environmental / quality / personnel / public/ vehicle /other)
Incident Date – the date of the incident
Identified By – the creator of the incident entry
Description – the details of the incident
Status – open/approved/close out status
From Diary? – box is checked if the instruction is part of a Site Diary entry. See the Site Diary page for further information.
Incident Details
An incident is made up of 6 areas of information:
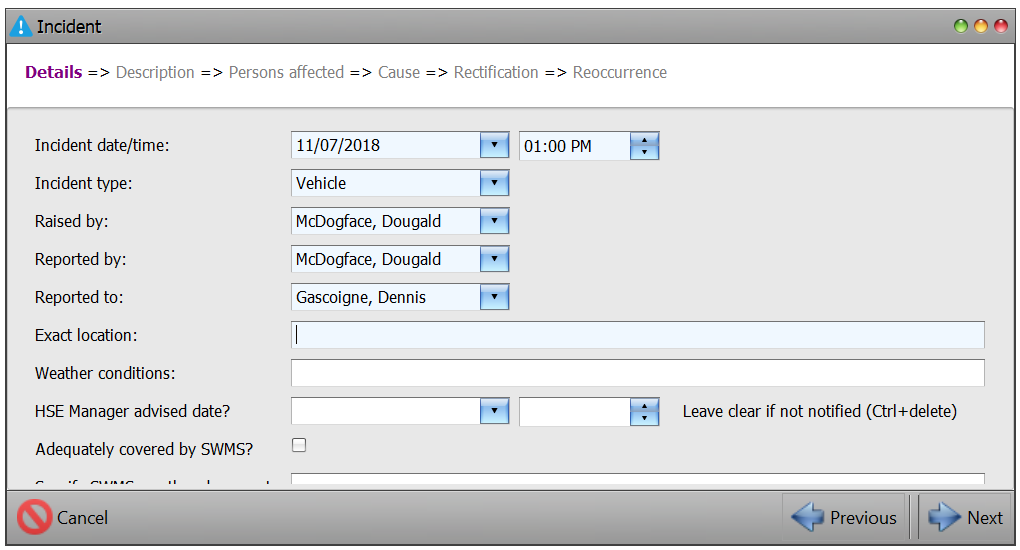
- Details – a summary of the incident including type; date & time; weather conditions; hours lost; estimated cost etc
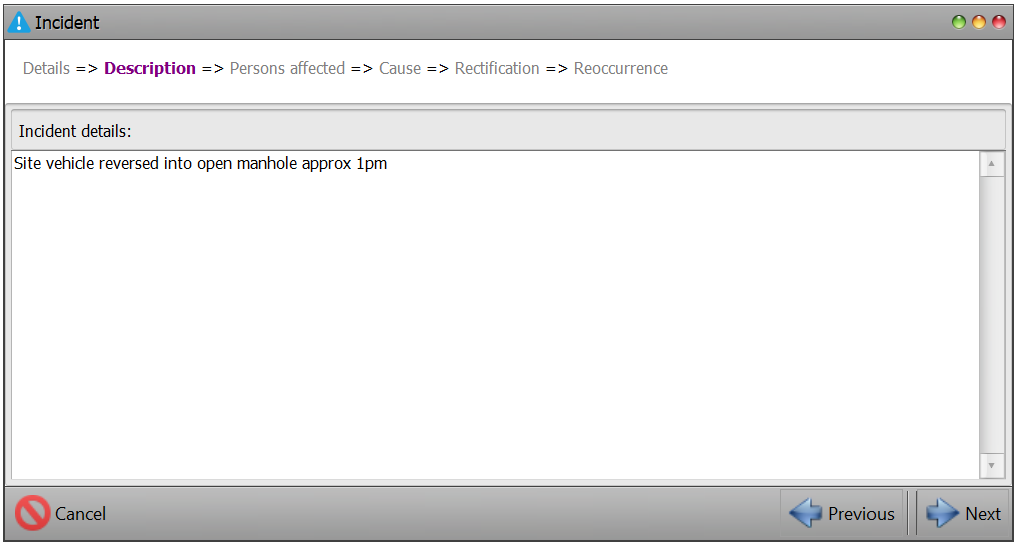
- Description – details of what occurred
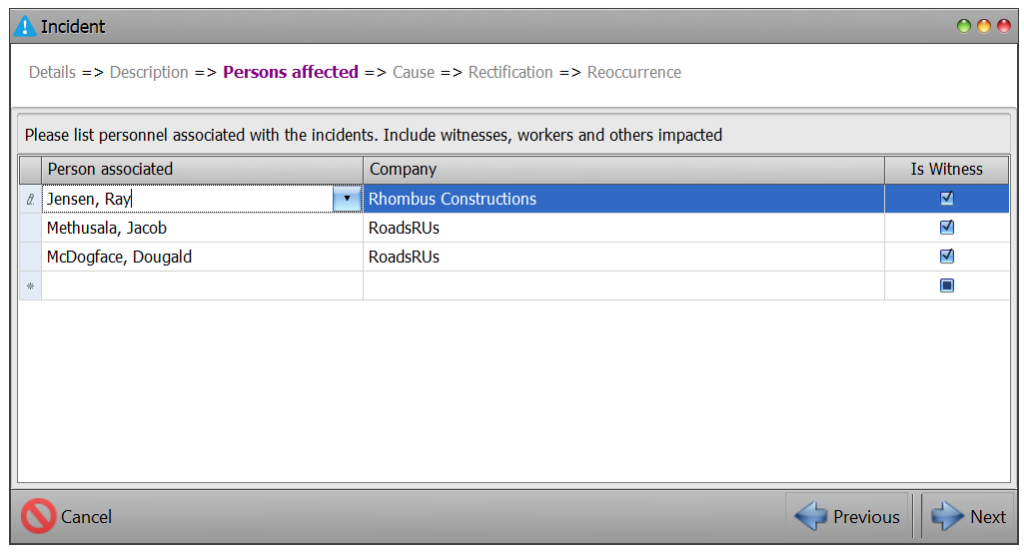
- Persons Affected – a list of all those involved in the incident including witnesses
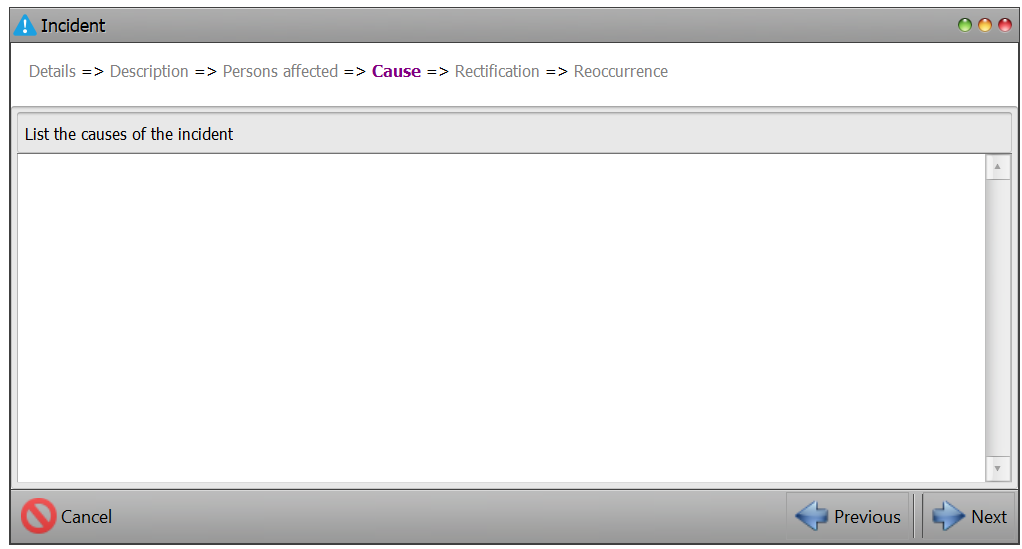
- Cause – details of the contributing factors of the incident
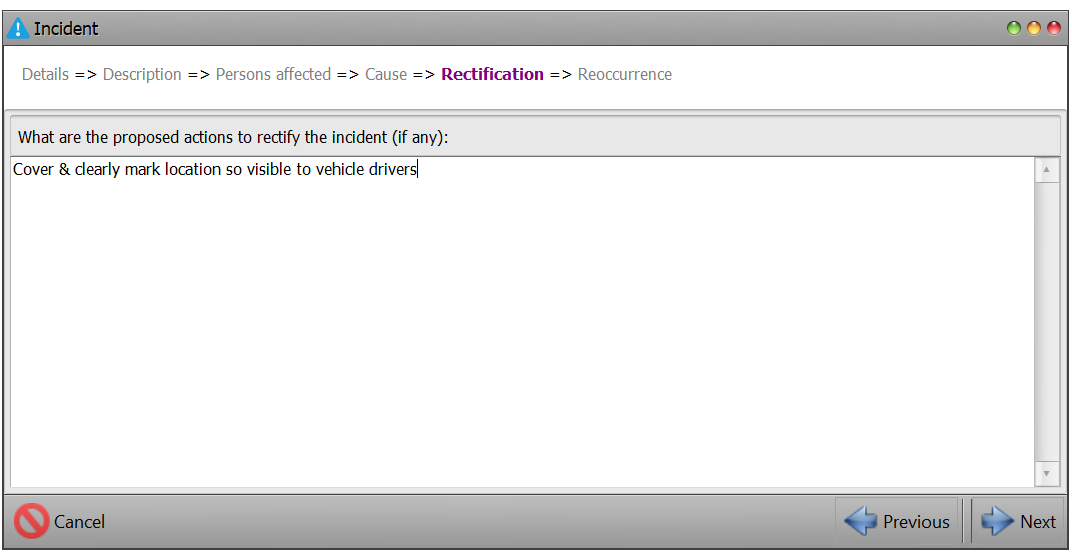
- Rectification- recommended actions that may be taken to remedy the incident
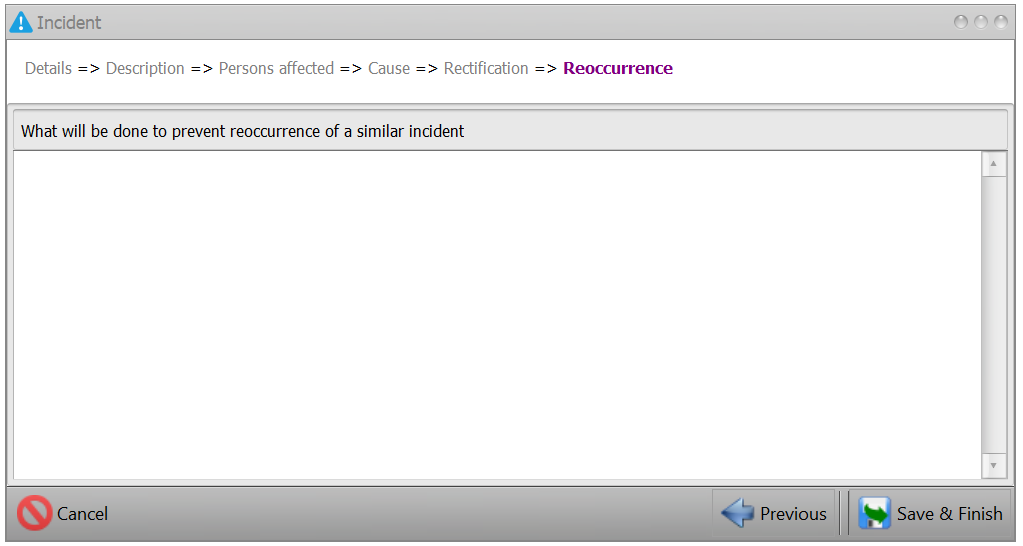
- Reoccurrence- recommendations to avoid a similar incident in the future
Adding an Incident
- From within the Incident Register click on New Incident from the menu at the bottom of the screen.
- The new Incident Details screen will appear. Complete the necessary information and when finished click the blue right arrow at the bottom right of the screen to go to the next page. Note: The fields shaded blue are required.
- The new Incident Description screen will appear. Type in the details of the incident in the Description screen and when finished click Next.

- The new Incident Persons Affected screen will appear. Complete the required fields. Check witness box to indicate a witness to the incident. When finished click Next.
- The new Incident Cause screen will appear. Type in the details of the cause of the incident in the Cause screen and when finished click Next.
- The new Incident Rectification screen will appear. Type in the details when finished click Next.

- The new Incident Reoccurrence screen will appear. Type in the details in the Reoccurrence screen and when finished click Save & Close

Tip: Rather than having to click through each page using the blue arrows, you can move to any page within the Incident by clicking on the page heading at the top of the New Incident screen.

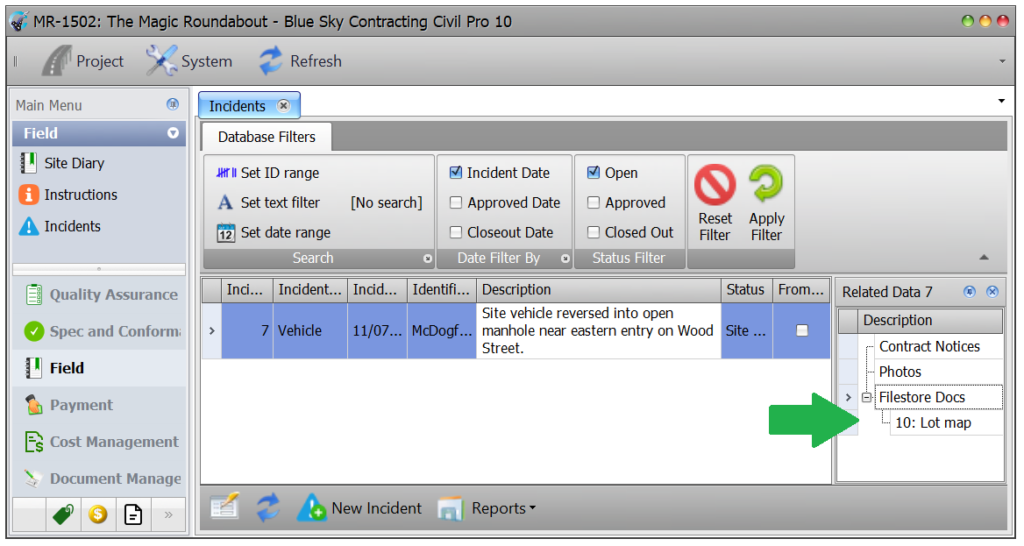
Linking an Incident to a Related Item
An Incident can be linked to related items – Photos, Contract Notices or Filestore Documents.
Linking to a Photo/Contract Notice/Filestore Doc
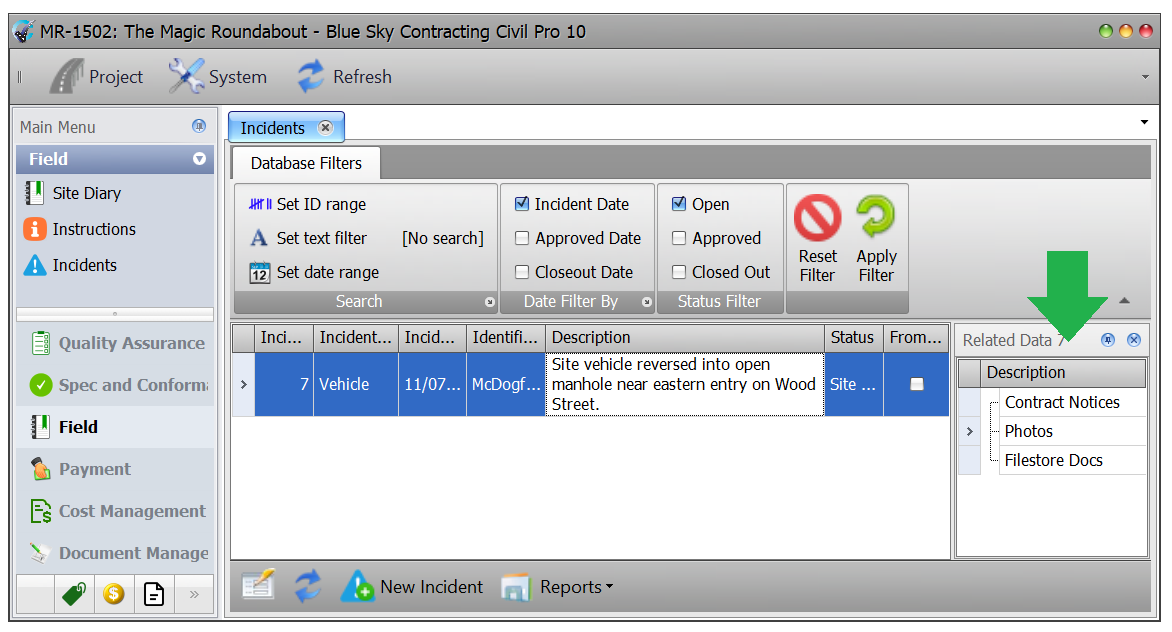
- From within the Incident register select the Incident you wish work with by clicking on the line. You will know it is selected when the line turns blue.
- Once selected double click on the heading of the type of document you wish to link to (i.e. photo / contract notice / filestore doc) within the related items tree to the right of the screen.

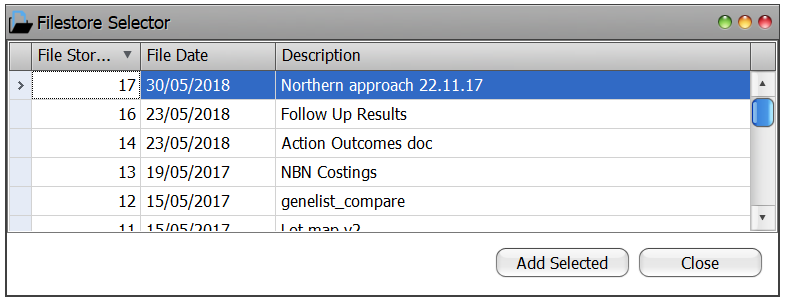
- The document selector screen will appear. Double click on the name of the item you wish to link the instruction to.
- Close the selector by clicking on the red button at the very top right of the selector screen or pressing Close.
- You will now see that the selected item will appear under the relevant heading as a related item in the related items tree to the right of the screen (in this case the lot map from the Filestore has been linked).

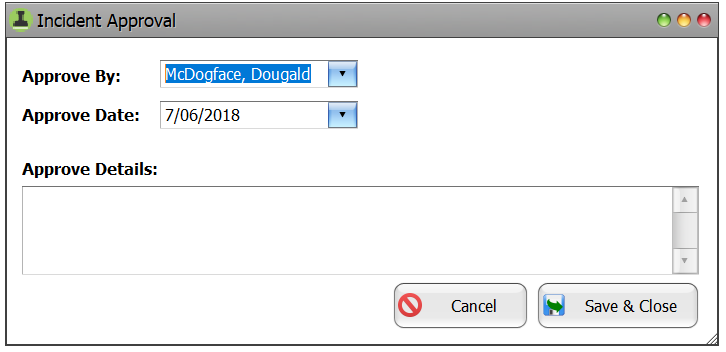
Approving an Incident
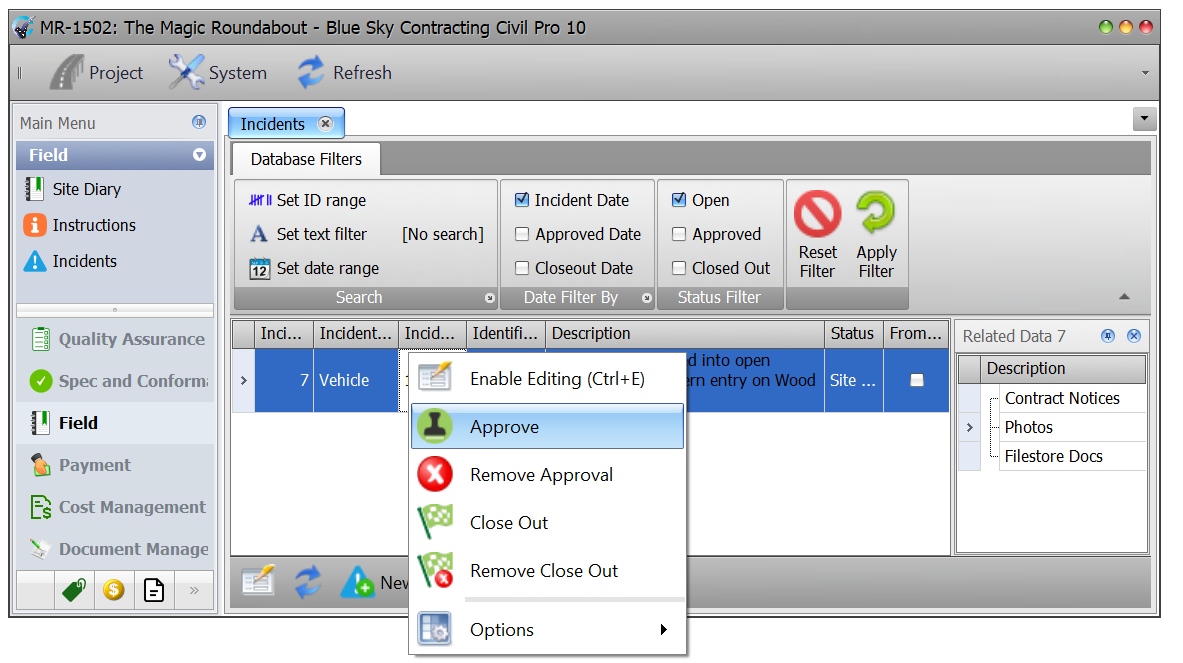
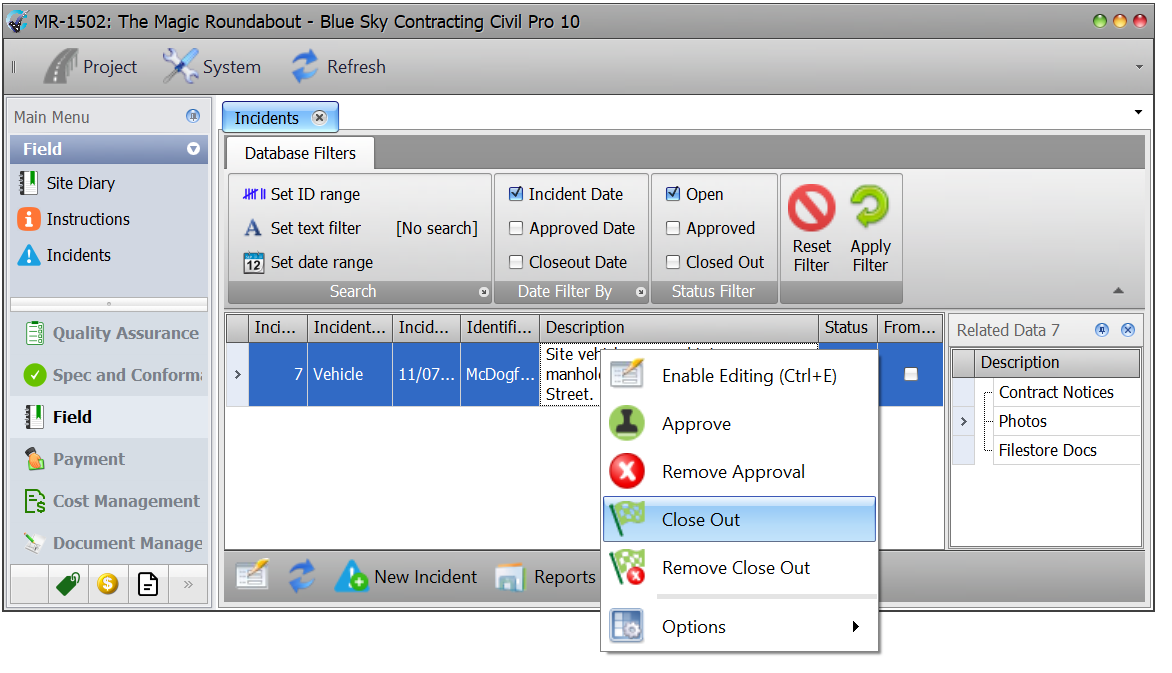
- From within the Incident Register select the Incident you wish work with by clicking on the line. You will know it is selected when the line turns blue
- Right click to bring up the context menu and from the options select Approval

- The Incident Approvals details screen will now appear. Complete the details as required and when finished click Save & Close.
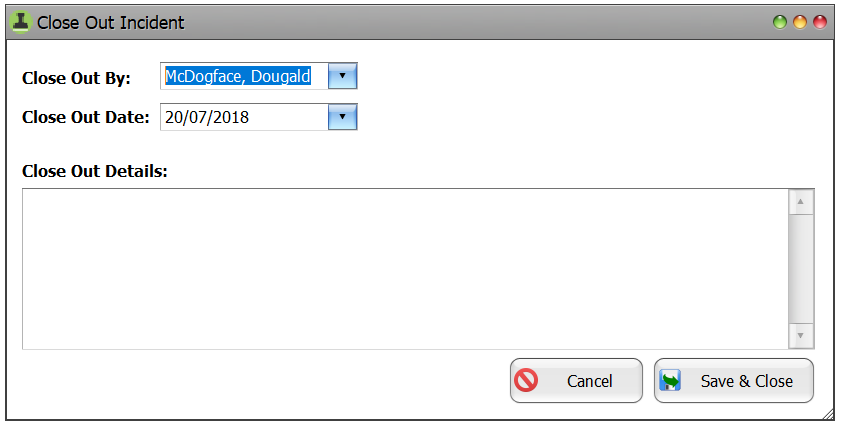
Closing Out an Incident
Once any actions relating to an incident have been completed it may be closed out:
- From within the Incident Register select the Incident you wish work with by clicking on the line. You will know it is selected when the line turns blue.
- Right click to bring up the context menu and from the options select Close Out

- The Close Out details screen will now appear. Complete the details as required and when finished click Save & Close.
Reports
To print an Incident Report click on Reports from the menu at the bottom left of the screen and choose Incident Report from the dropdown options. This will bring up the report viewer. From here you can export to various file formats and can save/print/email.
Filters
The Incident Register filter ribbon appears at the top of the register.

It consists of 3 data categories that incidents can be filtered by in order to present the most relevant data to the user depending upon their requirements at the time:
- Search
- Date
- Status
There is also an Apply Filter button to the very right of the ribbon. This MUST be clicked after a filter selection has be made in order to bring up the required data.
Search
This filter allows you to search by the following:
- ID
- Text
- Date
Find by ID
This filter allows you to search by the incident ID number:
- Click on the Set ID Range heading
- The ID Filter dialog box will appear. Type in the ID range details and click Apply
- Click Apply at the very right of the filter ribbon
Find by Text
This filter allows you to search by relevant content contained within the incident:
- Click on the Set Text Filter heading
- The search dialog box will appear. Type in any relevant identifying text and click Apply
- Click Apply at the very right of the filter ribbon
Find by Date
This filter allows you to search by the incident date:
- Click on the Set Date Range heading
- The date filter dialog box will appear. Select the relevant date range from the dropdowns and click Apply
- Click Apply at the very right of the filter ribbon.
Date filters
This filter allows you to search by the following:
- Incident date
- Approval date
- Closed out date
- Click in the circle next to the appropriate heading (when checked the circle turns blue)
- Click Apply at the very right of the filter ribbon
- Any approvals fulfilling the criteria of your search will appear in the register
Status
This filter allows you to search by the following:
- Open
- Approved
- Closed out
- Click in the circle next to the appropriate heading
- Click Apply at the very right of the filter ribbon
- Any approvals fulfilling the criteria of your search will appear in the register