Approval request are generated most commonly for Checklist items that have an Approval requirement (e.g. a milestone, holdpoint or witness point) or a high value Purchase Order.
Within the checklist register you can easily see the status of an approval by looking at the colour of the relevant Approval checkbox:
Orange = Requested
Green = Approved/Manually approved/Conditionally approved
Red = Not approved/NCR Required
Contents
Checklist Approval Request
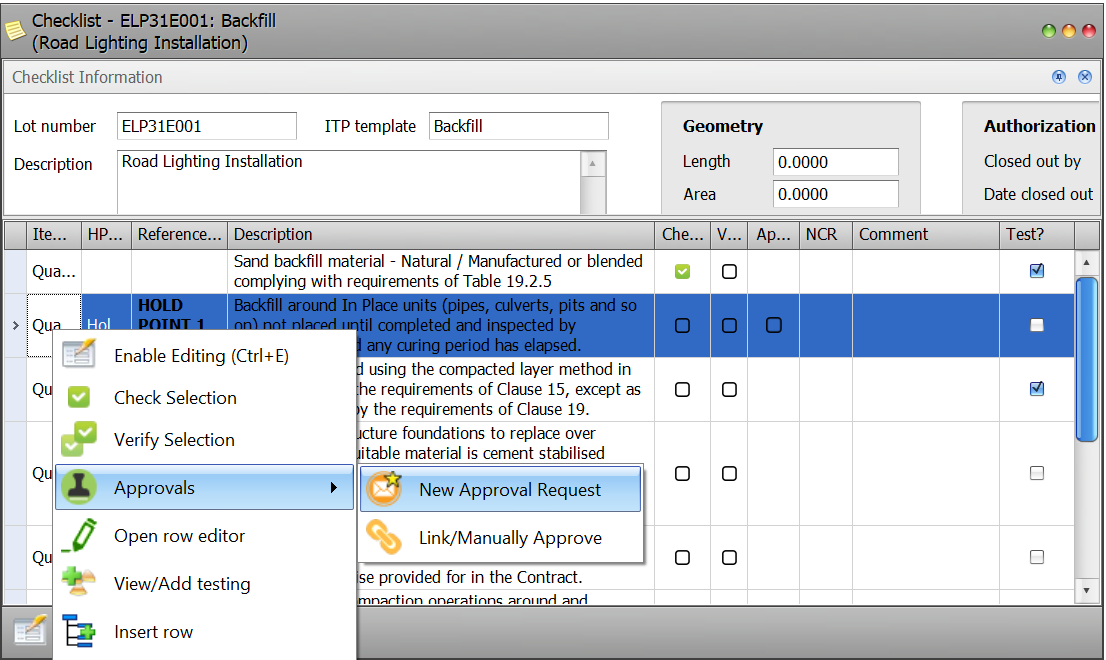
To create an approval request for a Checklist item:
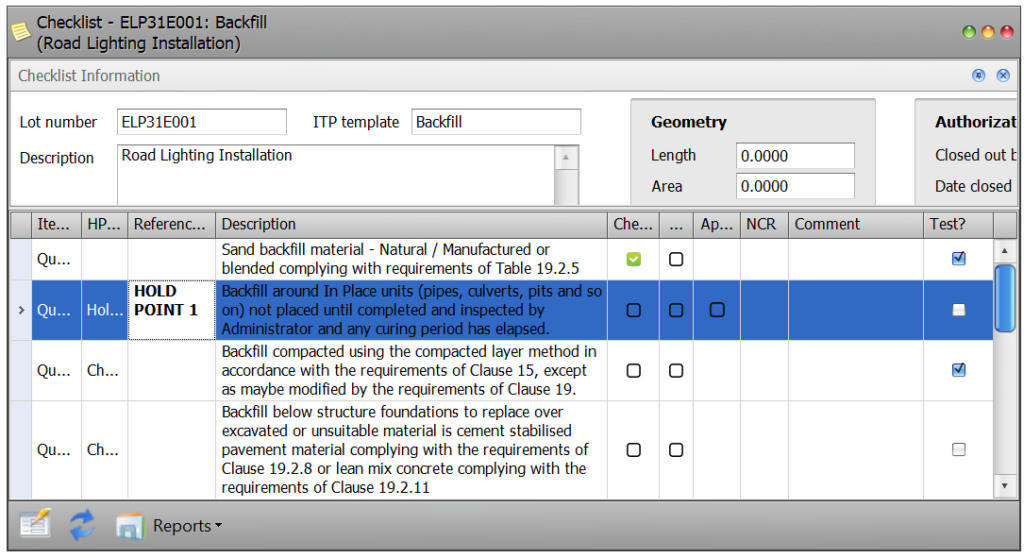
- Within the Checklists register double click on the item you wish to work with – you can tell when the line is selected as it turns blue. This will open the relevant checklist information.
- Select the item requiring an approval request by clicking on the line. The item selected turns blue. Tip: For instruction on how to send multiple approval requests at once see the section on Batch Approval Request.
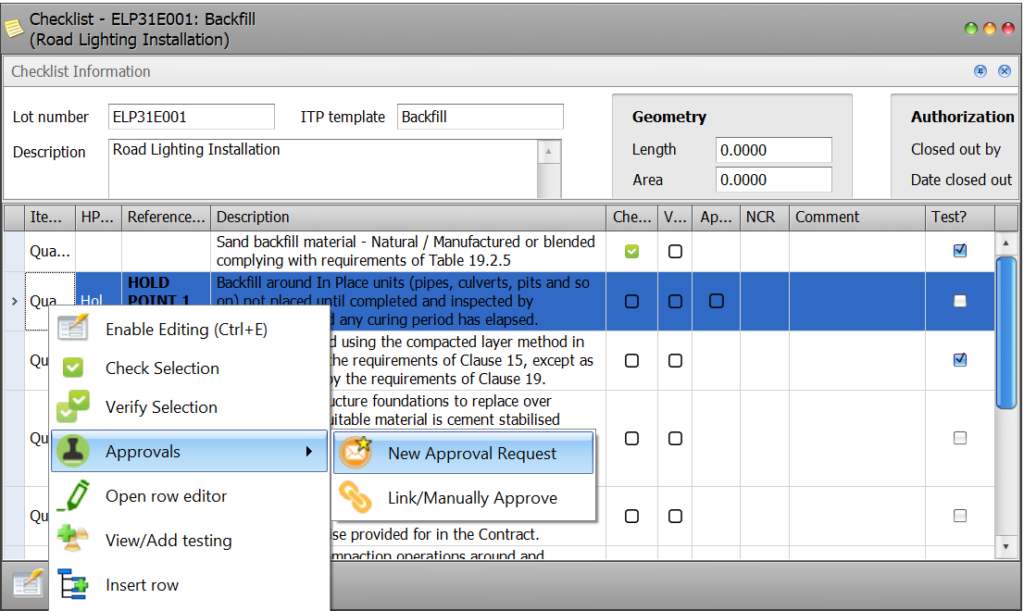
- With the items selected right click to bring up the context menu and select Approvals=>New Approvals Request from the options list.
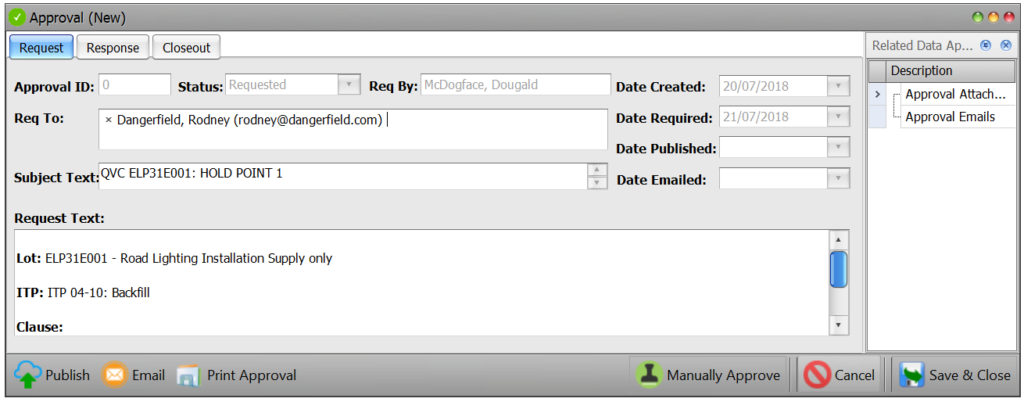
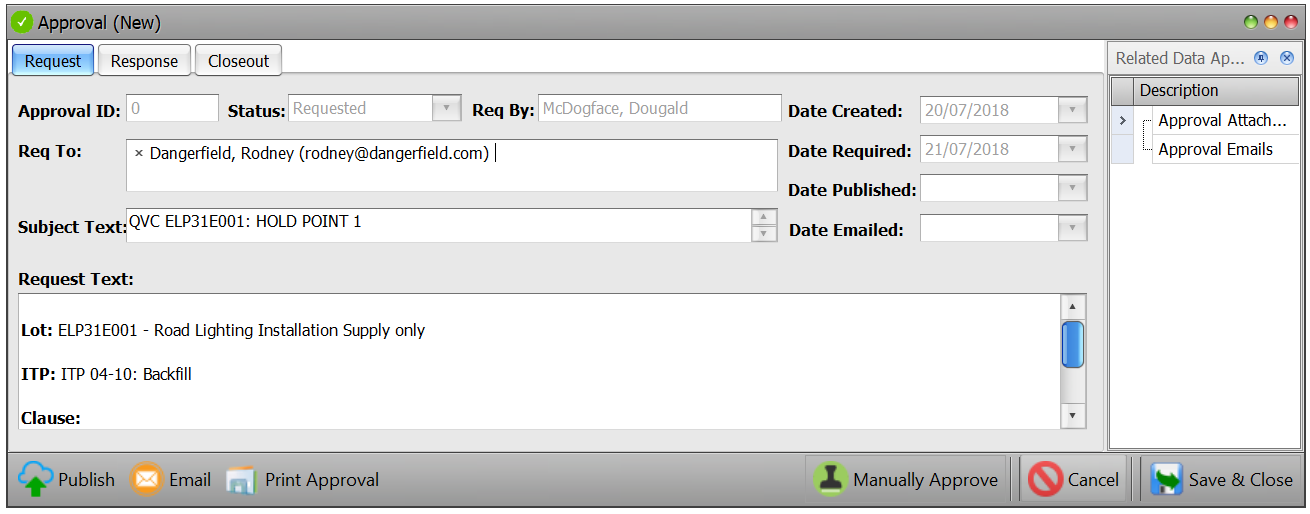
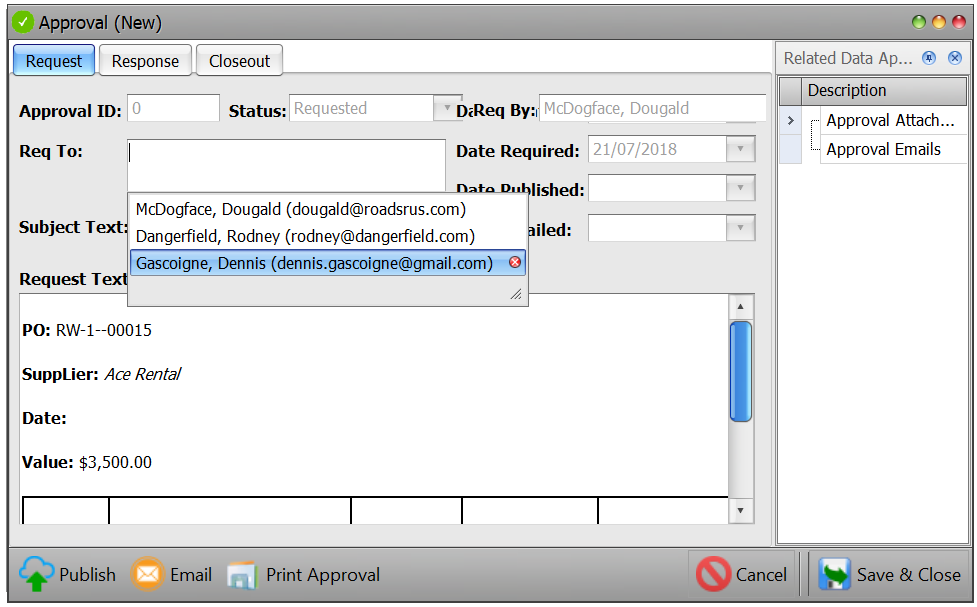
- A New Approval Request form will appear. Click in the ‘Req To’ field and select the addressee from the drop down. You can also add/edit content in the request (if required) and then email the request – see the Editing/Emailing sections below for details.

Purchase Order Approval Request
To create a approval request for a purchase order:
- Within the Purchaser Orders register double click on the item you wish to work with. This will open the relevant PO information.
- Within the opened PO, right click in the red header area to bring up the context menu and select Approvals t=>New Approval Request from the options list. Note: If the selected PO has no budget is set a message will appear asking if you would like to proceed or cancel and update the budget.
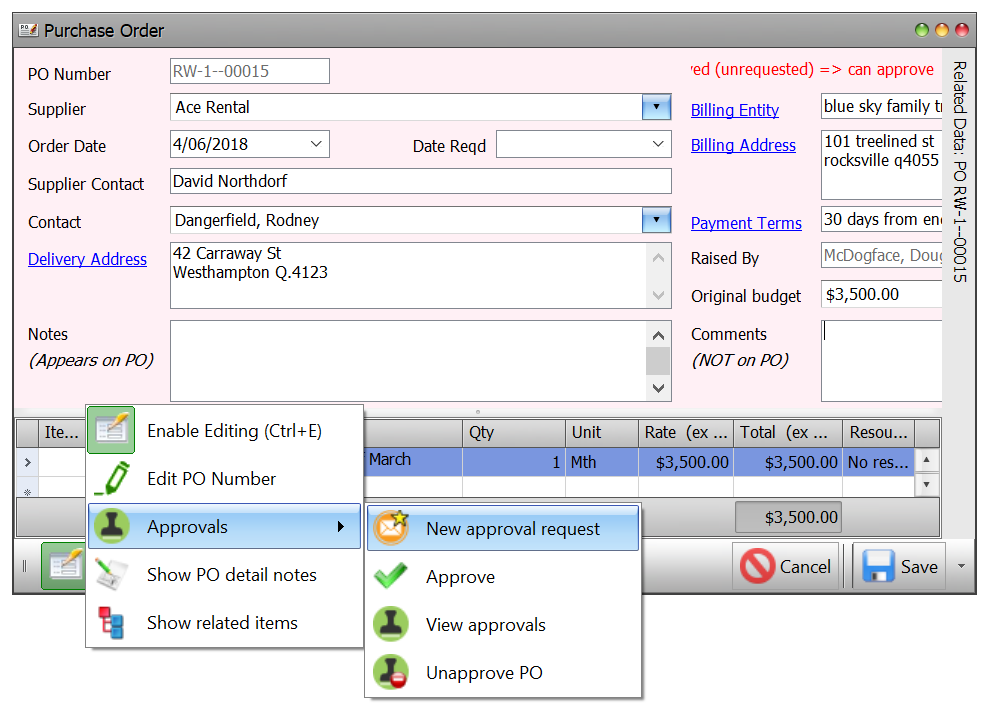
- A New Approval Request form will appear. Click in the ‘Req To‘ field and select the addressee from the drop down. You can also add/edit content in the request (if required) and then email the request – see the ‘Editing/Emailing’ sections below for details.
Tip: you can send a new approval request directly from the PO register without having to open the PO. Simply select the PO you wish to work with then right click to bring up the context menu and select Approval & Close out=>Request Approval.

Editing an Approval Request
All of the text in the approval request body can be edited until the request is published.
You can format your request using options within the context menu (right click within the body of the request to access options). From the context menu you can select Font, Paragraph, Numbering & Bulleting and Indent. If you want a more complete editing experience similar to word, then use the Open in full editor option from the context menu.

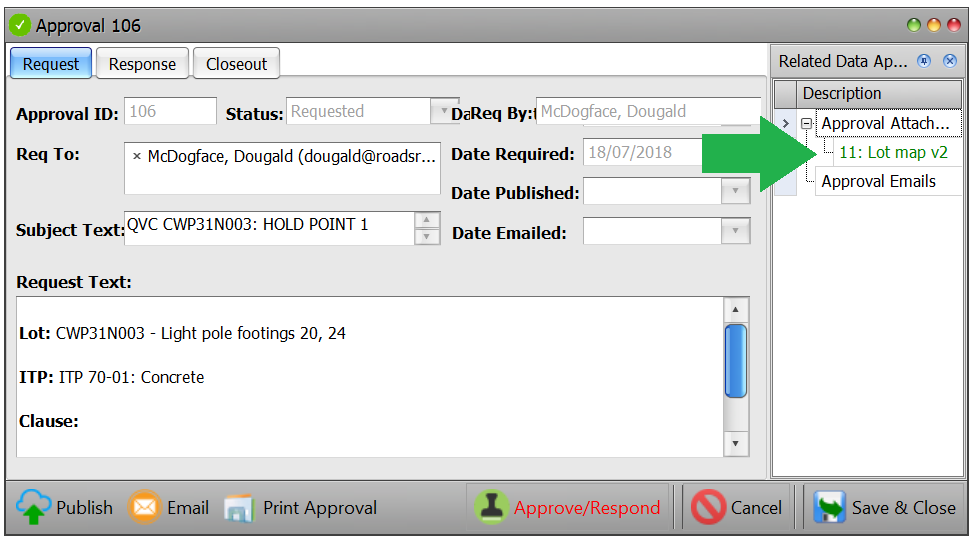
You can add a related Filestore document to your request (for further information see the section on Filestore documents).
- From within the new Approval Request, double click on the Approval Attachments heading within the related items tree to the right of the screen.
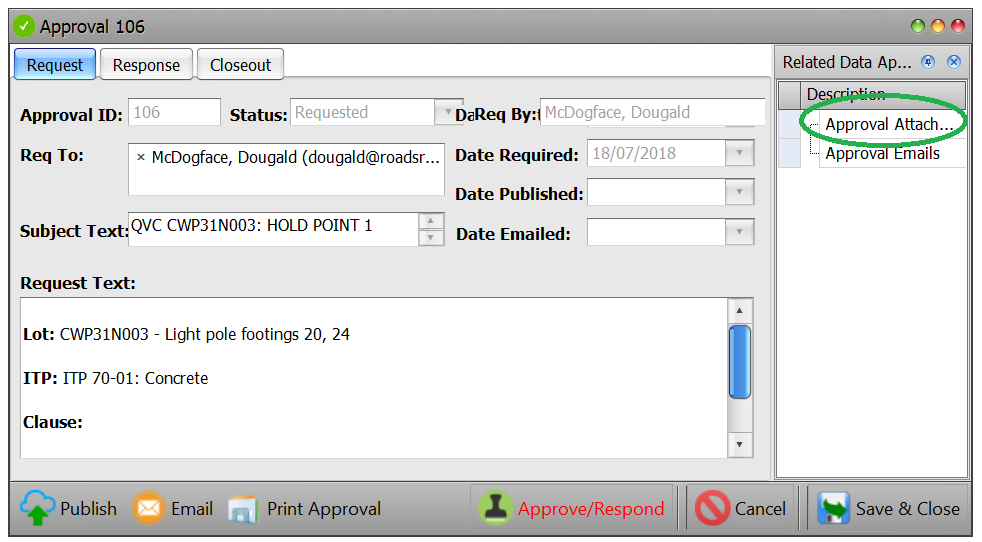
- This will bring up the Filestore selector dialog. Select the document you wish to add and click on Add Selected. Tip: you can also add items by double clicking on the record you want to add or select multiple records and drag/drop them onto the heading in the related items panel.
- When finished click Close.
- These related items will now appear within the related items tree.
Publishing & Emailing
The options for publishing and emailing can be found within the menu bar at the bottom of the screen.
Publishing
- To publish the notice and thereby make it available for viewing/responding, click on the Publish button at the bottom left of the page. Note: once published your notice is locked and cannot be edited.
Emailing
- To email a published notice to a related party for viewing/response, click on the Email button at the bottom left of the page. Note: once emailed your notice is locked and cannot be edited.
- Your Approval Request email will now appear. From here you can add additional attachments that are NOT Filestore documents – see the ‘Adding Attachments‘ section below.
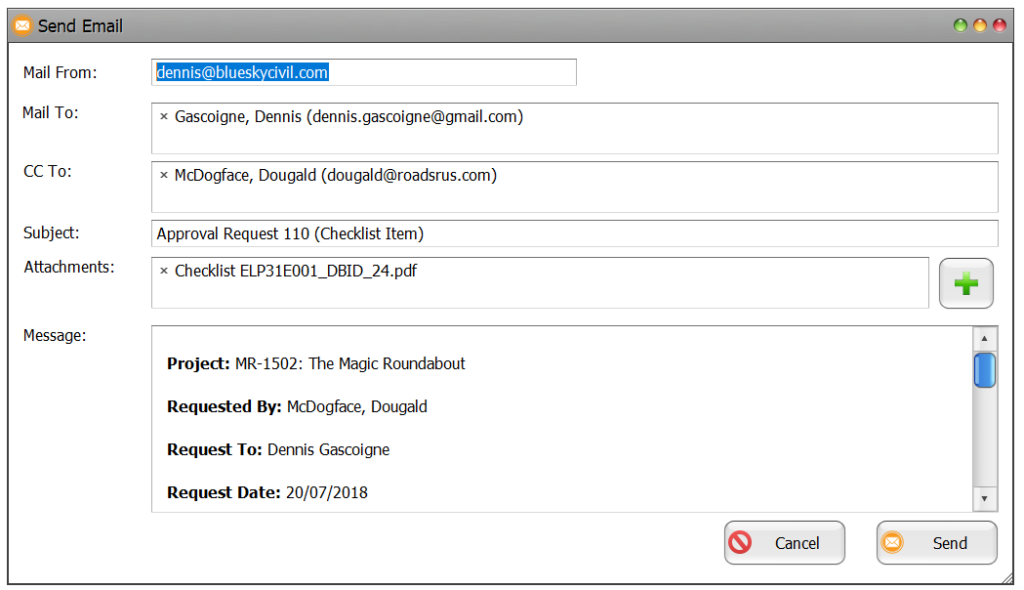
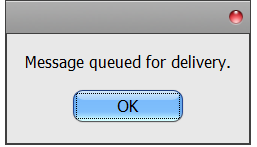
- When you are ready to send click on Send. You will then receive confirmation that your message is queued for delivery. Click OK.
Tip: You can do all the above steps in one click – when ready just click Email. You will be asked if you would like to render and publish in one step now – click Yes.
Adding an Attachment to an Approval Request Email
- If you wish to add any supporting documentation to your email that is NOT a Filestore document, just click on the green + sign on the right of the attachments field.
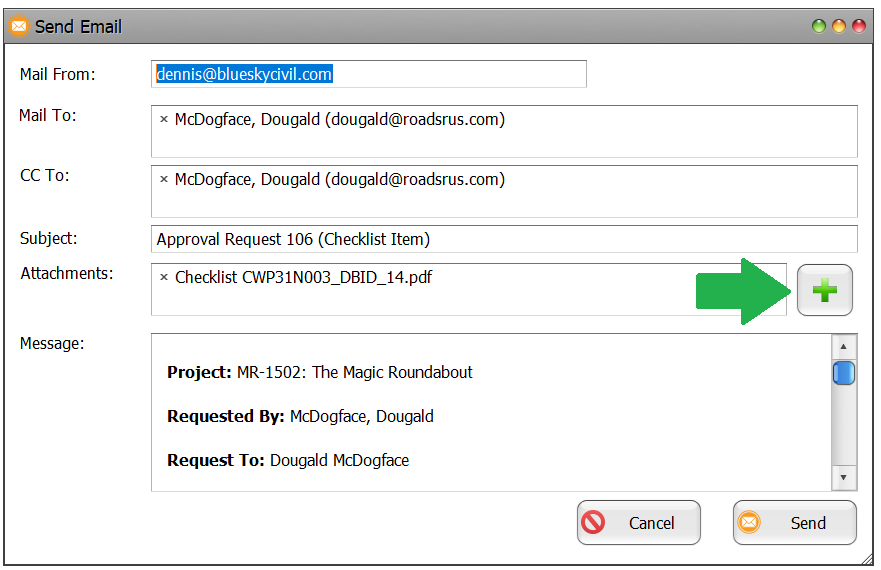
- This will open the file selector. Select the document from within your system and click Open. The selected document will be sent as an attachment to the email but WILL NOT be saved to Civil Pro as a related document.
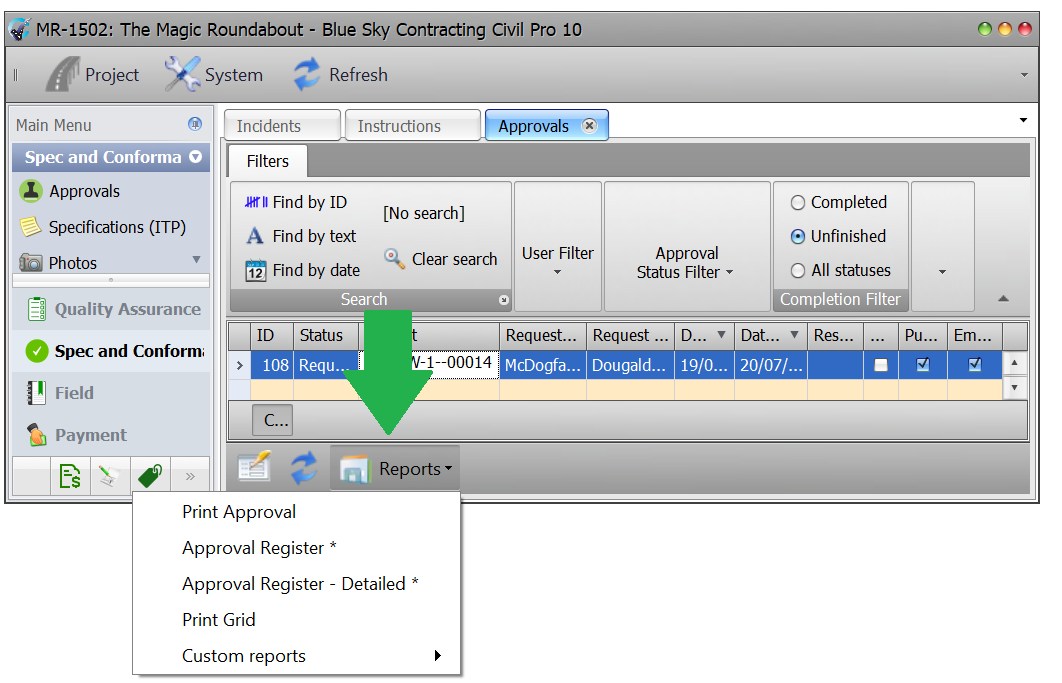
Reports
To access and print the report options, click on the Reports button at the bottom left of the page. A drop down will appear with report options to select from.