Contents
Approvals Register
The Approvals Register is a list of all approvals generated from within the Civil Pro system. The default view shows the following information:
- ID – unique number automatically generated by Civil Pro for identification of each approval. Not to be confused with the Approval Request ID
- Status – indicates the approval’s position within the approval process. For further details refer to Status section below
- Subject – a short description of the contents of the request
- Request To – the addressee of the request
- Request By – the creator of the request
- Date Created – the date the request was created
- Date Required – the date a response is due by
- Responds Date – the date the response was received
- Compl? – box is checked if the approval is completed. For further details see Completion Definition section below
- Published – box is checked if request has been published
- Emailed – box is checked if request as been emailed
Status
An approval can have the following status:
- Draft – at draft stage; not requested
- Requested – approval has been published and/or emailed
- Approved – request has been approved
- Manually Approved – request has been approved by a person other than the addressee
- Conditionally Approved – request has been approved under conditions specified
- NCR’s – a NCR is required
- Rejected – request is rejected
Approval Requests Register Colour Coding
Items in the register colour coded to indicate progress:
- Grey – draft status (not published)
- Orange -requested (published/emailed)
- Green – completed/closed out
Completion Definition
An Approval is considered COMPLETED if one of the following is true:
- it is approved or manually approved
- it is conditionally approved and closed out
- it is NCR’d and closed out
- it is rejected and closed out
Desktop Approvals
Viewing an Approval
From within the Spec & Conformance heading within the main menu, open the Approval Register.
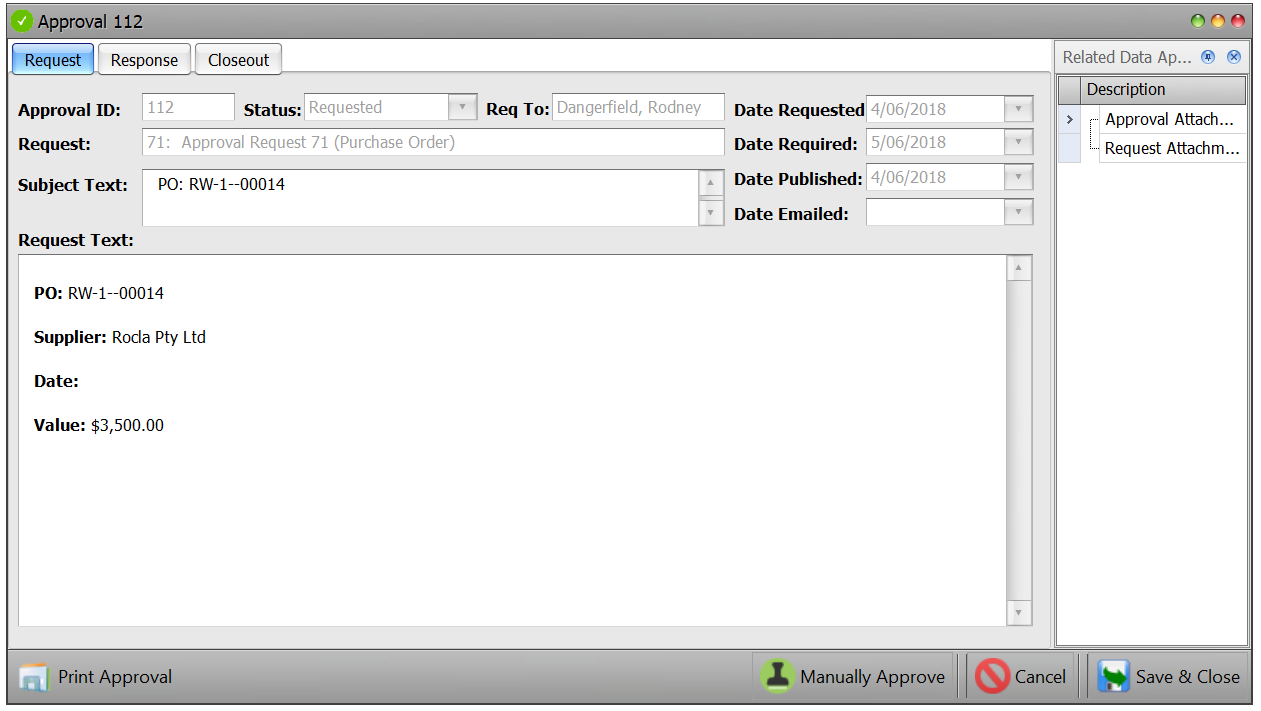
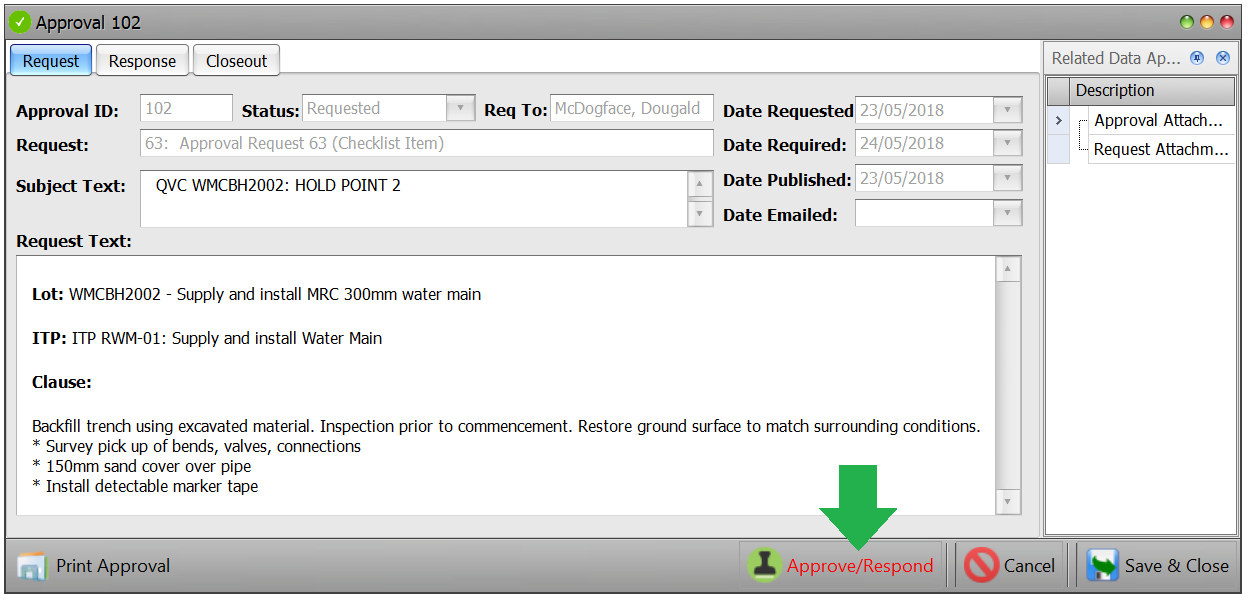
To view the details of an approval double click on the selected approval from within the Approvals Register. This will open the approvals details screen as per below.
Manually Approving from the Desktop
Even if you are not the addressee of the approval request there may be a situation where you have been given the go-ahead to approve it. To do this you have to do a “manual approval”:
- Double click on the item you need to approve from within the Approvals Register. This will open approval details screen as described above.
- From within the approval details screen click on the Manually Approve button at the bottom right of the screen.
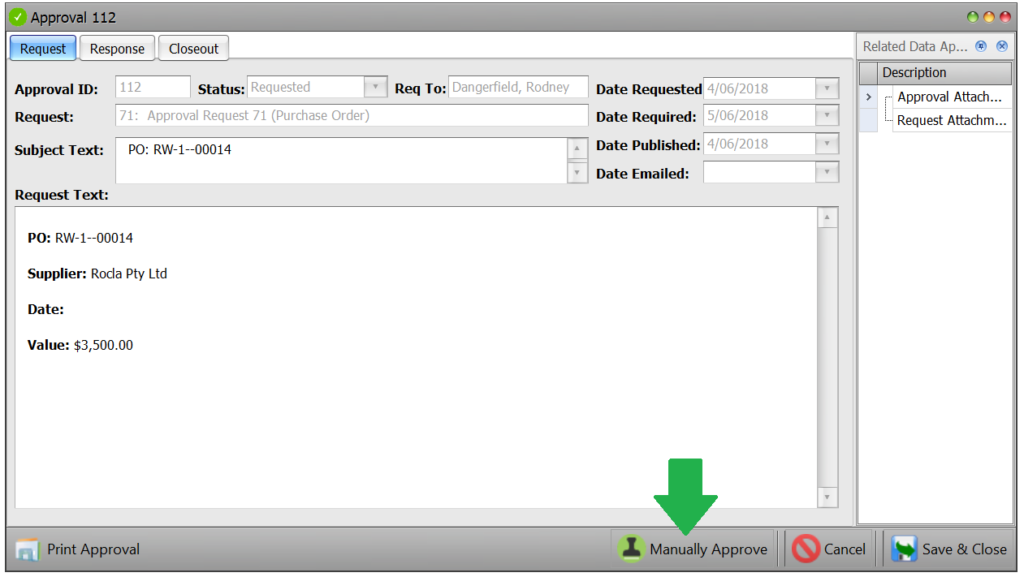
- You will then get a message confirming that the approval is not addressed to you but that you would like to approval manually. Click OK.
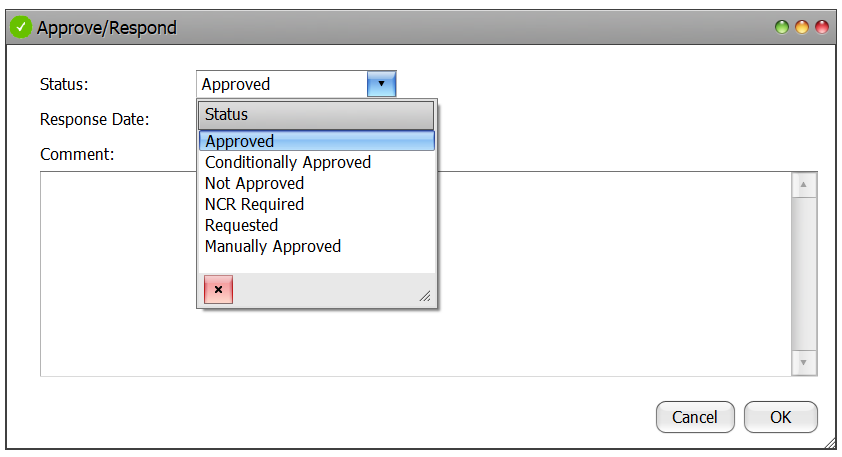
- The Approve/Respond screen will appear. Type in any notes regarding the manual approval in the comments section and click OK. Note: for a manual approval it is a requirement that you enter details in the comments field.

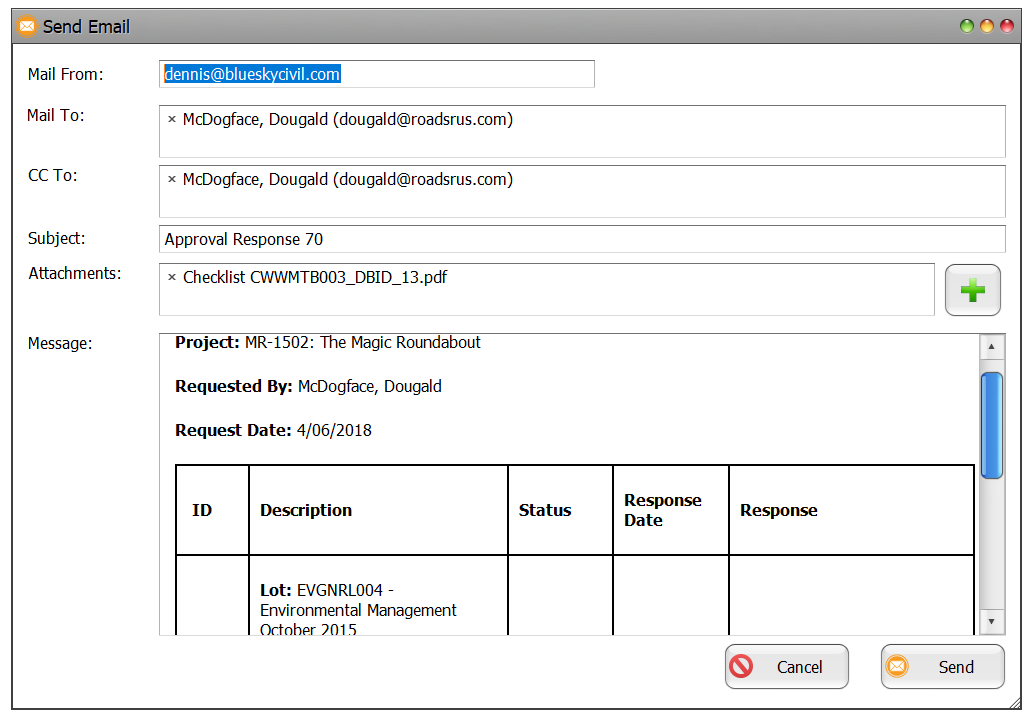
- A response email will be generated. This communicates to all related parties that this item has been manually approved. If necessary you can also add additional content to the email – simply type the content within the message section of the email. Press Send.
Note: You can attached files to this email using green + button to the right of the Attachments field in the header section of the email.

Approving/Responding from the Desktop
To approve/respond to an Approval Request:
- From within the Spec & Conformance heading within the main menu, open the Approval Register
- Double click on the item you need to approve from within the Approvals Register. This will open the Approval Details screen
- From within the Approval Details screen click on the Approve/Respond button at the bottom right of the screen.
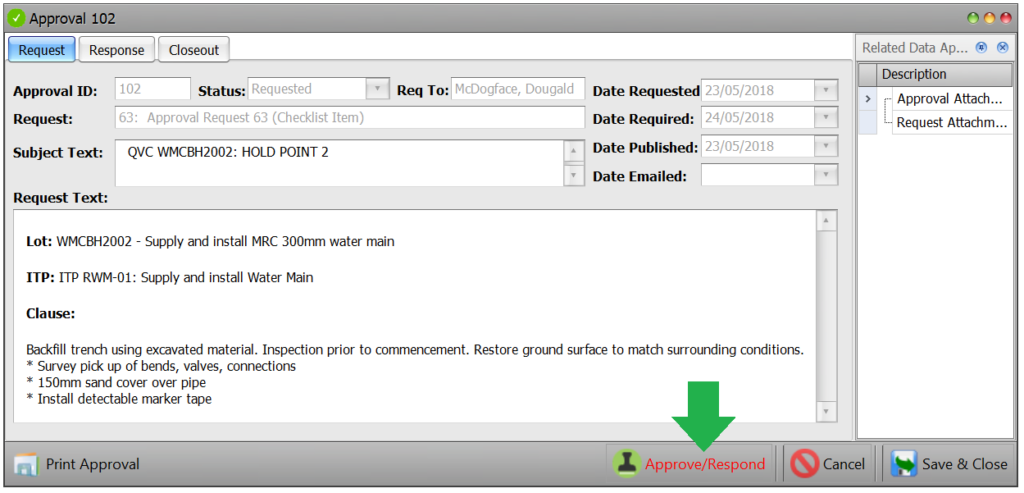
- The Approve/Respond screen will appear. Select the appropriate status option from the drop down and add any notes in the comments field. Press OK.
- A response email will be generated. This communicates to all related parties that there has been a response to this approval request (i.e. it has been statused). Press Send. Note: You can attached files to this email using green + button to the right of the Attachment field in the email header section.
Approval/Respond Shortcut
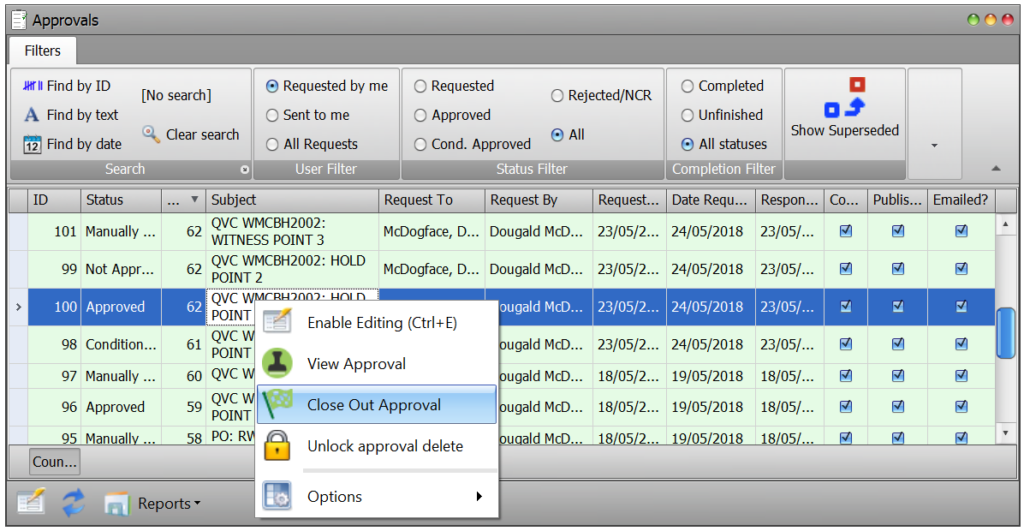
You can directly access the Approve/Respond dialog from within the register by using the Context Menu shortcut:
- From within the Approvals Register select the item for approval/response and right click to bring up the context menu.
- From the options select Approve. This will take you directly to the Manual Approval or Approval/Respond screen. Complete approval as described above.
Closing Out
When an approval request is completed it may be closed out.
- From within the Approval Register select the item to be closed out then right click to bring up the context menu. From the options select Close Out Approval.
- The Close Out dialog will appear. Complete as required and click OK. You will now see that the Compl? checkbox for that item will be checked. Note: for a close out you are required to enter details in comments section.
Reports
To generate a selection of reports including individual approvals, click on the Reports button at the bottom left of the Approvals Register screen and make your selection from the drop down options. These will open in the report viewer – from here you can edit, convert to various formats and save/print/email.
Filters
The Approvals Register filter ribbon appears at the top of the register.

It consists of 4 data categories that approvals can be filtered by in order to present the most relevant data to the user depending upon their requirements at the time:
- Search
- User
- Approval status
- Completion
There is also an Apply button to the very right of the ribbon. This MUST be clicked after a filter selection has be made in order to bring up the required data.
Search
This filter allows you to search by the following:
- ID
- Text
- Date
Find by ID
This filter allows you to search by the approval’s ID number:
- Click on the Find by ID heading
- The ID Filter dialog box will appear. Type in the ID details and click Apply
- Click Apply at the very right of the filter ribbon
Find by Text
This filter allows you to search by relevant content contained within the approval:
- Click on the Find by text heading
- The search dialog box will appear. Type in any relevant identifying text and click Apply
- Click Apply at the very right of the filter ribbon
Find by Date
This filter allows you to search by the approval date:
- Click on the Find by date heading
- The date filter dialog box will appear. Select the relevant date range from the dropdowns and click Apply
- Click Apply at the very right of the filter ribbon.
User
This filter allows you to search by the following:
- Requested by me
- Sent to me
- All
- Click in the circle next to the appropriate heading (when checked the circle turns blue)
- Click Apply at the very right of the filter ribbon
- Any approvals fulfilling the criteria of your search will appear in the register
Approval Status
This filter allows you to search by the following:
- Requested
- Approved
- Conditionally Approved (Cond. Approved)
- Rejected/NCR
- All
- Click in the circle next to the appropriate heading
- Click Apply at the very right of the filter ribbon
- Any approvals fulfilling the criteria of your search will appear in the register
Completion
This filter allows you to search by the following:
- Completed
- Unfinished
- All
- Click in the circle next to the appropriate heading
- Click Apply at the very right of the filter ribbon
- Any approvals fulfilling the criteria of your search will appear in the register