Non Conformance Reports (NCRs) are raised when an element of the works, or a process associated with the works fails to comply with the Specification. An NCR can be used for internal purposes or for gaining third party approval from the client’s representative. Civil Pro manages the entire Non Conformance process including documentation, Approval and Close Out, cross referencing to other records and valuation. The NCR Register is accessed from the Quality Assurance section of the Main Menu.
NCRs can be linked to Lots and Photos.
Contents
NCR Fields
Several fields describe the NCR, its progress, and when key events have occurred:
- NCR Number – the sequential unique identifier for an NCR. Generated when an NCR is first created.
- Location – a description of the location where the NCR occurred.
- Description – a text field providing a description of the non conformance.
- Corrective Action – the proposed actions or works to rectify the non conformance.
- Preventative Action – the proposed actions to prevent the non conformance reoccurring.
- Raised By – the user who created the NCR record – automatically assigned.
- Date Raised – the date the NCR was created – automatically assigned.
- Status – the NCR status is a calculated field and cannot be set directly. An NCR’s status can be changed by creating an approval request, response to an approval request, and manually approving an NCR or closing an NCR out using the Context Menu function. Statuses are calculated as follows:
- Closed Out – if a Close Out Date is set
- Approved – if an Approved Date is set – this is either through a manual setting of the date, or an approval of a request
- Rejected – if an Approval Request receives a rejected response, and no subsequent approval
- Requested – if an Approval Request has been made, but the NCR is not Approved, Closed Out or Rejected
- Open – no Approval, Closeout or Approval Request
- Action Type – the proposed action to resolve the NCR – Retest, Repair/Rectify, Replace/Reconstruct, Reject, Use As Is or Other
- Severity – the impact of the NCR – Incidental, Minor or Major
- Third Party Approval Required – checked if the NCR requires approval by a third party – e.g. the client’s representative.
- Related Parties – a text field for listing any other suppliers, subcontractors etc. who are associated with the NCR and its resolution.
- Root Cause – a classification of the root cause of the NCR for analysis purposes. These can be customised using Project Options.
- NCR Cost – a numeric value estimating the cost associated with an NCR. This is not to be confused with the NCR Value which is calculated as the sum of the values of Lot Quantities for Lots associated with the NCR.
- Approval Date – the date an NCR was approved.
- Approval By – the user recorded as approving an NCR.
- Close Out Date – the date an NCR was closed out.
- Close Out By – the user recorded as closing out an NCR.
- Notes – a text field for providing addition information about an NCR.
Adding a new NCR
To create a new NCR, click on the New NCR button in the Register Menu.at the bottom left of the screen or under the Operations heading in the Ribbon Menu. This will start the New NCR Wizard. As with all Civil Pro forms, only the coloured fields are compulsory.
The new NCR wizard
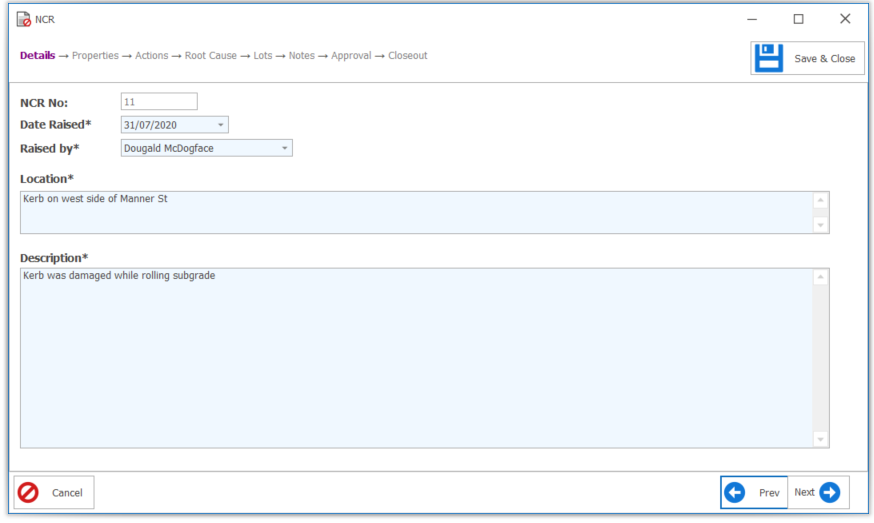
- When the New NCR Wizard starts, you will be prompted to specify the Location and Description.
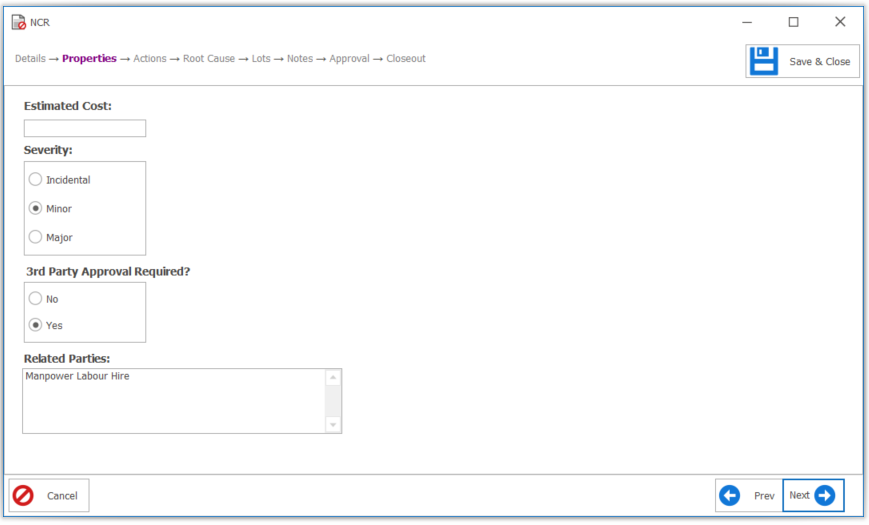
- The Properties screen required information regarding estimated cots (if appropriate), severity, third party approval requirements (if appropriate) and details regarding related parties (if any). Enter required information and click Next.
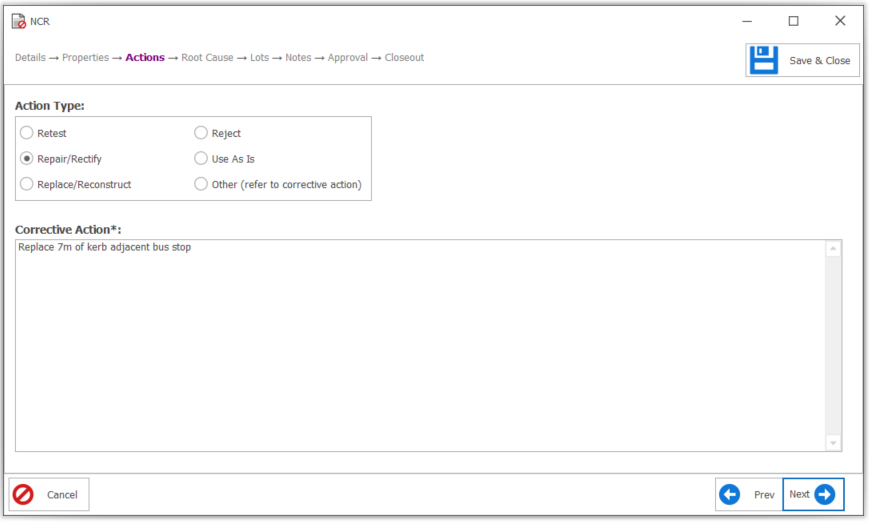
- The Actions screen required information regarding the tpe and details of any corrective action. Complete the applicable fields, and click Next.
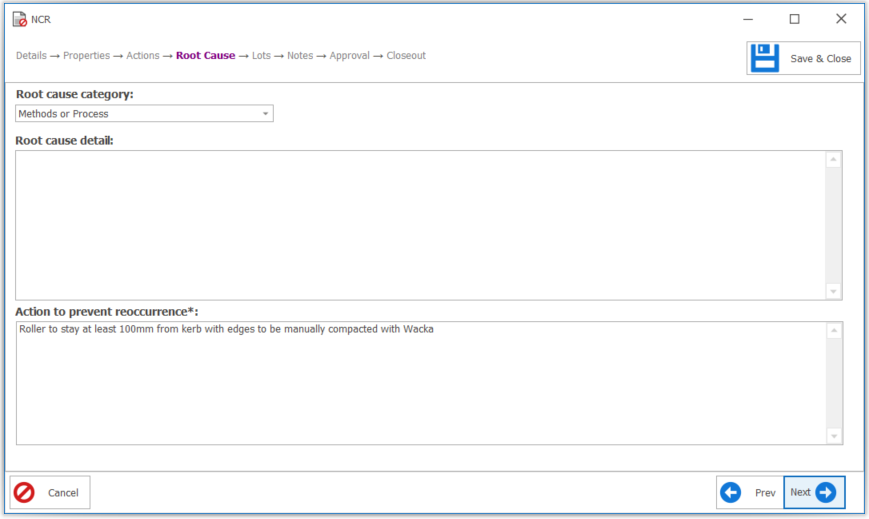
- The Root Cause screen prompts for details regarding the category and details of any root causes identified plus preventative action. Complete the applicable fields, and click Next.
- The Lots screen requires the associated Lot/s to be identified. click Next.
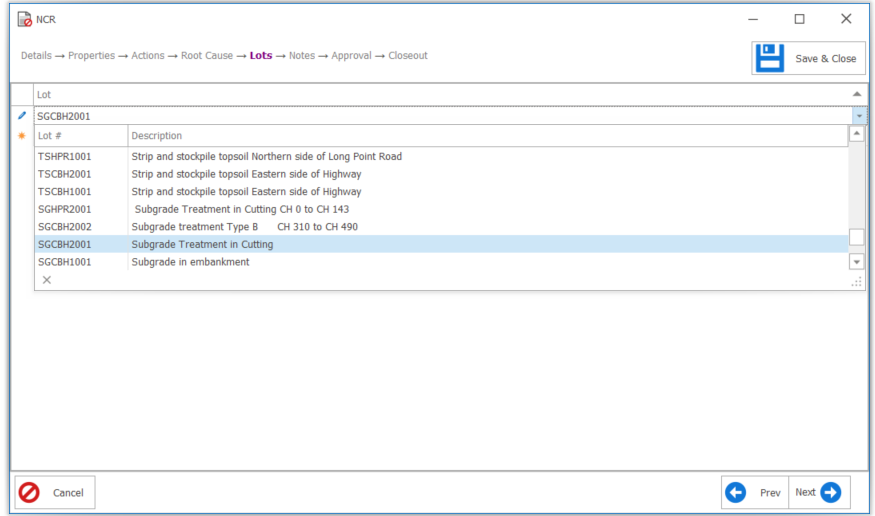
- When completed the wizard process review the summary and either click Finish to complete, or click the back arrow button in the top left to return to previous page.
Updating an NCR
To update an NCR, either:
- Enable Editing using the button at the left end of the Register Menu, or use the Context Menu option to do the same. Then directly update data in the grid.
- Update any field directly in the detail popup pages – access these by double clicking on the NCR within the register.
Updating the NCR number
If you need to edit the NCR number:
- Select the NCR you wish to edit from the register
- Select the Edit NCR Number function from the Ribbon Menu under the Operations heading
- Edit the NCR number to the desired, unique NCR number.
Note: You can also update the NCR number from within the NCR detail screen. Double click on the NCR you wish to edit from the register. This will open the details dialog. From within this screen right click on the white area to bring up the Context Menu and select Edit NCR No.
Deleting an NCR
To delete a record:
- Enable Editing and select the record to delete.
- Press the delete key.
While Civil Pro can generally identify all related records and remove them along with the NCR, it is still possible that NCRs may fail to delete because of these links. In this case, remove the links and try again.
Related Items
NCRs can be linked to lots and photos. The related items for each NCR are shown in the related items panel to the right of the register. If the panel is not visible, you can add it using the Ribbon Menu’s Show Related Items function under the View heading. Related items are linked in the standard way as described in the Adding, Updating and Deleting topic.
NCR functions
The NCR Register has several functions for managing your records. These are accessed from the Context Menu, unless noted otherwise.
Request approval
NCRs can require approval by a 3rd party such as the client’s representative. Civil Pro provides an approval request / response system which is designed to work in conjunction with the Civil Pro Mobile platform, but it can be also used with the Windows desktop version. For details on how the approval system works, refer to the Approvals topic.
To create an Approval Request using the Windows desktop client, you must have set the SMTP Server Settings.
- Select the NCR for which you want to request approval.
- From the Ribbon Menu, select Request Approval.
- In the next screen, select the approval workflow to use and the addressees. Press Build Approval.
- A preview of the email text is shown. Edits to the approval text may be done here. From the Ribbon Menu press Start Workflow.
- The default days until 1st step due will appear – this may be changed here if necessary. Press Start.
Manually approve
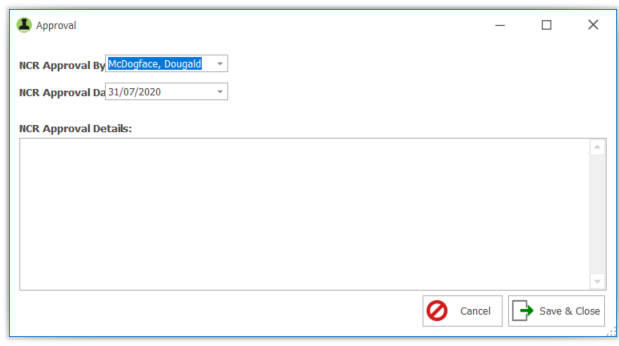
NCRs can be manually approved. To manually approve an NCR, use the Approval & Closeout => Manually Approve Function access via the Context Menu or the Set Manual Approval button under the Operations heading in the Ribbon Menu. Enter the details of who approved it and when, along with approval details. It is very important to provide as much detail about the approval as possible. It is especially useful to be able to reference correspondence or communications – including date and time.
Close out
Approval of an NCR is generally the step where the proposed actions are agreed. Close Out occurs when these steps have actually been completed. To close out an NCR, use the Closeout => Set/View Closeout option from the Context Menu or from the Ribbon Menu under the Operations heading. The process is completely analogous to the manual approval process described above.
Views
The NCR register has several pre-baked views for quickly accessing relevant data in the Register Grid. These are available in the Views sub menu of the Context Menu. You can also save your current layout as a Custom View. Pre-baked views include:
- Value – shows the NCR Number, Description, Corrective Action, Date Raised and calculated columns displaying:
- Lot Value – as calculated from Lot Quantities of associated Lots
- RPF Value – the value Reduced Payment Factors
- Approvals – shows the NCR Number and Description, and the approval details including Approval Date, Approved By and Approval Remarks
- Close Out – shows the NCR Number and Description, and the Close Out details including Close Out Date, Close Out Date and Details
- Standard – shows the NCR Number, Description, Date Raised, Status, Complete?, Req? and Public? columns