Contents
Viewing the NCR Register
To access the NCR Register, click on the NCR menu item. This menu item is not visible to users who only have approver permission (are not Project Users or Project Admin).
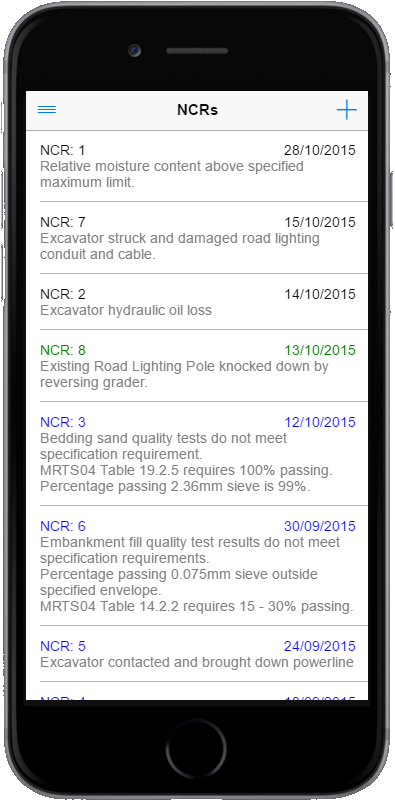
When you first open the ncr register, it will display all of the ncrs for your project in reverse chronological order. Due to Civil Pro’s ‘on demand’ loading strategy, only the 20 most recent will be loaded until the user scrolls to the end of the list, at which point the next 20 will load, and so on. This ensures that performance is not impacted by unnecessarily downloading ncrs you closed 8 months ago and do not need to review.
Viewing NCR Details
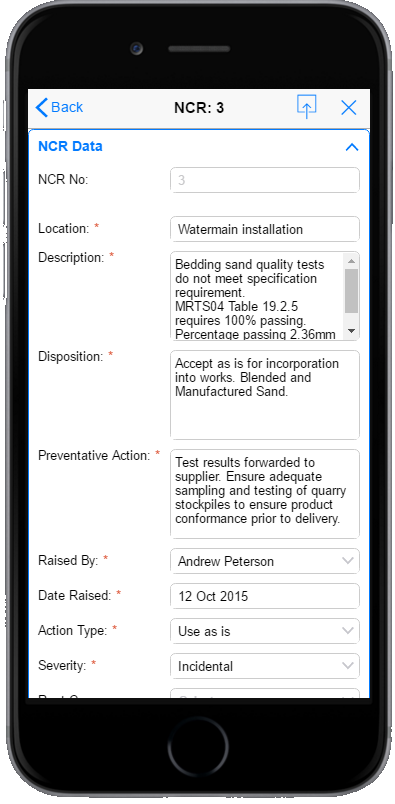
To view details for an individual NCR , click on the desired NCR in the register. The details for the selected NCR will be displayed.
As there is a lot of data for a single NCR, and many mobile devices have small screens, the initial view is rolled up into what is called an accordion view. Clicking on each section will expand it to show the data in detail. The different sections are;
- NCR Data – displays NCR information such as the description, location, disposition, dates etc
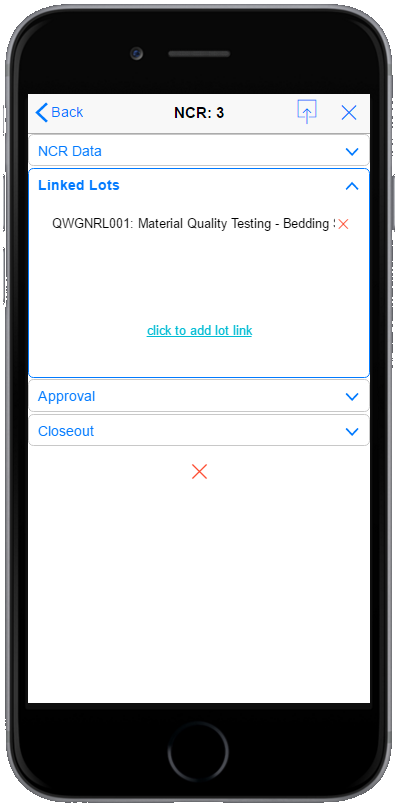
- Linked Lots– the lots linked to the NCR
- Approval – shows the approval information for the NCR (not editable)
- Closeout – shows the closeout information for the NCR (not editable)
The below screenshot shows the detail with the NCR Data section expanded, which is how the view is initially presented on opening.
Adding a new NCR
To add a new NCR, click on the + symbol next to the magnifying glass in the top right corner of the Register (not the detail page). You will be forwarded to NCR Details page (described above), except it is blank to enter the new record.
Data that is required for registering a new lot is marked with an asterisk. Other fields are optional.
Updating NCR Data
The information in the detail page is live and editable. No changes are made permanent unless the save icon (top right next to the X is clicked).
Viewing/Adding a lot to an NCR
To see the lots currently linked to an NCR, or to add new ones, simply expand the linked lots section. To link a new lot, click on the click to add lot link.
After clicking the link, the Add Linked Lot dialog will be displayed. Select a lot from the list and click the Link Lot button.

Clicking on any lot in the list will navigate to the lot record. To remove the link, click on the red cross to the right of each lot – this will NOT delete the lot – just the link to the NCR.
Approval and close out
Gaining Approval
Items marked as requiring approval can be checked in two ways.
- Approval Request and Response
- Internal Approval
- Override Approval
Approval Request and Response
The approval request / response system is used for Civil Pro Mobile’s checklist items and NCRs and and will also be used for ATPs and Quantities as these modules are developed. To start the approval process using the request/response method, click on the Request Approval context menu item (right click menu). The request/response system is described in the Approvals System section of the help.
Internal Approval
The internal approval mechanism allows an NCR to be approved by a user directly without needing to issue a request/response. This option is only available to NCRs for which the Ext Approval Reqd is false. To internally approve an NCR, select the Internal Approval Only option from the context menu – the following screen will be displayed. Click on the Approve button.

Override Approval
The override approval mechanism allows an NCR to be approved directly without a request/response. This use case is identical to the internal approval, but is named override to emphasise that this is an NCR that is marked as Ext Approval Reqd
Close Out
Closing out an NCR is identical in function to the Internal Approval and Override Approval function. Simply click on the Close Out context menu option, and complete the details in the dialog which is displayed.