Civil Pro 8 has always supported customisation of the grids in which register are viewed, and now from Civil Pro 8.8.55, users can save their layout as the default or as a named layout. This applies to the lot, test request, ATP and NCR registers.
Saving the current view
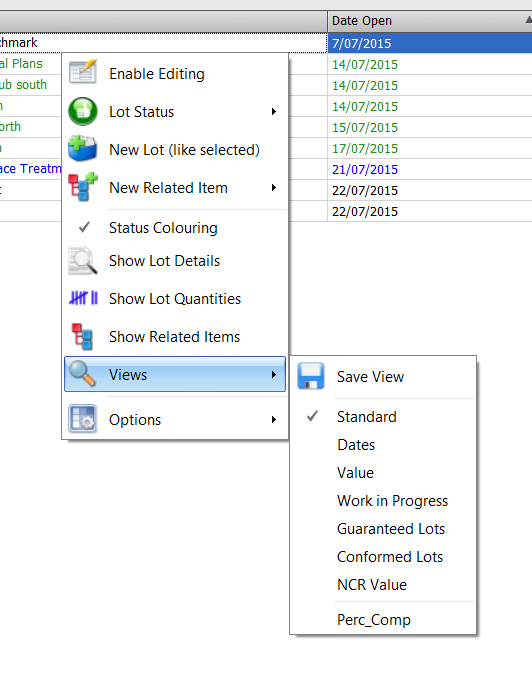
To save the current layout, simply activate the context menu by right clicking on the register grid, and select “Save Layout” from the “Views” sub menu.
You will be prompted to enter a name for the view. If you leave the name as “Default” then this view will be the view shown when the register is opened. Alternately, you can enter a name that describes the view (alphanumeric, no spaces. Underscore is allowed) and the view will be saved as a named view.

Loading a View
To load a view, simply select it from the same context menu location used to save the view. Your named views will be listed under the standard civil pro views. If a default view has been made, the default view will also be listed. If there is no custom default view, civil pro defaults to its normal view layout. You can see in the below screenshot that the lot register has two named views, Extended_Data and Perc_Comp. It also has a custom Default view.

Deleting a View
If you no longer want a view in your list, simply right click on it. You will be prompted to delete it. If you need to change a view, delete the original view and re-save it.